Hi, I’m Mike from 1A Auto. We’ve been selling auto parts for over 30 years!
With the vehicle still on the ground, we’re going to loosen the lug nuts. The wheel and tire doesn't spin on you when you're trying to break them free. Use the 21-millimeter deep socket on a breaker bar. Break these all free. Give them a couple turns. Do that the same for all of them.
Going to raise and support the vehicle using our two-post lift. You can use jack and a jack stands. The vehicle is raised and supported. I'm just going to use the socket to finish removing the lug nuts. Should be able to remove the wheel now, unless it is seized to the brake rotor. So this particular wheel is steel, and it has rusted to the brake rotor. Can't break it free just by wiggling it.
I'll take a lug nut and put it on here. Actually, before I do that, it's very easy to remove these center caps. Just find the little slot right here. Going to use a flat bladed screwdriver. It should just pop right off. You can see the hub. This is partially where the wheel rusts because it rides on this hub. Going to spray some rust penetrant in here. Spray some in openings—the wheel studs. Install a lug nut. I actually like to use two so the wheel doesn't tilt too much because I'm going to hit it with a mallet to break it free. So you want to hit on the tire. It might take one good hit. It might take 10 good hits, but eventually it should break free. Just make sure that the vehicle is supported securely if you're hitting on this wheel. Take the wheel off. Set aside.
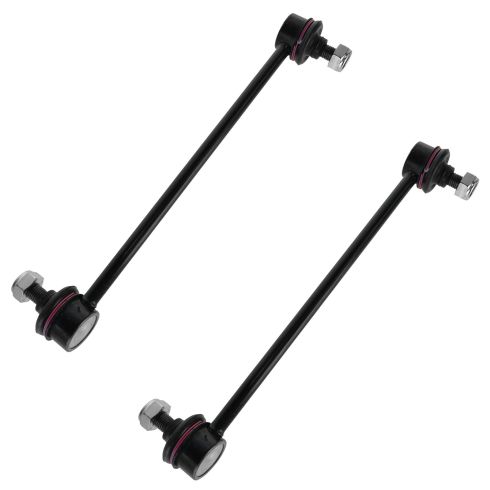
Sway bar link is attached to the strut body, and down here to the sway bar. They're attached the same way on both ends. This one's easier to see. This one's facing away so it's harder to see. These are pretty rusty and most likely when you go to remove these you will destroy them so you should have a new set on hand, especially if you're doing struts, or if yours are already broken you can use a reciprocating saw and just cut them right off. I'm going to try to remove these in one piece to show you how. If not, I might have to get some locking pliers, and worst case, cut them off, but to start, I'm going to put some rust penetrant on here.
Use a wire brush to knock off as much of the rust as I can and dirt. There is a spot in here for a five-millimeter Allen key or hex drive. That will help me counterhold it when I go to remove that nut. There's a 14-millimeter nut. I'm using a 14-millimeter box wrench. I'm going to use a breaker bar with a five-millimeter hex key bit, or also an Allen key, and I'll do my best to get it into here. It's pretty rusty. See if I can find the original slots for it. Sometimes if you can get them lined up as best you can by hand, you can take a small hammer and just tap it in. Get it jammed in there.
Put a breaker bar handle on here so I can hold it, and then I'll push up on this to remove it. Yeah, this one's just going to strip, so that happens. It's very, very common. It started to move and then it stripped. You can see all the rusty bits coming loose. Locking pliers back here. You're probably going to rip the dust boot. Just repeat this until you get it loose. It's starting to come loose. Once it gets past the end, it usually goes a lot easier. If you've gotten to this point, I've probably destroyed that rubber boot with the locking pliers. The sway bar link should be replaced.
The other end of the sway bar link can be accessed from underneath, or you can do it from out here from the wheel well. It's just easier for us to show you what we're doing. So it is going to want to move on the sway bar, so I'm going to take the other end and put it back up in the top and just lightly thread on the nut. This will give me a little tension on it so it's not totally moving around.
You can replace just a single sway bar link, but if one's bad, the other one's probably not far behind, so we really recommend that you do them in pairs. This procedure is the same for both sides. Start with the rust penetrant. Just repeat this until you get it loose. Just pop it out, and then it's still hanging by the top one which was just hand-tight. I'll take it out and pull the whole sway bar link out. Whoops. No big deal.
Here's our original sway bar link from our vehicle. Here's our brand new one from 1A Auto. One of the things that is nice, it does have a hex key on here so you can counterhold it instead of trying to put an Allen key or a hex key in here. This actually has a six-point, so you can put a wrench over here. It comes with new nuts. It's the same design. This will work great and fit great in our vehicle.
Get the top one in place, and then these nuts are oblong so they lock once they get to the end. So I'll thread this one on, and it will get to a point where it wants to stop. That's good enough for now. Going to work on the bottom one, and there is flex to these. They do have a ball joint on them. You might have to push it up to adjust it, and then get it into the sway bar opening. Put this nut on here.
To counterhold them, inside that six-point is 14-millimeter. Have to find it here, and then this nut is 15-millimeter. So snug these up, and then come back and torque them. Bring this down snug, and then come back and torque it. Counterhold this one, and then tighten it up. Torque for these nuts is 29 foot-pounds. I'm going to counterhold them with a 14-millimeter wrench. Use the torque wrench. Once it clicks, you're all set. Do the same for both of them.
You can see inside this steel wheel where it was rusty and touching the rotor. Cleaned it up as best I could. It's really just going to rust again, but take some copper anti-seize, put it on here. It's easier to put it on the wheel than on the rotor because you don't know where the rotor's going to land, but the wheel will land exactly where it needs to.
Reinstall the wheel. Thread the lug nuts on by hand. Just going to use the socket, get these seated. Lug nuts have a cone seat that matches with the wheel. It will sort of align itself. Now you'll lower the vehicle to the ground and torque the wheel. Torque the lug nuts to 76 foot-pounds in a cross pattern. Reinstall the center cap. It just pushes in place.
Thanks for watching. Visit us at 1AAuto.com for quality auto parts, fast and free shipping, and the best customer service in the industry.