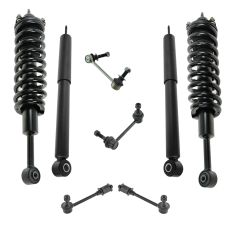
Hey friends, it's Len here at 1A Auto. Today I'm working on a 2007 Toyota FJ Cruiser. I'm going to show you how to do rear sway bar links. It's going to be a very easy job. I want to be the guy that shows you how to do it. If you need these, or any other part, you can always check us out at 1AAuto.com. Thanks.
So, here we are friends. We've got the vehicle's weight mostly supported off the ground, the wheel just barely touching. We don't have very much of the weight of the vehicle at all on the ground. I'm going to take my 21 millimeter socket and all I'm going to do is I'm going to break all these lug nuts free. You don't have to unscrew them very far. We just want to make it nice and easy so when we have the wheel up in the air, it's not spinning while we're trying to break these free. They're all nice and loose, they're not super loose, now we can go ahead and raise the vehicle so the wheel's off the ground. We'll take off all the lug nuts and get the wheel off safely. We're going to hold the wheel, and leave this lug nut on just a little bit. I'm going to remove my last one here. 21 millimeters. Let's let this down, roll it out of the way so it's in a safe position.
Okay friends, so we've got our rear wheel off at this point. We've got clear access or a view of our rear sway bar link right here. There should be a nut right on top of there. This particular vehicle, well, it's gone. So, what I'm going to do is I'm going to use this quality tool right here, it's available on 1AAuto.com, it's a little cutting wheel. It's got a shield right here to protect your face. That doesn't mean that you shouldn't wear safety glasses and hand protection of course. You always want to wear those. I'm going to go ahead and grind this off as much as I can. If I can't get the complete thing off, I'll just grind as much as I can because of course, there's not much room. And then I'll just knock it right off.
After that, we'll come down here and we'll take off this nut. So, this is going to be shooting out sparks. You want to make sure that you don't have any fuel lines open or anything like that. If you smell gas or fuel under here, you definitely don't want to do this. I don't smell anything. I think we should be good to go, so let's continue. As you can tell, it's grinding away. So, this right here is super hot. I'm just going to take a small pry bar and a hammer. I'm just going to try to bonk it out of here. There we are. We've got our hot parts. Obviously, I'm not going to touch them with my hand.
Okay, so this nut right here, we're going to want to remove this. As you can tell by the condition of the rest of the vehicle, everything's pretty rusted so I'm just going to go ahead and heat that up. Before I go ahead and heat it up, though, I'm going to make sure I know what size that this is so I'm ready to go when it comes time to take it off, and I'm going to put my locking pliers on right here on the backside of the stud in between the sway bar link body itself and the sway bar. See if I can get this in here, as tight as I can. Nice and tight. Yeah. Cool. We'll figure out what size this is real quick, and then we're going to put some heat.
Okay, so I'm going to use some heat. I'm not going to go ahead and blast this way because I've got a fuel tank there, okay? I'm going to come this way. I'm going to just try to heat right here on the nut away from the fuel tank. There's no fuel hoses around here, I checked. Nothing I need to worry about. I already smelled. I don't smell any gas. We're going to use a 17 millimeter to take this nut off. I always like to move my heat around a little bit when I'm doing this. Nice and warm. Of course, it's smoking a little bit so you don't want to breathe in any smoke, and it's going to smoke a little bit more here because I'm going to put on some penetrant. Be very careful not to breathe this in. I'm going to stop talking here for a second, but I'm going to grab a 17 millimeter and I'm going to loosen that up. Nice. If you have a ratcheting wrench or whatever you can get in there to make it happen. I think my locking pliers might have loosened up a little bit here, so I'll just snug them back up. Still spinning. Okay, that nut's going to be hot. See if I can grab it with this rag.
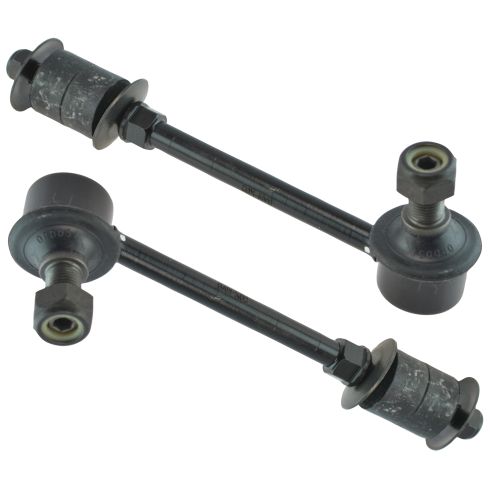
There it is. Super hot. Get my locking pliers out of there. Grab our sway bar link. We took it out of our sway bar, now we're just going to bring it down. Take this off of there. And there's our rear sway bar link. Hey friends, a quick product comparison for you. Today we're working on a 2007 Toyota FJ Cruiser. I want to show you the rear sway bar links. This is the sway bar link we just removed from the vehicle. It was very easy. Over here, we have our brand new quality 1A Auto part. As you can tell, they both the exact same in exception of, well, this one isn't junk. We can hold them up next to each other. If you had to guess, this one would be about the same length, right? They're both the exact same shape. Your brand new quality part comes with a sealed boot, it's already greased in there. Comes with a locking nut. Super important. Comes with two brand new bushings. A brand new locking nut, new washers, it even comes with this down here so you can hold it with a wrench while you tighten this up.
So, as you can tell, this is a quality auto part. I don't see any reason why I wouldn't want to install this into this vehicle so I'm going to go ahead and do it. If you need this or any other part, you can always check us out at 1AAuto.com. Thanks.
So, on our old sway bar link, you'll notice that the shaft that rides inside of the boots here gets rotted away, and I'm sure you can imagine why because you get your new boot on there, moisture can get down in there and it just hangs out, does what it wants. It eats away your metal. What I like to do is take a little bit of silicon paste, or you can use whatever you want, something that's going to hold on there pretty good, though, just put it all in there. This is going to make it so moisture can't hang out with that metal while no one's looking and get into trouble. So now I'm going to go ahead and put this together now that I've got my lube on there. Put that there. Put this like this. And then once we get this through the frame, we'll put this one on and then our other washer.
So, we'll get this up in here like this into the frame. Put that through there. That'll hold it for us. Get this down on there. Then our washer just like that. Get this. There we go. So I'm going to grab some pliers. I'm just going to squeeze this down, and then I'm going to try to turn that to at least get it started. So, down here, there's a 14, the nut itself is a 13, and if you wanted to and instead of using pliers because you know, whatever, you could just grab it, just try to squeeze it down. All we need to do is get that nut started. Once I get the nut started, I'll get my hands right out of your way so you can hold that once it starts getting tight. For now, I'm just going to go ahead and try to tighten this down.
So, we're going to hold this with our 14, come up here with our 13. We're just going to continue tightening these until you see the bushing start to swell. They kind of squish down, they start to swell a little bit, and that's all you need. You don't need to crush them down nice and flat, okay? You don't want them flat. All that's going to happen at that point is it's going to dry out and crack super fast on you. The nut itself is a locking nut so you don't have to worry about bottoming it out. It's not about that. It's just about making sure that both these rubber bushings are going to grip onto the frame, and the sway bar link can do its job. Feels like we're getting pretty close to where we need to be. I'm looking. I can see it's starting to bubble out a little bit here and a little bit down there. I would say that's good.
We want to make sure we tighten this up down here. Okay? Put our nut on there. Put our locking nut, 18 millimeter, put it on here. See if I can't get it started. Come on, baby. There it is. I can see this side getting pulled closer to the sway bar. It's going to get snug here in one second. That's nice and tight. Okay. Now you want to make sure that your sway bar link is facing in the right direction. Basically, the way that we want this to be sitting is pretty much straight with the sway bar. So, if it's not, you're just going to spin this using your 14 millimeter wrench. See, you can pivot it. I like to have it pretty much as straight as possible. Is it going to pivot again on its own? Yeah, it's going to do that. That's what it's supposed to do. It's got a little ball and socket here. This right here makes it so it can pivot. I like to just have it the way it's supposed to be right off the bat. If it changes on its own, well, it's going to do it's own thing.
Now, we're going to take our wheel, lift it right up our leg, use our ab muscles to lift it up and put it on. There we are. Hold the wheel. Got one lug nut started on there. We know the wheel can't go anywhere now, we'll grab the rest. We'll put them all on, bottom them out, and then we'll torque them down. Okay, so we've got our 21 millimeter socket and our torque wrench set to 85 foot pounds. We're going to tighten down these lug nuts. We're going to go in star or I guess in this case a snowflake-type pattern. You never want to go around in a circle. You want to criss-cross. Just like that. You want to go around again. Go around again. 85 foot pounds.
Thanks for watching. Visit 1AAuto.com for quality auto parts shipped to your door. The place for DIY auto repair. And if you enjoyed this video, please click the subscribe button.