Hi, I’m Mike from 1A Auto. We’ve been selling auto parts for over 30 years!
To remove the driver side wiper arm, you can leave the hood down. Use a small flat bladed screwdriver and gently pry open this plastic cap. Find the edge. Pull it off. There's a 14 millimeter nut under here. Use a 14 millimeter socket extension and racket. Loosen this up. Pull that off. Then we can lift up on the arm, and now I'll wiggle it back and forth. It should come right off of the wiper arm shaft.
To open the hood, we'll go inside and pull the release. Find the safety latch and release that. Prop rod is under the hood. It's get two positions. One position here, and then a service position here opens further.
Passenger side wiper arm has two mounting nuts. They're 14 millimeter. We're going to use a 14 millimeter socket ratchet again. Loosen that one up. Loosen this one up. You might need to pull the wiper arm. Thread it off, and it'll pop right off. Just the spring action of the wiper arm. Lift it off the windshield and put it aside.
To remove the side corner trim, this will be the same on both sides. We're going to pry it up with a plastic prying tool. You can buy this from 1AAuto.com. Once it's up you can slide it out. Put it aside. There's two push clips on both sides that need to be removed. We'll use a small flat bladed screwdriver, pry it up. Pull the clip out. If the center part comes out, that's okay. Just push it back in to reuse it.
The center piece is clipped along the edges, and then it slides up under the window glass, so we're going to unclip it and slide it out this way. We're kind of going underneath. Push the clips in. So that one's loose. We'll go in and find all the clips.
It might be easier to use the plastic trim tool to push the clip in. Push it up. Going to slide it from underneath the windshield. Ooh, I think this one clipped back in. Yep, it did. Make sure these stay clipped out. Put that aside. Unplug the wiper motor. The lock for the clip is underneath at the bottom. Squeeze up and pull connector off. The harness should be clipped into here.
Somebody's had it apart before, so the clips are a little bit broken, but you'll have to pry this clip out of here. You'll have to either slide this off or cut the electrical tape. Be careful not to cut the wires. Somebody's already had this apart. It will come off here. There should be a clip here. It's missing. Then there's this clip here. We can just get the wiring harness out of the way.
There's a 10 millimeter bolt here, one here, and then one here and here that's holding the wiper transmission to the car. We'll use a 10 millimeter socket extension ratchet to remove these bolts. We'll lift the wiper transmission out of the car. It's sitting on a stud just under here. So pull that off.
We need to remove the lower cowl panel. There's nine 10 millimeter bolts holding it in place. We need to remove all these bolts and then slide it out of the engine compartment. Use a 10 millimeter socket extension and ratchet. We need to clear it, so we're going to remove this bracket. There's two 10 millimeter bolts. Lift it out of the engine compartment. Flop these down and over. Give myself clearance.
All right, let's spray some rust penetrant on top of these strut bolts while we have access to it, while this cowl panel is off. You can use a small pry bar, or you can use a large flat bladed screwdriver, and it'll pop the wheel cover off. We're going to use a 21 millimeter socket and a large breaker bar to loosen the lug nuts of the vehicle on the ground so the wheel doesn't turn.
Place your vehicle with a jack and jack stands. We're going to use our two post lift. With the vehicle in the air, the lug nuts are loose. I'm going to use the socket to finish taking the wheel and tire off. Spray some rust penetrant on the top nut. It's a 17 millimeter nut. I'm going to try to break it free first. It might want to spin on the ball joint part.
So there is a way to counterhold it. But typically before I try to counterhold it, I like to try to break it free a little bit. So it started to move, and then now it's spinning on the ball joint part. But I did free it up a bit. I'm going to take a six millimeter hex drive on the breaker bar. Put it in here to counterhold it. Now loosen the nut.
It's possible that these could be so rusted together that you may have to cut the sway bar links off. If you're replacing the strut, you should have a new sway bar link on hand in case you destroy it while you're removing it. This one came off really nicely. Pull it right out.
Need to remove the bracket that's holding on the rubber break hose and the ABS wire to the strut body. There's a 12 millimeter bolt here that goes through. So I'm going to spray some rust penetrant on the backside of it. Remove the bolt, and pull the whole bracket off. Use a 12 millimeter box wrench to loosen it. I'll switch to a ratcheting wrench. Pull the bracket off. Just be careful of your ABS wire and your hose.
I'm going to use this clip prying tool to pull the clip that's holding ABS wire into the strut body out of there. Just pry it out. Just put these aside. Need to remove the two strut mounting bolts from the top and the bottom here. Both the nut and the bolt head are 22 millimeter. I'm going to loosen on the nut, and then I may need to counterhold the bolt afterwards. I'm going to start by spraying some rust penetrant on them.
Use a 22 millimeter socket on the long breaker bar. Loosen these up. Be careful not to bash this into your fender. These are moving nicely, so now the bolt's starting to move. I'm going to switch to a small ratchet, because I don't need the leverage anymore. I'm going to counterhold the bolt, loosen this up. And do the same for the other bolt. Remove the nut from the other bolts.
Might have to wiggle the nut a little bit to get the bolts to come apart. This will separate just like that. Loosen the three nuts at the top of the strut. They're 14 millimeter. I'd get them all loose first and then loosen. Remove two of them and leave one still attached, because the strut will start to lower and you want to be able to hold onto it so it doesn't fall. Get this nut off here. So now it's just hanging on by one nut. So I'm going to reach underneath with my other hand, hold onto the strut so it doesn't move around too much. Finish loosening this nut. Take this nut off. Take this plate out of here. Pull the strut out.
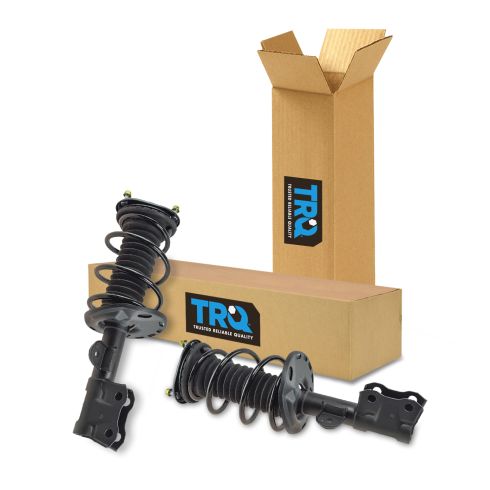
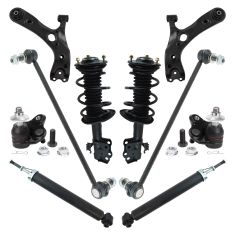
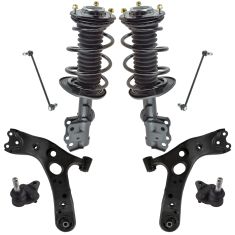
Here's our original strut assembly we pulled from our vehicle, and our brand new assembled strut assembly from 1AAuto.com. You don't have to swap the spring to a new strut. This is ready to go and ready to be installed. It does have a little warning here. You should always do these in pairs. The warning just tells you that since these are new springs the vehicle may sit higher and the spring will eventually settle with the weight of the vehicle. It comes with new mounting hardware. There's also a warning here. You do not need to loosen this nut that's inside here. Leave it alone. This is ready to go and ready to be installed. It'll fit great and work great for you.
We're going to install our new strut. We'll go up from the bottom. Get it lined up. Get one of these nuts captured. Get these other two nuts captured. Don't forget to reinstall that plate. Part of your cowl panel mounts to this. Tighten these nuts up. The new hardware is a 15 millimeter nut versus a 14mm, the original. Tighten them up evenly. They are self-locking. I did have to switch to a deep socket as the studs come through. Once I feel them get tight, then I stop.
Put the knuckle back into the strut. May have to lift up on the knuckle. Slide it in here. There it is. Put the bolt in. Whichever one goes in easier first. Get the other one started. There we go, that one's going in. Just have to wiggle the knuckle around. Put the two nuts back on here. With the nut started we'll use that to draw them in. Counterhold the bolt and tighten the nut. Then counterhold the bolts and use a torque wrench. Torque the nuts on the strut bolts to 177 foot-pounds. Do that for both of them. Once it clicks, you're all set.
All right, put the brake line back in place on the bracket. Kind of slides up behind here. There's key. Key that it sits into. Sits like that. This bracket goes on top of it. Install the original bolt. Tighten this up. Once I feel it get tight, I'll stop. And don't forget to clip this back into the strut, your ABS wire, so it's not hanging loosely.
To reinstall your sway bar link, we're using a new sway bar link. But if you're reusing your old one, the procedure will be exactly the same. Tighten it down. It is a self-locking nut. You can see it's sort of oval. It may start to turn the mounting stud that goes into the ball joint of the sway bar link. And when it does, I'll counterhold it to finish tightening it up. But for now I'll just tighten it as is. Once it gets down to being fairly tight, come back and torque it. Torque the sway bar link upper nut to 55 foot-pounds. Once it clicks, you're all the set.
Reinstall the wheel. Start the lug nuts by hand. These lug nuts do have a shoulder on them. The opening in the wheel is a little bit bigger, so you might have to line it up and just kind of fiddle with the wheel a little bit while you're tightening these down. Just going to use the socket to snug these down. When I'm down, we'll lower the vehicle to ground and torque them to spec.
Going to torque the lug nuts in a cross pattern to 76 foot-pounds. Reinstall the wheel cover. We'll line up the hole for the valve stem and then snap it in place. We've got our lower part of the cowl panel, the steel piece. These little air guides are folded over so they'll fit under the windshield. Slide it into place. We'll start reinstalling the bolts. I'll just go along and start them all by hand, and then I can come back with a socket and ratchet and tighten them all. I'm going to shut that door, and snap it in place. Feel them get tight. I'll stop. Clip this little door back. Tighten this one up. Install the support bracket. It's got a little tab that fits in there. Let's bolt the here first.
Reinstall the wiper transmission. So this little pin here is going to go into this rubber grommet up here. Push it up into place. We'll push it into that rubber grommet. That wants to pop out. So let's see. I took it off. I'm going to push it onto here. And then we can hook it in this way just like that. And line it up with the mounting holes. We've got our bolts. Get this one started. Start the other ones. Tighten these all up. Feel them get tight, then I'll stop.
Reinstall the harness for the wiper motor. So this clip was kind of broken, but it does go in here. There's a missing clip here. Need to clip it back into place. This goes through this opening here. This is normally-clipped into here. And then there's a final clip here. And then of course you plug it in. It's keyed. It can only go in one way. It will click when it locks in place.
So the plastic upper cowl cover, it's got some little tabs here. They're going to slide underneath the windshield at the edge of it. And then clips in the front that will clip down into the metal. Get it in a position, and put it over the wiper arms. And we're going to slide it up. Push it along the edge, and slide it over the glass like that. And then it will clip down into place. Place your push clips. Do that for both sides. To clip these little pieces back in place, so that part will go under the windshield. And these will clip into the plastic here. Slide them underneath. Clip them into place. Do the same for both sides.
Put the passenger side wiper arm in place. There was a little dust line here where the wiper blade was. So I'll use that as a reference point. Right about there. There is some spring tension to this. It's pushing it back up, but I'll install the nuts. I'll just tighten these down until they get tight. I don't want to break the studs off the wiper transmission.
Reinstall the driver side wiper, arm, and blade. You could do this with the hood down, or the hood up, it's all right. Just get it in place reinstall the nut. Tighten it up. I feel it get tight. I'll stop. I don't want to break off. And reinstall the cap. Just pushes into place.
Thanks for watching. Visit us at 1AAuto.com for quality auto parts, fast and free shipping, and the best customer service in the industry.