Brought to you by 1AAuto.com, your source for quality replacement parts and the best service on the Internet.
Hi, I'm Mike from 1A Auto. I hope this how-to video helps you out, and next time you need parts for your vehicle, think of 1AAuto.com. Thanks.
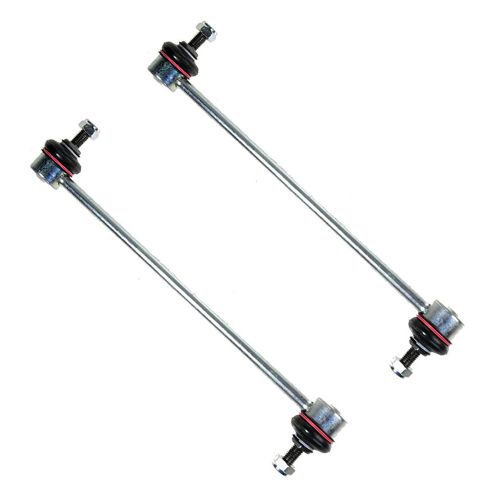
In this video, we're going to show you how to replace a front stabilizer link on this 1998 Volvo S70. This is similar for a lot of Volvo's of this era. Tools you'll need are jack and jack stands. You'll need your log wrench or a 19mm socket. You'll need a 17mm wrench with a socket and ratchet. Also, you may need a breaker bar or a pipe for leverage which is what I use, and a 3/16inch or 6mm Allen wrench and some penetrating oil.
If you're hearing a clunking noise from your front end when you go over bumps, you can check to see if it's your stabilizer links. What you want to do is on both sides, turn your wheel all the way the other way. I'm on the driver side. So I've got my wheels turned all the way to the right. Right back in here, it's a little bit tough to see, but that kind of gold rod right there is your stabilizer link. It goes from your stabilizer bar there up to your strut, up there. Basically, reach right in with your hand and my arm's a little big. Reach up here and just grab hold and try and shake that back and forth and if you can hear it clunk or clink or whatever or it's really loose, then you know that's your issue.
If you don't have the benefit of air tools, you want to use a 19mm socket and ratchet and a breaker bar or your tire iron. Loosen the lug nuts while your car is on the ground, then lift it up secure it and then remove the lug nuts all the way. Just fast forward here as I remove the wheel and tire. We're going to spray some penetrating fluid on here, as well as down below. First, I'm going to take a 17mm socket, put it on here with a larger ratchet and see if I can't break it loose. Do the same thing from the bottom. At the bottom, use a piece of pipe to give me some more leverage. Now that those are broken free. You'll find that the center stud is going to spin. You can put an Allen wrench in there. The Allen wrench holds the stud, as I loosen it up. I'm going to do the same thing for the bottom. As you can see here, I've got the Allen wrench holding it. I'm going to kick in to high gear here. Just fast forward through using the wrench and the Allen wrench to remove those nuts. It looks like I missed the shot here, but obviously once you have the nuts off, the link just comes right out.
I put the stabilizer link back in. Yes, I am putting my old one back in. This one actually looks like it's replaced pretty recently. I actually did the repair on the hub that's why I had this apart. We're just putting a good one back in and put the bottom in first. String it up here. Make sure you're out of the way of your ABS harness. Put the bottom in. Start that nut on, and the top one. Once again, I'm going to kick it into super high speed. Again, use your Allen wrench and your wrench to tighten up both nuts. As far as how tight, as long as you're holding it with the Allen wrench and you get it as tight as you can with that combination wrench, that's good enough. These are a crucial part of the suspension but they're not a critical part of the suspension. Some of you may have noticed that the brakes are not on the vehicle, that's because I film this part of another video. You do not have to remove your breaks, obviously, to do this job.
You can see that the wheel has a space here and that goes over this spike. I'm going to grab this spoke below that space. Put the wheel on. Start all five lugs by hand, then tighten them preliminary while the vehicle is in the air and then let your vehicle down. Now, torque your lug nuts to 100 foot-pounds.
We hope this video helps you out. Brought to you by www.1AAuto.com, your source for quality replacement parts and the best service on the Internet. Please feel free to call us toll-free, 888-844-3393. We're the company that's here for you on the Internet and in person.