Brought to you by 1AAuto.com, your source for quality replacement parts and the best service on the internet. Hi, I'm Mike Green. I'm one of the owners of 1A Auto. I want to help you save time and money repairing and maintaining your vehicle. I'm going to use my 20+ years' experience restoring and repairing cars and trucks like this to show you the correct way to install parts from 1AAuto.com. The right parts installed correctly; that's going to save you time and money. Thank you and enjoy the video.
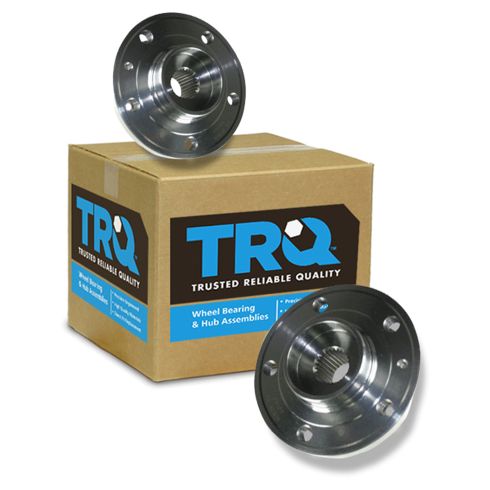
In this video we're going to show you how to replace a front hub on this 1998 Volvo S70. We're going to show you the passenger side. The driver's side is very similar. Dealing with the axle might be a little bit different if you choose to remove the axle. It is a similar process for a lot of Volvos of this era. Tools you'll need are jack and jack stands, 10 to 19 millimeter wrenches and sockets. You'll need a ratchet and a breaker bar. If you don't have a breaker bar, you'll need a pipe for some extra leverage. Some of the bolts are very difficult to get out. You'll need a torque wrench, large hammer, 3/16ths or 6 millimeter Allen wrench, T47 Torx bit and an E14 star bolt bit. I recommend that you have a 1/2 inch drive which is a little more difficult to find, probably have to order it online, and a large screwdriver or a small pry bar. If you don't have the benefit of air tools, you'll want to use a 19 millimeter socket and ratchet and a breaker bar or your tire iron.
Loosen the lug nuts while your car is on the ground, then lift it up, secure it and then remove the lug nuts all the way. Also if you don't have impact tools, you'll want to pull off the little center cap and loosen, it's either going to be a large nut or a 14 millimeter bolt. You want to loosen that with the vehicle on the ground and held in place first. We'll speed up here a little bit as I just removed the lugs and then the wheel entire.
Turn your wheels and then remove two caps on the back of the caliper to expose the caliper bolts. I'm using a T47 Torx bit that goes onto a ratchet. You'll need that to get a good amount of torque on it. Make sure it's in there well, and they should break loose pretty easily. I'm going to speed up here as I loosen those up. You loosen them and you kind of pull them out a little bit. You don't pull them all the way out of the caliper. Just take a large screwdriver, put it right in here and this does two things. It helps to loosen up so the caliper will come off. It also helps to reset the piston, which you'll need to do for new pads.
Speed up here slightly. I use my screwdriver to pry off that retainer and then screwdriver to kind of pry on the caliper and it comes up and off. The caliper comes off. Put the pads in it. The inside pad will just pull right out. Your outer pad, just pry out from the end here and it comes right out. You just kind of hang your caliper up like that for now. Now, to remove your rotor you'll need to remove this caliper bracket, which is held on by two 15 millimeter bolts here and here. These bolts are generally on there pretty tight. I'm going to put my ratchet on and use a piece of pipe to help me get some more leverage. Nice and easy, controlled. I'm just going to speed up here as I repeat that for the top bolt, and then I just use my ratchet to remove the bolts the rest of the way. That comes off.
Now, what I need to do is put a lug nut in and a couple of quick hits usually gets it off. Here at the top I'm going to spray the three mounting nuts on the top of the strut. You can either just loosen them up or you can take two of them off and leave one on. You may want to just pull the strut out of the way. That's really the easiest way. I do leave the strut in there. I just work around it. Next, we're going to disconnect our stabilizer link from the strut. We're going to use some penetrating oil there, and then just put some penetrating oil on the strut bolts. First, I'm going to take a 17 millimeter socket, put it on here with a larger ratchet. I'll see if I can't break it loose. Now that those are broken free, you'll find that the center stud is going to spin, so I can put an Allen wrench in there. A 3/16ths or 6 millimeter Allen wrench will work. Now this holds the stud while you loosen it up. Just speed up here as I remove that nut the rest of the way and disconnect the top of that stabilizer link.
Additionally, there's an ABS harness that's attached to the strut just with a rubber grommet. You can just pull that away from its clip. These bolts for the struts are 18 millimeter. I suggest a breaker bar or a piece of pipe on your ratchet. Then speed it up here as I change over to my ratchet and a wrench and remove those bolts the rest of the way. Now, here I'm just going to remove the bolts from the strut and then release it from the knuckle and move it out of the way. Pull your suspension down. Push your strut around. Put your bolts in. Start these nuts on. Now you want to torque these bolts to between 55 and 60 foot pounds. Then go up on top, put your other nuts on. You want to torque them to 20 to 22 foot pounds. Once that strut is unhooked, you actually just take an extension and your axle should drive out pretty easily. You can see your axle is free there. You don't have to remove your axle. You can move it around to get to the hub bolts, but it does make it easier to take it out so I'm showing you. Remove two 12 millimeter bolts from that cap underneath and then slide your axle out.
As you're sliding your axle out, be careful not to damage your CV boots or your ABS or brake lines. Here, I'm just going to put the steering knuckle back into the strut and put the bolts in and just thread the nuts on by hand. This just kind of holds it together, makes it a little easier to get the hub apart. Now on the back, there are four bolts that hold your hub, one, two, three and four. These bolts require an E14 socket, which is a star-shaped socket. You can see here it requires a breaker bar and I use a pipe for some extra leverage. These bolts have anti-seize on them and they're in there really well. Actually the anti-seize is really what causes the problem. Once they break loose, they come out pretty easily. You're going to want a 1/2 inch drive socket as I suggest in the beginning. After I break them loose, I switch back over to a ratchet and just kind of fast forward as we remove those.
Use a wire brush, just kind of clean out here a little bit. Take your new hub from 1A Auto and start threading on your bolts. Start off all four bolts now. Just fast forward as I start in those bolts and then preliminarily tighten them. I'm going to torque these four bolts to 70 foot pounds and start with this one here. Go diagonally across and this top one and the bottom one. I'm going to speed up a little bit. Take those bolts back out and pull the steering knuckle away from the strut, then carefully install your axle if you took it out. Again, you don't have to take the axle out, but if you did, carefully install it. Again, be careful of your brake lines, ABS line and your CV joints. Put the cap back in and you want to torque those 12 millimeter nuts to 35 foot pounds. Now feed your axle into the hub here. Again just take care not to damage your boots at all. Move stuff around until your axle goes in. Now pull your suspension down, push your strut around, put your bolts in, start feed nuts on. Now you want to torque these bolts to between 55 and 60 foot pounds. Then go up on top, put your other nuts on and you want to torque them to 20 to 22 foot pounds. Now put your stabilizer link back in place and start the nut on. Then use an Allen wrench to tighten it up. This part, it's not a critical suspension part. It's important but not critical. It probably does have a torque spec, but I just tighten it basically as tight as I can get it using the Allen wrench and the combination wrench.
At this point you want to start either your center nut or bolt that holds the axle to the hub. You're not going to tighten it at this point. You're just going to start it in there. You tighten it when the vehicle is on the ground. I'm just going kind of go fast through putting the brakes back together. If you want to see this in regular speed, just check out our other videos for the S70 front brake job, but it's pretty easy. You put the disc on, then you install the caliper bracket. Tighten those bolts to 70 foot pounds, then make sure the pads are in correctly. Put the caliper on, tighten the caliper bolts to 20 to 22 foot pounds, and you should be all set there. You can see that the wheel has a space here and that goes over this spike. I'm going to grab the spoke below that space, put the wheel on. I'm just going to speed it up here as I put in the lugs by hand, then use my impact wrench just to preliminarily tighten the lugs. Our vehicle uses the small bolt, so you tighten that to 33 foot pounds and then you tighten it an additional 1/8th of a turn. If your vehicle uses the larger nut, you want to tighten it to 89 foot pounds and then tighten it after that about a third of a turn.
Put your center cap on. Torque your lug nuts to 100 foot pounds. If you do decide to take your brakes apart, make sure that you pump the brakes a bunch of times before you road test the vehicle and do test stops from 5 and 10 miles an hour and make sure everything's stopping correctly.
We hope this helps you out. Brought to you by www.1AAuto.com, your source for quality replacement parts and the best service on the internet. Please feel free to call us toll free, 888-844-3393. We're the company that's here for you on the internet and in person.