Brought to you by 1AAuto.com, your source for quality replacement parts and the best service on the Internet.
Hi, I'm Mike from 1A Auto. I hope this how-to video helps you out, and next time you need parts for your vehicle, think of 1AAuto.com. Thanks.
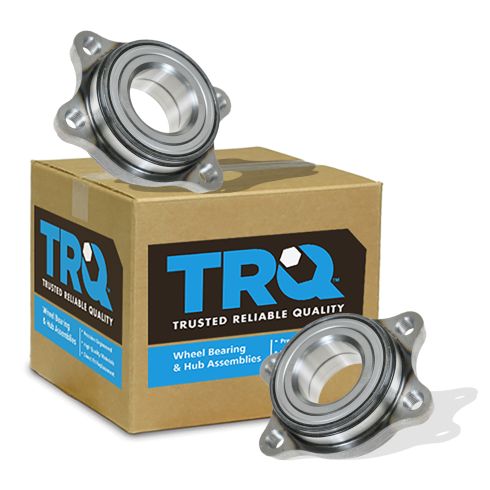
In this video, we're going to show you how to replace the front hub bearing on this 2007 Audi A4. It's the same for the 2002-08 A4, as well as various other Quattro Audi models.
You're going to need a new bearing from 1AAuto.com, center cap removal tool or 93 degree pick, various tools including multiple-sized sockets, Allen sockets, and wrenches, pry bar, some bungee cords or wire—we'll show you how to use those—penetrating oil, hammer, an M-12 triple square or 12 point bit hub puller and slide hammer, chisel, and a bearing press.
Start by removing the wheel. Remove the center cap. For this vehicle, you need the special tool, which we sell under VWXXX00001. You could also, if you have one in your tool box, use a pick tool. Remove the cap and remove your five 17mm lug bolts. If you don't have the benefit of air tools, loosen the lug bolts on the ground, with your tire iron, or a 17mm socket with a breaker bar, then raise and support the vehicle. Remove the lug bolts the rest of the way and remove the wheel and tire.
Install two of your wheel bolts, a few threads by hand. Use this and a big pry bar to keep the hub from turning or you crack the axle bolt loose. Remove your axle bolt, using a 17mm Allen socket. You can leave the wheel straight to do this—we just turned it out to make it a little bit easier for you to see. You can use a 5mm Allen wrench. Remove the bolt on the bottom of the wheel speed sensor, located on the front of the hub on either side. Remove the sensor from the hub. Some come out easier than others. If yours doesn't want to come out easily, you can work it side to side with a pair of pliers or try to get underneath it and pry out gently with a flat blade screwdriver.
Remove the wheel speed sensor from the retainer on the back of the hub. Pull it through and allow it to hang at the back. Remove the two 21mm bolts securing the caliper carrier to the back of the spindle. Once you got them cracked loose with a breaker bar, you can remove the rest with the socket and ratchet. Remove the caliper as an assembly. Use a bungee cord, a zip tie, and a mechanics wire to hang it out of the way. You need to work on the back of a spindle, so try to get it up nice and high. Remove your wheel bolts, and it's missing on our break rotor, but you may also have to remove the Torx or Phillips head screw that secures the rotor to the face of the hub.
The hub assembly is bolted to the spindle from the back side, so the threads on the back of the bolt are exposed behind the hub. This tend to get filled with road grime and corrosion. Start off by spraying some penetrating oil on the threads. You may have to tap the axle back to allow the bolts to come out all the way for the hub. Put your axle bolt in a few threads. Give it a few taps with a hammer. It should release the axle from the hub. Remove your bolt.
Undo a four M-12 triple square bolts with your triple square bit. It's easier to cut the wheel one way and access two bolts then turn it all the way the other way to access the other two. Triple squares are very easy to strip, so make sure they're seated in fully before you try to turn them. This bolt back here could be accessed with an actual triple square socket. We don't have one, so for access, we're going to put our bit in and break it loose with a 13mm wrench. Once your axle’s loose, if you can't get the bolts out all the way, you may have to pry it out just a little bit more.
As long as the bolts are free of the threads in the hub, the hub can still be removed. The best way to remove a hub is with a hub puller and a slide hammer. If you don't have access to one, the back side of the hub can be worked off the spindle with a hammer and chisel. Line up your hub puller on the hub and install three lug bolts into the puller. Tighten your bolts flat on with a puller. This doesn't have to be all the way tight. It's best if they are, but if the puller can't go down all the way, just make sure that all the bolts are tightened evenly.
Install your slide hammer into the puller and hammer the hub out of the spindle. Our hub is separated from the bearing. This is something that can happen on these older parts, especially when you have to fight with them and work them out. This isn't really the worst thing that could have happened just because we'll have to remove this hub from our bearing assembly anyway.
We can press this hub back into our new bearing. You'll have to remove the raise, the other raise just still stuck to the hub on a bearing press, and then press the hub assembly into the new bearing. Best thing you can do for a bearing that's still stuck in the spindle is to use a series of chisels. Get behind it, work it out of the hub. Be very careful not to angle in and gouge into the aluminum of the spindle.
Before installing your new hub assembly, you'll want to start the bolts of the hub. That way you don't run into any issue with the axle interfering with them. We had our old hub pressed out and reinstalled, so still good. Line up your hub with the axle. Get the spline started. Put your axle bolt in. Just a couple of threads to hold it in place.
Using your M-12 triple square bit, start running all the bolts to the new hub in. Be sure to bring them down evenly. These bolts are torque-to-yield, so after all four of them has been torqued to 80 Newton meters or 60 foot-pounds, you'll need to add 90 degrees of a turn. Be sure that these are new bolts or they will snap when they reach their torque point.
Reinstall your rotor onto the hub. If your hub has a rotor screw in it, be sure to reinstall that. Otherwise, we can just use two lug bolts to help keep the rotor where it needs to be. Remove your caliper and whatever you use to secure it out of the way. Start your two caliper bolts by hand. Torque the break caliper carrier to the spindle to a 100 and 40 foot-pounds. Run the wheel speed sensor back behind the spindle into its carrier into the hole in the spindle with a 5mm Allen screw, using and Allen wrench to tighten to this, but you could also use an Allen socket and a ratchet. Remove your wheel bolts. The 17mm socket.
Reinstall your wheel. Torque the lug bolts to 90 foot-pounds on a cross pattern. Using a 17mm Allen socket and a torque wrench, torque the axle bolt to a 148 foot-pounds. Again, this is a torque to yield bolt, so be sure to always use a new one. Once it's torqued, we'll add an additional 180 degree turn. The slots on the back of a log cap are staggered. Be sure to align them before installing.
Thanks for tuning in. We hope this video helped you out. Next time you need parts for your car, please visit 1AAuto.com. Also check out our other helpful how-to and diagnosis videos.