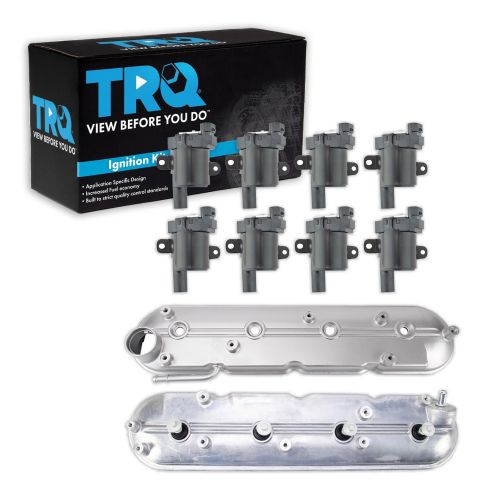
Matched TRQ Kit: Fit, lab, and road tested for peak performance
Application Specific Design: No modifications necessary
Heat Range and Life Cycle Tested: Exact match to stock specifications
Complete repair to restore your engine to like-new conditions
Item Condition:New
Attention California Customers:
WARNING: This product can expose you to chemicals including Di(2-ethylhexyl)phthalate (DEHP), which is known to the State of California to cause cancer, and birth defects or other reproductive harm. For more information, go to www.P65Warnings.ca.gov.
Lifetime Warranty
This item is backed by our limited lifetime warranty. In the event that this item should fail due to manufacturing defects during intended use, we will replace the part free of charge. This warranty covers the cost of the part only.
Returns: Parts with electrical components cannot be returned once installed.
How to Replace Ignition Coil 1999-2004 GMC Sierra 2500
Created on:
Tools used
7mm Socket
Ratchet
1. Remove the ignition coil
Unbolt the ignition coil
Disconnect the wiring connector.
2. install the new ignition coil
Bolt the ignition coil down.
Connect the wiring connector.
Brought to you by 1AAuto.com. Your source for quality replacement parts and the best service on the internet. In this video we're going to replace an ignition coil on this 2002 GMC Sierra with a 6 liter Vortec V8. This procedure is the same for most of the 4.8, 5.3, and 6.0 liter Vortecs in the trucks as well as the SUV's, very simple, only tool you'll need is a 7 mm socket with a ratchet and extension.
The coils on this GM V8's is pretty easy to get to. There's four of them each side, eight total, one for each cylinder. They're right up here on top. I'm going to do this one because it's just the easiest one to see and film. They're all really easy to get to though. Now, there's a harness that goes in right here. I'm going to pull back on that tab and pull up and the front wire is right down here. You twist it. Hold down. Now you can see the two 7 mm bolts on each side holding it in. One here and one there. We'll just speed it up as we're removing those two 7 mm bolts with a socket and a ratchet and an extension. Our original coil, the new one from 1A Auto, you can see it's all the same. It's going to bolt in just like the original. I'm going to speed up again as I just tight those bolts in and then tighten them up with my socket, ratchet and extension. When you tighten them you want them nice and firm. They're not to be overly tight though. Put the extension back in and then plug your plug wire right back and then just repeat for the other seven.
We hope this helps you all. Brought to you by www.1AAuto.com. Your source for quality replacement parts and the best service on the internet. Please feel free to call us toll free 888-844-3393. We're the company that serve you on the internet and in person.
TKA36304
In Stock
Product Reviews
Loading reviews
There are no reviews for this item.
Customer Q&A
No questions have been asked about this item.
Customer service
877-844-3393
Monday - Friday 8:00am - 9:30pm ET Saturday - Sunday 8:00am - 4:30pm ET
Chevrolet is a registered trademark of General Motors Company. 1A Auto is not affiliated with or sponsored by Chevrolet or General Motors Company.See all trademarks.
Enter Vehicle Year Make Model
Specify your vehicle's year, make and model to guarantee fit.
Year
Make
Model
Options
Drivetrain
This part doesn’t fit a . Select from parts that fit.