Brought to you by 1AAuto.com, your source for quality replacement parts and the best service on the Internet.
Hi, I'm Mike from 1A Auto. I hope this how-to video helps you out, and next time you need parts for your vehicle, think of 1AAuto.com. Thanks.
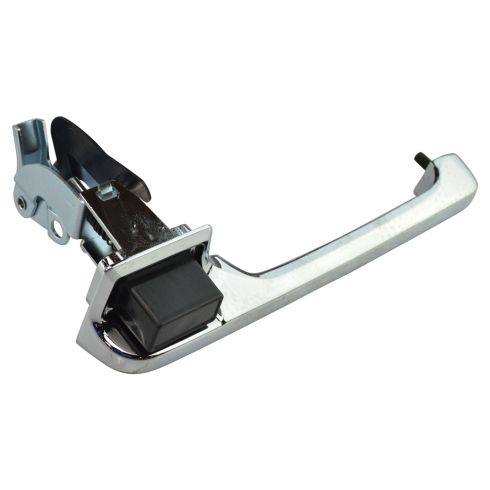
In this video, we're going to show you how to replace a door handle on this 1996 Ford F150. It's pretty much the same for any '92, actually even earlier, but any '92 to '96 F150, 250 and 350. This truck does have manual windows and manual locks, so if you have power windows and power locks, some parts of the procedure will be different. Tools you'll need are a new door handle from 1AAuto.com, T20 Torx driver, a Phillips screwdriver, a door panel clip tool or a putty knife to remove the door panel, an 11mm socket with a ratchet and extension, and a flashlight will help as well.
You want to remove the window crank handle. On these Fords sometimes you can see the screw here. On this particular one you pull this part of it out and then move it off to the side. This one needs a T20 Torx driver, and remove the mounting screw. Pull the handle off. Now you'll want to remove two Phillips screws: one right up here, one right in the door pull there. Just fast-forward here as I use a Phillips screwdriver to remove those two screws. Once you have those out, you'll want to take a door panel clip tool and put it right in behind here. There's usually a clip right behind this reflector, slide it a little bit further. Then from here continue around and release all the clips. If you don't have one of those door panel clip tools, you can actually use a household putty knife. Now you want to pull back your water shield so you can access the back of the outside door handle.
Right down here, there's an 11mm bolt, remove that. I'll just hit the fast-forward button here as I remove that bolt. Now there are two 11mm or one nut and one bolt. You can see a nut right there, you can get to it through this hole and then further up inside. Here's that first nut, there's another nut, you can just see it right there. You can go through this hole, and then that bolt that we just took out loosens this track, so you can move the track out of the way and get to that bolt. Now, before you unbolt the door handle, you need to remove the linkage from the handle down to the latch. I'm looking right into that same hole.
Part this part here, you push it towards the outside of the door and then, basically, what I have is I've got lower, down lower I've got my, I can't film it but I've got my fingers around the rod lower, and I'm pulling out. Then I use my thumb, push this out of the way, and pull this rod out. An 11mm socket with an extension; do this rear one first, just pull the track out of the way. Again, I'll fast-forward here as I remove the bolt and the nut, just be careful as you're taking them out, put your hand in underneath there, make sure the bolt doesn't drop out down in the door. They're sometimes hard to retrieve from the bottom of the door. As I take this nut off the rest of the way with my hand, that comes off, and then the handle just pulls right up and out.
To reinstall the handle, make sure you put the gaskets back on and feed the handle in. Actually, the handle is back in place and I just have a nut in my hand, just the nut into place. To get this bolt, it's where the extension comes in the most handy. Just pull your channel to the side, look back in there. Put the bolt right in. Tighten it up first. While you tighten up this nut, I'm just reaching on the outside here, making sure the gasket is lining up correctly. Now, peeking through here, reach in, you can see the latch rod right there. I just push the latch rod down, fit it right in, and push it in place. Fast-forward as I just put that bolt back in that holds the channel in place, and tighten it up. Make sure the door's unlocked. Quick test and it's all set.
Put your water shield back up in place. Now take your door handle, pull your door handle out, get the panel on there, push the front in here, pull the back up and on. Make sure you get the door lock knob through. Lift up and go back, push it towards the window, slide it down on. Then your clips should pretty much line up and peek in the back here. Then put your two screws back in. Now the little washer for your handle goes back on, put the crank back on, T20 Torx driver. Speed it up here as I put that screw in and then tighten it up snug. You don't want to make it too tight. You're all set.
We hope this video helps you out. Brought to you by www.1AAuto.com, your source for quality replacement parts and the best service on the Internet. Please feel free to call us toll-free, 888-844-3393. We're the company that's here for you on the Internet and in person.