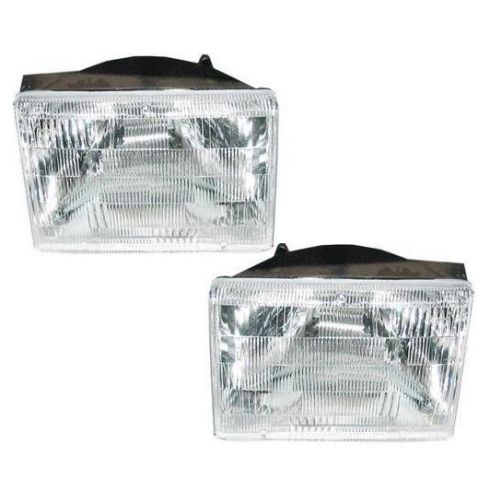
1ALHP00013-1993-98 Jeep Grand Cherokee Driver & Passenger Side 2 Piece Headlight Set DIY Solutions LHT03072
Replaces
1997 Jeep Grand Cherokee Driver & Passenger Side 2 Piece Headlight Set DIY Solutions LHT03072
Product Reviews
Loading reviews
4.72/ 5.0
18
18 reviews
Good Product
February 20, 2017
These are good lights that I have needed for a while (as everyone knows, Jeep lights get pretty cloudy after a while), but didn't replace because my mechanic said they would be so expensive. Found these for less than $50 at 1A Auto and now I can drive my Jeep at night and see the road!
February 21, 2017
Not feeling working with the rep on the phone . Right part nice fit and it shipped fast
95 Jeep grand Cherokee headlights
June 26, 2017
I could not be more happier with the quality and price point of these headlight pairs fixed the overall problem with the jeep extremely easy to install and came in a quick and timely manner
terrific
July 6, 2017
These were the perfect fit and shipped and delivered as promised. Great deal and fantastic bargains . I also received a set of gas shocks for the back hatch door FANTASTIC will do more business with 1A as I need parts
Headlight replacement
July 6, 2017
Excellent delivery time and very easy installation. Very very satisfied and parts fit perfectly. Would recommend parts for any vehicle.
Great set of lights at a great price
August 15, 2017
The lights work and look great. The best part of the whole experience was their video for installation. Don't get me wrong. The lights are great and the price was better than Amazon. As a product I couldn't ask for more but the video made installing them a breeze. That's a level of service above what you get some places. I'll definitely shop here again for parts.
I Can See
September 2, 2017
Product arrived quick and quality is good. Night and day difference compared to the old ones.
Satisfied
November 1, 2017
Quality parts that fit well, timely service, great phone assitance, love the videos!
THE place for parts!!!
November 12, 2017
I always look here first for my parts! Everything I've ordered fits correctly, saving valuable time that I generally don't have to waste. Ordering is simple, arrives quickly, and I would DEFINITELY recommend this site to all!!
Happy Headlights
January 10, 2018
I was really impressed with the fit and finish of these lights. Went right in with no issues. I find the items made in Taiwan seem to always fit better than ones from China.
Look great
June 6, 2018
Good quality set. Includes gaskets and so forth. Went right in. Price is right. Recommend.
Head Lights
September 12, 2018
Someone needed my headlights more than I did. I sent my order of to 1A Auto my parts came sooner than expected. Very pleased with the headlights, I cannow drive at night.
Headlights
October 9, 2018
Every thing I have ordered has fit and worked well. I will order as much as possible thru 1A
November 5, 2018
I RECEIVED MY HEAD LIGHTS AND THEY DIDNT FIT MY CAR AND A PIECE WAS MISSING FROM ONE
These headlights fixed my problem
June 25, 2019
Had a problem with dim headlights so I replaced them with these, plus upgraded to LED. Problem solved, took about a half hour to make the switch. These fit a 98 Jeep Grand Cherokee perfectly.
SO CLEAR
October 22, 2020
OLD ONES CRUMBLED WHEN TRIED TO REMOVE THESE LOOK GREAT. LIKE A NEW VEHICLE. BOSLA LED HEADLIGHTS WHILE YOU DO THIS. THEN LED REPLACEMENT BULBS FOR TURN AND PARKING LIGHTS
December 10, 2022
The clips that hold the light in place are a very tight fit. I had to drill them out to fit.
them out
Great value, just like new.
April 23, 2023
Perfect fit and works great. Wife loves being able to see again while driving at night.
Customer Q&A
Are these glass?
February 19, 2022
10
Yes, these are glass.
February 19, 2022
Charles H
10
No, these are not glass.
February 21, 2022
Kelly S
10
Definitely plastic, not glass as the other person answered. Hope this helps.
February 22, 2022
Michelle W
10
plastic
February 23, 2022
CHARLES M
Are bulbs included?
December 10, 2022
10
No. The bulbs are in the wiring harness from the factory.
December 10, 2022
Kenneth Y
10
The bulbs were included with mine.
December 10, 2022
Phillip G
Jeep is a registered trademark of FCA US LLC. 1A Auto is not affiliated with or sponsored by Jeep or FCA US LLC.
See all trademarks.


