Replaces

Replaces Honda Accord Front & Rear 16 Piece Steering & Suspension Kit TRQ PSA56181
$443.95
Replaces 1994-97 Honda Accord Front & Rear 6 Piece Suspension Kit TRQ PSA39191
$283.95
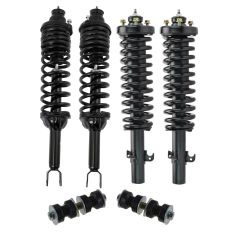
Replaces 1994-97 Honda Accord Front & Rear 4 Piece Strut & Spring Assembly Set TRQ SCA57078
$274.95
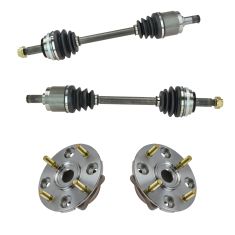
Replaces Honda Accord Acura CL Front 4 Piece Drivetrain Kit TRQ CSA80131
$242.95

Replaces 1994-97 Honda Accord 2 Door Complete Carpet Auto Custom Carpets 14549-160-1115000000
$239.95

Replaces 1994-97 Honda Accord 4 Door Complete Carpet Auto Custom Carpets 14678-160-1085000000
$239.95

Replaces 1994-97 Honda Accord 4 Door Complete Carpet Auto Custom Carpets 14678-160-1077000000
$239.95

Replaces 1994-97 Honda Accord 4 Door Complete Carpet Auto Custom Carpets 14678-160-1115000000
$239.95
Replaces 1994-97 Honda Accord 2 Door Complete Carpet Auto Custom Carpets 14549-160-1077000000
$239.95

Replaces 1994-97 Honda Accord 2 Door Complete Carpet Auto Custom Carpets 14549-160-1085000000
$239.95
Part Details
Complete Repair in One Purchase - Stop searching for parts individually and complete your repair with a customized kit or set from DIY Solutions.
High-Quality Parts from Trusted Brands - DIY Solutions' kits and sets are selected from the best automotive brands and include hard-to-find and even obsolete parts you may need for your vehicle.
Guaranteed Fit - DIY Solutions ensures its selected parts are quality-tested to guarantee fit and function.
Item Condition:
New
Attention California Customers:
 WARNING: Cancer and Reproductive Harm - www.P65Warnings.ca.gov.
Lifetime Warranty
This item is backed by our limited lifetime warranty. In the event that this item should fail due to manufacturing defects during intended use, we will replace the part free of charge. This warranty covers the cost of the part only.
FREE Shipping is standard on Orders shipped to the lower 48 States (Contiguous United States). Standard shipping charges apply to Hawaii, Alaska and US Territories. Shipping is not available to Canada.
Expedited is available on checkout to the United States, excluding Alaska, Hawaii and US Territories as well as P.O. Boxes and APO/FPO/DPO addresses. Final shipping costs are available at checkout.

Created on:
Tools used
Brought to you by 1AAuto.com, your source for quality replacement parts and the best service on the internet. Hi, I'm Mike Green. I'm one of the owners of 1A Auto. I want to help you save time and money repairing and maintaining your vehicle. I'm going to use my 20+ years experience restoring and repairing cars and trucks like this to show you the correct way to install parts from 1AAuto.com. The right parts installed correctly, that's going to save you time and money. Thank you and enjoy the video.
We're going to burn through taking the door panel off. If you want to see this in regular motion, just check out our other videos for the Accord door panel removal. You probably can get enough here. It is a couple screws, remove your door handle, remove your switches and then unplug the switches. Then take your putty knife or your door panel clip tool and a rag, so you don't scratch your paint, and release the clips on the door panel. Pull it up and off. After that, carefully remove your water shield. If you look closely on this car, at some point, somebody's torn it all up. You want to carefully remove all the screws and stuff that hold the brackets on and remove the clips that hold the wiring on so you can get it off in one piece. It does keep moisture out of the car. Once we get through this, then we'll go to the door handle.
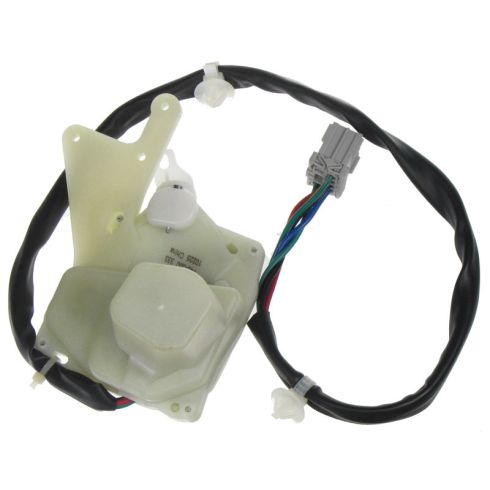
What I've done here is I've actually taking the latch mechanism out of the door. You don't need to do this during this repair, but I'm taking this out so I can show you the motions you have to go through to get this actuator out. This is your door lock actuator. You can see this little pivot point here. That's the arm. Turn it around backwards and you can see this is the arm. That has to attach to this little post here. This angle right here. Now you can see right under here that is attached. This sits in the door like this. After you unscrew the three screws, you need to pull forward on the actuator and then down.
When you want to reattach it, you want to come up from an angle and put this part of your actuator right up against that plastic and I'm pulling towards me on the actuator and then going up and in. You can see as long as you use the right motion, you can get the arm on there correctly. It's basically pull towards you and down. Then this installs toward you and up. You'll get that actuator on there. Once you've pulled your water shield back some, you need to remove this bolt right here, which loosens up the window track. Inside the door, to get your lock actuator out, there's going to be three screws. You can see them right there. There are two down below and there's one inside that black collar. You're going to remove those three screws.
When you get those three screws out, I've actually put a flashlight right in here. Two of them I can look down in here like this and see them. They're right next to the window track. They're about at this level. I can get at those. The third one is closer in to the door panel. Unless you have a really small head that fits in this hole, you can't really see it. I actually just use a mirror to guide my screwdriver, which is always fun because everything's backwards in the mirror, and then I can reach the screw. Once you're into the screw, it's easy enough to get them out. They're not that tight.
Once you've got those screws out, you do need to have the top one out of it and pull it towards the front of the car and down and it comes out. There are two clips to hold the wiring harness. The first one's easy because it's on the outside. Press and pull out. This one you can reach in the back, pinch those teeth the teeth on there, not the teeth in your mouth and pull it out. Then, this little fun tab here and that pulls out and there's your harness out. My last screw is still stuck in there. Make sure you keep track of those screws. There's your harness out. Here's our lock actuator. Here's the new one from 1A Auto. They're exactly the same thing. All the same, the same harness and everything. The new one from 1A will bolt right in. There's nothing wrong with this old one, so I am going to reinstall it.
To put it in, I've got this lower screw in. Like I did on that example, I'm going to put it back up in here. I'm going to get close to my bracket. As your putting it up in here, pull it this way. Put that lever on. Once the lever is on, it will hang there. I've got some dexterity because I've been doing this quite a while. Basically, push that screw in so you can find the hole where it goes. That one's in. Your next screw. Move it around a little bit until the screw finds its home. The last one you can actually sorry about my big old hands you can actually get up in there with your paw and start it with your fingers. I'm using the camera to get my- I'm looking upside down and backwards.
Make sure you put your wiring harness in behind this. It goes up and over this little bracket, so put it in behind and clip it in there. Clip it in and hook it up. We can put this bolt back in, tighten it up and then check it before you put the door panel back together. I'm tightening up this bolt and I've got my keys so I can make sure I can get in the car if I didn't do something right. Locked. Unlocked. A little duck tape patchwork on the water shield and it's just about as good as new.
We're going to speed through reattaching everything and putting the water shield back on. Make sure you put the water shield back on and put all the components on. Then put the door panel on and you're all set. If you want to see this part in regular motion, just check out our other videos for the Honda Accord driver's side door panel.
We hope this helps you out. Brought to you by www.1AAuto.com, your source for quality replacement parts and the best service on the internet. Please feel free to call us toll free at 888-844-3393. We're the company that serves you on the internet and in person.