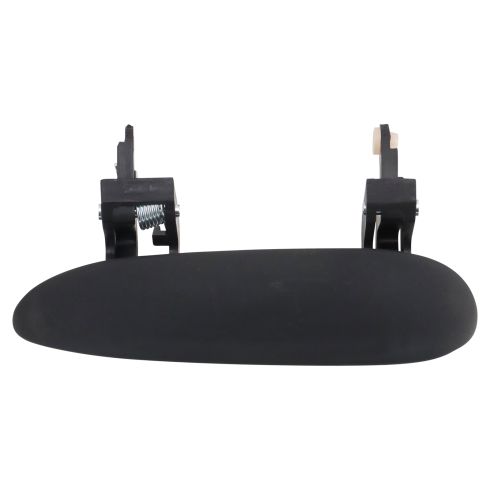
Complete Repair in One Purchase - Stop searching for parts individually and complete your repair with a customized kit or set from DIY Solutions.
High-Quality Parts from Trusted Brands - DIY Solutions' kits and sets are selected from the best automotive brands and include hard-to-find and even obsolete parts you may need for your vehicle.
Guaranteed Fit - DIY Solutions ensures its selected parts are quality-tested to guarantee fit and function.
Item Condition:New
Attention California Customers:
WARNING: This product can expose you to chemicals including Lead and Lead Compounds, which are known to the State of California to cause cancer, and birth defects or other reproductive harm. For more information, go to www.P65Warnings.ca.gov.
Lifetime Warranty
This item is backed by our limited lifetime warranty. In the event that this item should fail due to manufacturing defects during intended use, we will replace the part free of charge. This warranty covers the cost of the part only.
FREE Shipping is standard on Orders shipped to the lower 48 States (Contiguous United States). Standard shipping charges apply to Hawaii, Alaska and US Territories. Shipping is not available to Canada.
Expedited is available on checkout to the United States, excluding Alaska, Hawaii and US Territories as well as P.O. Boxes and APO/FPO/DPO addresses. Final shipping costs are available at checkout.
How To Replace Rear Door Handle 2004-09 Dodge Durango
Created on:
Tools used
Ratchet
8mm Wrench
8mm Socket
Phillips Head Screwdriver
Putty Knife
Door Panel Removal Tool
Flat Blade Screwdriver
1. Removing the Door Panel
Pry off the trim piece inside the door handle with a flat blade screwdriver
Remove the Phillips head screw inside the door handle
Remove the two Phillips screws at the bottom of the door panel
Pry out the door panel with a door panel clip tool or putty knife
Lift the door panel up and off
Remove the clip from the door lock rod
Remove the door lock rod
Disconnect the window wiring harness
2. Removing the Door Handle
Carefully peel back the water shield
Unclip the lock rod from the door handle
Remove the two 8mm nuts from the door handle
Pull the door handle off from the outside
3. Installing the Door Handle
Unclip the lock rod from the old handle
Clip the lock rod onto the new handle
Put the handle into place
Fasten the two 8mm nuts onto the door handle
Clip the lock rod into place
Put the water shield into place
4. Reinstalling the Door Panel
Connect the window wiring harness
Connect the door lock rod to the door handle
Reclip the clip to the door lock rod
Lift the door panel into place
Push in the door panel clips
Insert the two Phillips screws at the bottom of the door panel
Insert the Phillips head screw inside the door handle
Push on the trim piece inside the door handle
Brought to you by 1AAuto.com, your source for quality replacement parts and the best service on the Internet.
Hi, I'm Don from 1A Auto. I hope this how-to video helps you out, and next time you need parts for your vehicle, think of 1AAuto.com. Thanks.
In this video we're going to show you how to remove and reinstall a rear door handle, the outside door handle, on this 2005 Dodge Durango, much the same for any 2000 Ford, '09 Durango, as well as the procedure's the same for the Aspen. Tools you'll need are a small flat blade screwdriver, a Phillips screwdriver, and an 8mm wrench or socket and ratchet.
First there's a little trapdoor in here. Use a small flat blade screwdriver to go in and pry it out. You have a Phillips screw there, as well as one down here and one further back. I'm going to speed it up here as I use a Phillips screwdriver to remove those three screws. Once you have those screws out, lift up and pull out on the panel. Back in here you'll see a little blue clip. Pull that blue clip off. Pull that up and out, and then your connector for your window switch is right here. Press on the little tab. Now just pull the panel off.
Pull your water shield down enough so you can access the upper inside of the door. There's your door handle right there. See there's a little green clip here. Use your thumb and pull that clip off and pull this rod right out. Now you have two 8mm nuts there and there. You'll need an 8 mm wrench or a socket and ratchet to get these nuts loosened up and they come right off. The handle comes right out.
On your new 1A Auto handle, you would want to switch this rod over. Just unclip it and pull it out. My handle is in good shape so I'm going to put the original one back on as if this is the new one from 1A Auto. Clip it back on and put it back down in. You may have to pull on your handle just a little bit to get it back up in. Restart your 8mm nuts putting them on by hand at first. You can actually see that one right down through this hole if you have a light. Tighten them up nice and firm and about another quarter of a turn and tighten them. Reach in and get the lock rod in place and then snap the clip on. Now put your water shield back up in place. Make sure that the door lock knob is upright, the door latch rod comes through, as well as the harnesses if you took it off that far.
Reinstall your door panel. Put your window harness up in. Reach back there and bring this out; push it down in. Lock the clip on. If you look down there are hooks. You have all these hooks, so you look at the bottom ones to make sure you get the bottom ones in. Bring it up. Make sure the lock goes down and behind. Make sure your lock comes up through. Push the panel on. Make sure it goes in flush, and then lock it down. Now put your three screws back in. Again, we'll fast-forward through that. Three Phillips screws, tighten them up, and tighten them nice and firm don't over-tighten them, though. Put this little trapdoor back on. We hope this video helps you out. Brought to you by www.1AAuto.com, your source for quality replacement parts and the best service on the Internet. Please feel free to call us toll-free, 888-844-3393. We're the company that's here for you on the Internet and in person.
BHS00946
In Stock
Product Reviews
Loading reviews
There are no reviews for this item.
Customer Q&A
No questions have been asked about this item.
Customer service
877-844-3393
Monday - Friday 8:00am - 9:30pm ET Saturday - Sunday 8:00am - 4:30pm ET
Chevrolet is a registered trademark of General Motors Company. 1A Auto is not affiliated with or sponsored by Chevrolet or General Motors Company.See all trademarks.
Enter Vehicle Year Make Model
Specify your vehicle's year, make and model to guarantee fit.
Year
Make
Model
Options
Drivetrain
This part doesn’t fit a . Select from parts that fit.