Brought to you by 1AAuto.com, your source for quality replacement parts and the best service on the Internet.
Hi, I'm Mike Green. I'm one of the owners of 1AAuto. I want to help you save time and money repairing or maintaining your vehicle. I'm going to use my 20+ years experience restoring and repairing cars and trucks like this, to show you the correct way to install parts from 1AAuto.com. The right parts, installed correctly, that's going to save you time and money. Thank you and enjoy the video.
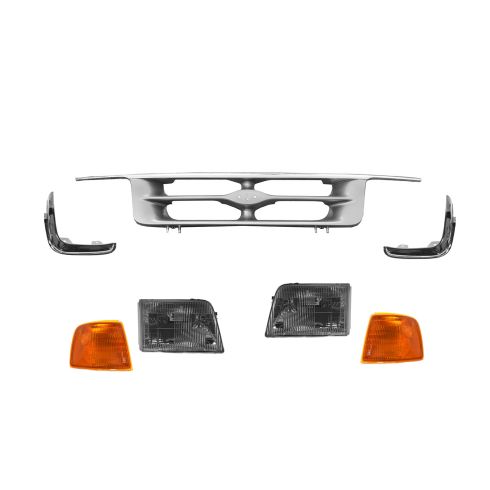
In this video we're going to show you headlight replacement, both just replacing the bulb as well as replacing the whole assembly on this '96 Ranger and you'll see I'll install a few different new parts as well with the headlights, to give the front end of the truck a little bit of a facelift. If you're just replacing the bulbs you don't need any tools, if you're replacing the headlights you'll need a Phillips Screwdriver, a Flat Blade Screwdriver just to help you get the bolt clips back in, an 11mm Socket and Ratchet or Wrench, also a 14mm or 9/16 Combination Wrench and I have on here a 7/32 Socket or Wrench and there's a star next to it because I believe somebody just used the wrong bolt at some point, I think it's probably just a Phillips and you may not even need that last tool.
If you are just looking to replace the headlight bulb, it's pretty easy. The bulb is right here, twist this, as you look at it, clockwise, pull it back, here's your bulb, pull your bulb out. Bring this all up and pull this back, little tab right here, either pry it with your thumb or maybe use a screwdriver to help you. The bulb unplugs. Ok, I'll plug it back in, make sure it clicks. The bulb does have locating notches in it, and when it goes in the headlight you want to have basically the plug up on the top. So we put it back down in. Like I said, there's the plug on top. See, the light goes in, ring goes on, and locks in place.
Ok, so here you can see our Ranger, pretty decent little work truck for us. Not a bad looking, but change the lights and grill and takes a bunch of miles of the front end. So once again, here it is before, ok, and then with some new lights and a new grill from 1AAuto, and a little bit of time, you can take a bunch of miles off the front of your little work truck. Remove the grill by removing six Phillips screws. One, two, three, four, five and six. Now the grill, you just kind of pull up at the top, up on the other side, forward and up and out.
You want to remove the parking light, which involves removing an 11mm nut right there. Use an 11 mm socket with a ratchet; a wrench works fine as well. Put your fingers in behind here and it's held in just by a couple of pins that have to push through and feed the wiring harness out. Here's the signal light. If you're looking to just change this bulb, turn it counterclockwise, pull it out. Behind the light it's held on with some tabs. These are designed so that you should be able to pry them up with your finger. What I like to do is either a 9/16ths or a 14mm wrench. Put the wrench right on the tab. Just kind of hold on to the tab with your finger and pull up on the wrench. Try not to drop the tab down. This one down here is a little bit. If you push on the headlight, that can help it come out easier. This one here and now the light comes out.
Here's my old light and the new light from 1A Auto. What you can do before you install them is just preliminarily adjust everything and what you're going to want to do is look at these, measure the distance between here and here, and set them the same. You can see that's about the same there. Obviously you're going to have to take this adjuster off, put it right onto the new one. Okay. Then on this one over here, you can see that this one's way in. You can take this new light. With the Phillips screwdriver, hold on to this here, and you need to twist it right in.
Okay, here I'm just going to fast forward. I use my screwdriver and I'm holding on to that adjuster star I guess, move it in and then compare it to the other light. You can see that they're pretty well in the same position. The other thing is the bulb in the light already, it goes through. Remove the bulb and move that here. Put the new light in. These need to go right into here, that's to hold it in place. You've got one down here, you've got this one over here and you've got this one up here. We can put everything back into place. Then connect the harness connection back, pushing it back through.
Here I'm pushing on the headlight and starting the clips down in, on the newer ones you probably won't do the clips all the way on. The older one, which is the older adjuster we transferred from the other headlight, will probably go on a little bit more. Push down on your locking clips. You might want to use a screwdriver, just to try to force them right down on. What you're probably going to want to do is un-plug the bulb from the harness, then put it in, then re-plug it in the bulb. This and this line up with little clips. We're just going to peek in, get one of them in. You might need to push the harness back a little bit, get the other one in. Make sure you're stud up here is lined up. Push it right back in. Put your 11mm nut back on. Tighten it up.
We'll start a couple of these screws in. What we do is we loosen up this eyebrow trim here. I push the grill down, looking under the trim. I bring the two pieces together. Here you can see, on this side I used some pretty good force to push that eyebrow trim in, and then get the grill snapped on over it, then put the other screw on the outside of the grill. The last screw on the grill, put that in, tighten it down first, and then tighten that eyebrow trim, the top screw on that, then put your other few screws in. We tighten these up, you don't need to have these crazy tight, just have them nice and firm and you should be all set.
We hope this helps you out. Brought to you by www.1AAuto.com, your source for quality replacement parts and the best service on the internet. Please feel free to call us toll-free, 888-844-3393. We're the company that's here for you on the internet and in person.