Brought to you by 1AAuto.com, your source for quality replacement parts and the best service on the Internet.
Hi, I'm Mike from 1A Auto. I hope this how-to video helps you out, and next time you need parts for your vehicle, think of 1AAuto.com. Thanks.
In this video, we're going to show you how to service the rear brakes on this 2000 Mercury Grand Marquis, same as any Grand Marquis or Ford Crown Victoria, basically the same for 1998 up to 2011. This vehicle does have the disc brakes. The tools you need are a jack and jack stands, your tire iron or a 21mm socket with a ratchet and pipe . I say that because you'll probably need some extra leverage to get those lug nuts loose ., 10mm to 12mm wrenches, a large hammer and a wire brush.
If you have this style wheel cover, you should have a little key in your glove compartment. You pull the little center medallion off, and then, use the key to remove a bolt that holds the wheel cover in place. Then, use a screwdriver to pry off the wheel cover. If you don't have access to air tools you'll want to start with the vehicle on the ground. Loosen the lug nuts, then raise and secure the vehicle and remove the rest of the lug nuts and the wheel and tire.
Now, you can inspect the condition of your pads. You can see that the outer pad is looking a little thin. This rotor, if you run the back of your finger along it, it actually feels like it's in okay shape. It probably should be turned down. You can also just replace it with one from 1A Auto. You look back in here and then turn the rotor; you can see this pad is really worn down so they do need to be replaced.
To do that, you'll remove this lower 10mm bolt and this upper 10mm bolt. This lower bolt is 10mm. I'm going to use a wrench. Put it on there like that and then I'm going to use a little bit larger wrench. Hook it on there like that for some extra leverage and these really should come apart pretty easily. I'll fast forward here as I finish removing that bolt. The lower one you just pull out as far as you can. It goes into the control arm. Then remove the upper one. Then once you have those bolts out, just use a large screwdriver and pry the caliper away. Then the inside pad just pulls right out and the outside pad pries out with a screwdriver. Take the rear pad out, and take that front pad off.
Spray around the wheel studs and the center hub and spray it with some penetrating oil and let that sit for awhile. To get this apart, use a nice big hammer. Avoid hitting your lugs. You want to hit the rotor itself.
The rotor comes off; a new rotor from 1A Auto can go right on. It looks a lot prettier. I just like to put a lug nut on just to hold things in place.
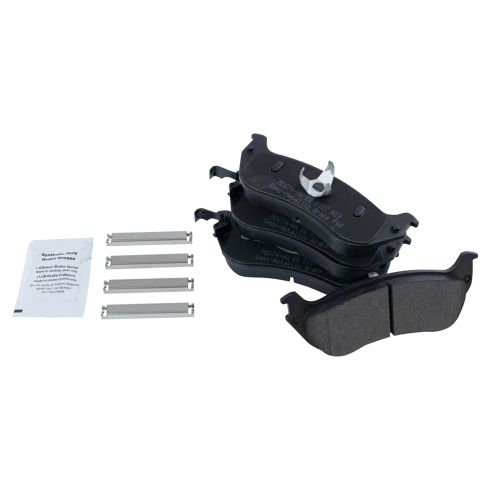
The adjusting mechanism in these brakes is the caliper itself. Right here, this is piston. As the brakes wear down, the piston just kind of edges its way out of the caliper. To put the new brake shoes on you need to force that back in. What I've done is I've put my old inside pad back into the caliper and now I have a big C-clamp here and I'll slowly tighten up the C-clamp, and you'll see the piston go back in. It's actually more effective if I use fast motion, and then once you've forced the piston back in, remove the C-clamp. Take the new pads from 1A Auto. This one, this clip, is the inner one. You put it right in. Then this one you kind of have to pull. I'm just wedging my fingers in there and pulling out while I push that down into place. Before you reinstall your caliper use a wire brush and clean off these slides here. Then put your calipers back together. Make sure these slide. As you're putting the caliper back in place you'll probably have to pull these out some. These should slide nice and easy back and forth. If you have any issues you can pull them out, clean them up and put them back in. Now, we're going to slide the top in first. Make sure your pads get onto this slide correctly. Tap it in place if necessary. From here on out it's just a matter of getting those 10mm bolts in and tightened up. To get them in just kind of push them in and move the caliper around a little bit back and forth. Slide it in and out a little bit and you'll feel the bolt get down into the hole and then you can start threading it in. When you tighten them, they should only be tightened to about 12 to 15 foot pounds. Just get them about as tight as you can with a small 10mm wrench, and that is tight enough.
Remove that lug nut that you had holding stuff in place. Put your wheel and tire back on. Start all your lug nuts. Remember to put that bracket that holds the hubcap and then preliminarily tighten the lug nuts. With the car back down on the ground, use a torque wrench. Tighten the lugs to 100 to 120 foot pounds. Use a star pattern as you tighten and then put your hubcap back in place. I generally try and get it on somewhat and then I thread that bolt back in; tighten it up, and then, go around the rest of the hubcap again and make sure it's all seated well. Always make sure you put your key back in the glove compartment. Then, whenever you've done work on the brakes, make sure you pump up your brakes. Get the pedal nice and hard before you road test the vehicle. Then, when you road test, do a couple of stops . actually before you road test, stop from 5 and 10 mph. Make sure the brakes are working properly before you road test.
We hope this video helps you out. Brought to you by www.1AAuto.com, your source for quality replacement parts and the best service on the Internet. Please feel free to call us toll-free, 888-844-3393. We're the company that's here for you on the Internet and in person.