Brought to you by 1AAuto.com, your source for quality replacement parts and the best service on the Internet.
Hi, I'm Mike from 1A Auto. I hope this how-to video helps you out, and next time you need parts for your vehicle, think of 1AAuto.com. Thanks.
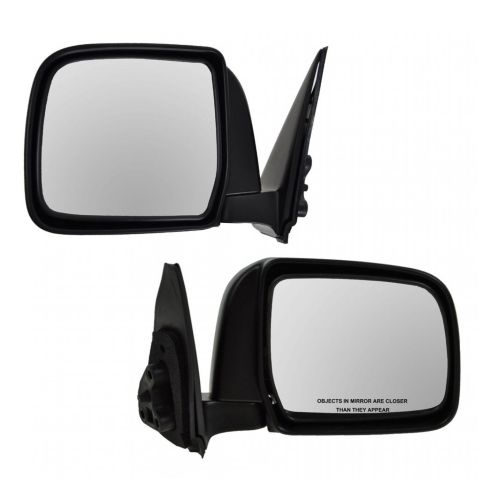
In this video, we're going to show you how to replace the side rear view mirror on this Toyota 4Runner. We show you the driver's side, but the passenger's side is basically the same. Though mirrors differ somewhat, this process is basically the same for any 1996 to 2002 4Runner. The tools you'll need include a small flat blade screwdriver, a Phillips screwdriver, a door panel clip tool or a putty knife, a 10mm socket, a ratchet or a wrench.
Start with the small screwdriver, and get right under the front here. Pry that up and then pull this out. There are three harnesses to unplug. They each have tabs you push with your thumb and then pull out. Take your screwdriver again, go up under here, and pry up on the arm rest and it comes out. Now, use your Phillips screwdriver, and screw from here. Okay, then there's a little pin right back here. You push the center of it in and then use either a screwdriver or your fingernails and pull that clip out.
Get your door handle, pull it forward, and bring it out. There's a little clip right here that holds the lock rod. Pull that clip out towards you, lift the handle up off, push the rod down, and that comes off. Now, using a door handle clip tool or a putty knife, and probably starting here, slide down and you'll come to some of the pins. Pop the pins out. Get to them. There's also a little pin right up in here that's missing on this vehicle. Put the passenger sides here so I can show you how to remove it on the passenger side door. Just push the center of this in, and then pull it out. Pull the door up and it comes off.
To get to your mirror, you want to remove this triangle. There's a little pin in here. You can just pull firmly or use a screwdriver, pry lightly, and pull at the same time. Then that comes right off. Pull your water shield back just a little bit. Try not to rip it or stretch it too much, and your harness plugs in right here. Press down on the tab with this connect harness, pull it through, then use a screwdriver. There's a little clip here. Push down on the top and pull up from the bottom.
Now you can see there are three 10mm bolts that hold the mirror in. First, we'll remove the screw so we can move the speaker out of the way. Fast-forward here as I use a Phillips screwdriver to remove the screw for the speaker. Then carefully let the speaker hang down. Then use a 10mm socket with a ratchet extension, or a wrench would work as well, and remove the three bolts that hold the mirror.
The original mirror has a little assembly line clip just so they can kind of clip the mirror on there, and you just kind of have to pull it, just nice and firm. Work it around a little bit. There's your mirror out.
The new mirror is from 1A Auto, just like the original. They come molded in black plastic. Obviously, you can install them and they'll make a functional replacement, it just wouldn't be the same color as your vehicle. If you want to paint them to match the vehicle, you can use crude as just getting some paint from a hardware store that is a close match, or if you want a good match, go to an automotive parts store that has a paint department. They can usually match the color pretty well, put some in an air-charged can, and you can spray it yourself. You'd want to tape off the mirror surface, make sure that you don't paint the gasket. Obviously, my original mirror is fine, so the installation is to reverse the procedure.
Make sure you put the harness right through. Speed it up here again. Start all three bolts in first, and then tighten them with your wrench or 10mm socket and ratchet. You want to make them firm, not over tight. Put your harness and plug it in to leave that all back in place. Now, take your speaker, put it back up in, and put in that little screw that holds it in place. Tighten that up, and you can put your door panel on. I'm going to kind of speed up the tape as I put the door panel back on. It's pretty easy once you've gotten it off, but you can probably pick up enough right here.
Hang the door panel up on top of the sill. Make sure that you get the lock button in. Then engage all the clips around the edge. Put all the rest of the screws, trim, and stuff back in. If you want to see this in regular speed, just check out our other videos for the 4Runner door panel installation.
We hope this video helps you out. Brought to you by www.1AAuto.com, your source for quality replacement parts and the best service on the Internet. Please feel free to call us toll-free, 888-844-3393. We're the company that's here for you on the Internet and in person.