Brought to you by 1AAuto.com, your source for quality replacement parts and the best service on the internet.
Hi, I'm Mike Green. I'm one of the owners of 1A Auto. I want to help you save time and money repairing or maintaining your vehicle. I'm going to use my 20-plus years' experience restoring and repairing cars and trucks like this to show you the correct way to install parts from 1AAuto.com. The right parts installed correctly. That's going to save you time and money. Thank you and enjoy the video.
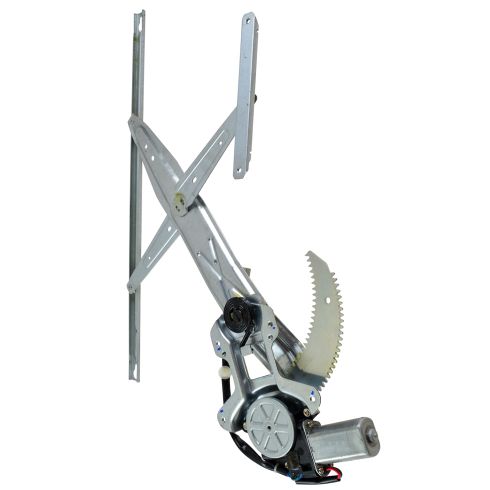
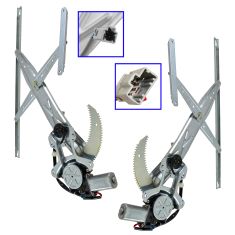
In this video we'll show you how to replace the driver's side front power window regulator, same as the passenger's and same as pretty much any '98 to '02 Accord. The tools you'll need are a flat and Phillips screwdriver as well as a 10-millimeter socket with a ratchet and extension, or even a 10-millimeter wrench would work. We'll start by removing this triangle panel by pulling it off. You're going to pull a little pin out here and then there's two Phillips screws, one you can see right here. On your vehicle it may have a little trim door in front of it. Then the other one you can see down Sin the arm rest or pull handle here. Just use a screwdriver, pry up, and you can see it right in there.
Use your screw driver, pull out this pin here, multiple pins. Phillips screw driver here. Keep track of it. Now remove this Phillips screw. Okay, now this panel right here, you just want to grab this side and pull. It just has a couple clips that go in there. Now you will want to take your push pin, pull it up, back and out. Then all these connections just have little buttons on there. This blue one, the button is right here. Push the button down like that. Brown one, button is right here. It snaps. And the gray one, the button is right here. One thing I forgot here- your door handle pull it forward and then out.
Now, there's a little clip right here. Just take your thumb, pull the clip off. Then the rod pops up and out. Then disconnect the connector here. Then after that, just take your hand, put it in behind and there are some clips. Pull on this here, the door panel comes up and off and now I'm behind again. This is your courtesy light. Just twist it counter-clockwise and pull it out. Then there's another connector here. Push the button, disconnect it, and your door panel is off. Just to speed it up here, you want to use a 10-millimeter socket and ratchet or wrench to remove a nut and then a Phillips screwdriver to remove the two screws so that those brackets come off. Then once you have those off, then you're going to want to slowly pull back your water shield. Be careful not to rip it. Now you also want to use a Phillips screwdriver and remove the four screws and pull the speaker and let it hang down.
Now there are two 10-millimeter bolts that hold the window to the regulator and you can see it; it's a little hard to film. I'm kind of pointing to it inside the door right there. See down at the bottom get to barely and then get to the other one it's very hard to see but if you reach into the speaker hole, you can feel it kind of deep down in there. The reason I showed them to you like that is because if your window motor dies, you'll need to reach in through that rear hole and that speaker hole and you have to kind of contort yourself and get those bolts out.
Sometimes if your regulator is broken you can actually grab the window by hand and move it up and down. My regulator is actually fine, so I'm going to raise it up to here. You probably see these bolts right here. Now you can see those bolts that hold the window right through those holes right there and right there. Most of the time when your window is broken you can just move your window up and down by hand to get those bolts in the right place. Now you want to loosen them up. Actually you want to remove those bolts.
Then once you remove them you can take your window, lift it up by hand, and put it in place. You can see I use a a little blue painter tape to hold the window up; make sure it doesn't slide down. Disconnect my window button again. Right here is your power window lead, and there's a little button right there; disconnect that. Use a screw driver pry it away from the door. Then a little clip right here. Push one, two down, and the other one through. Now to remove the regulator, I want to remove this bolt. Remove these two lower bolts down here. Pull it back and move this up here. Then loosen this bolt and loosen this bolt. Then you can reach in bring the regulator up, reach further, pull your motor up and out. Now pull it right out.
Here's my original regulator, new regulator from 1A Auto. You can see they're all the same. The bolts are the same; the plugs are the same. The new one from 1A Auto, you can have this clip here and this clip here. What you would do if you're going to put a new one in, it has this bolt in it here. Change that bolt over to the new regulator and then change these two bolts over to the new window motor. You would actually want to pull this strut out. This strut is what we took out before. As you saw, the regulator in my vehicle is working fine so I'm just going to reinstall it to show you. No real reason to put a new regulator into a car that doesn't need it.
First you'll put the regulator back in. Work it up in the plate. Here's our bolt coming through it here hanging up there. On our window motor are two bolts. Tighten those up. I'm just going to speed up the action here, because all I'm doing is putting back in all the bolts for the regulator and then going through and tightening them up. When you tighten them, you don't want to over tighten them, nice and snug with that quarter-inch drive wrench is usually what I do.
I'll plug in the lead. Since I took it apart this way, my holes are right here. What you would want to do is hook your switch back up and make sure you move the regulator to the point where you can get to these holes easily. It's wrapped in here. Hold your window in place, take the tape off, and slide it, slide your windows down. It comes in contact with your regulator. Check in there. Start the other bolt.
Just in the interest of keeping this somewhat on the short side, I'll speed up. Put on the water shield and then we put on the brace for the door panel, the one 10-millimeter and a couple of Phillips screws. Then we screw on the speaker with those four Phillips screws. After that we'll actually speed through the door panel as well. If you want to see the door panel installation in regular speed just check out our other videos.
We hope this helps you out. Brought to you by www.1AAuto.com, your source for quality replacement parts and the best service on the internet. Please feel free to call us toll-free, 888-844-3393. We're the company that's here for you on the internet and in person.