Brought to you by 1AAuto.com your source for quality replacement parts and the best service on the internet.
Hi. I'm Mike from 1A Auto. I hope this how-to video helps you out, and next time you need parts for your vehicle, think of 1AAuto.com. Thanks.
In this video, we're going to show you how to service the headlights on this 2003 Honda Odyssey, pretty much the same for any '99 to '04 Odyssey. We'll show you both, if you just need to change the bulbs. We start the video just showing you how to change the bulbs. Then we also show you how to change the whole headlight assembly, if you want to make your van look a little nicer, replace the cloudy, faded, dull headlights with new brighter headlights from 1A Auto. The only tools you'll need are 8 and 10 millimeter sockets with a ratchet or 8 and 10 millimeter wrenches, as well as a flat blade screw driver.
Here on the passenger side, easiest to see here. You can see here is the back of the headlight. There's a wire harness that goes in, just grab hold of that and pull it off. Then you pull this boot off, okay. You can see back in there, there's a little wire retainer right here, you push it towards the front of the car, flip it up a little bit and out, and then the headlight comes right out. Okay, to show this to you. My bulb is actually fine. Put it back in and make sure it goes in there correctly. Then put this retainer back around, push it in and lock it. You lock it by pushing it in and then down. Okay, and then, put your boot, push it back on. Finally, get the wiring harness and put it back in. A lot easier if I have two hands, but since I am using one hand to film. A little tougher, but there you go.
Okay, if you need to replace this bulb here, you actually do have to pull the entire assembly out of the car, which requires removing the bumper cover, which I'll show you next. On the driver's side, it's pretty much the same thing, and that boot is right here. You open up the hood of your van and 11 clips. These clips are pretty easy. Just use a flat blade screw driver, kind of pry underneath. Pry on one side, pry on the other. Sometimes, they're a little hard to get going. Then either the middle comes out. The middle came out on that one, and the clip comes out. Or sometimes, you have to pry the whole clip out. Let's do another one here.
This one, pop the middle up and the whole clip came out on that one. Okay, so there's one, two, three, four, five, I'm missing one there, six, seven, eight, nine, ten and eleven of those clips. I'm just going to fast forward here as I remove those clips. Sometimes, sand and stuff can get into them and make them hard to pry up so just be careful you don't want to break the tops of them off. Just pry on one side carefully, pry on the other side, and then go the next one.
Now, looking up underneath the van, you'll find some of the same clips. There should be four of them; one, two, third and fourth here that are missing. Once again, fast forward. This is where you'll really find that they can get gummed up and mucked up with sand and are hard to get out. Actually, I think on this one, I end up just prying one of them out and breaking it off because it doesn't really come out the right way.
Now, on each side near the wheel, there's a 10 millimeter bolt right down here. Up inside the fender, there is an 8 millimeter bolt right up in here. Again, fast forwarding. Use a 10 millimeter socket ratchet or a wrench would work as well. On this vehicle, that 10 millimeter bolt is rusted into the clip so it actually just ends up tearing the plastic underneath. That's something that might happen. There's really no way to prevent it. Then, I go and do the 8 millimeter bolt and it comes out no problem, and repeat that for the other side.
Now, we're ready to remove the bumper cover. Pull out, push it down a little bit, pull out. This actually this cover can come off. Then on the other side, pull it right out. I think on some vehicles, they'll have fog lights. If you have fog lights, you want to reach in there and disconnect them.
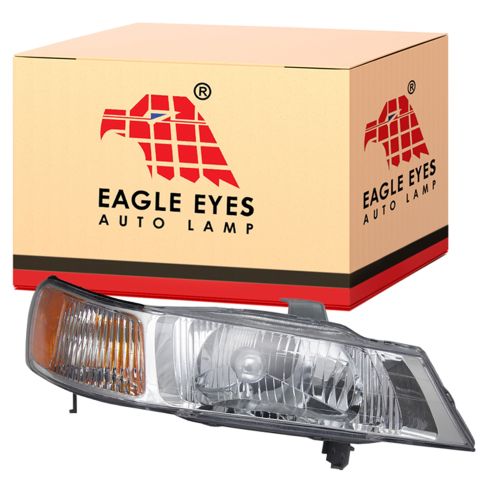
You'll see the old light scratched, faded and clouded. New light from 1A Auto, nice and clear. We'll show you how to install that. Each headlight is held on by four bolts. One right here up top, nice and easy to see. Then, one here on the side and there's two right down here. I'll fast forward here as I use my 10 millimeter socket and ratchet again to remove those four bolts.
Headlight forward, just reach on to the back, disconnect the headlight. Then also down here, put it down. Also unplug the side light as well. Pull this off and grab the bulb from the old light. New light comes with a little filler bulb, just to keep dust out of the socket. Get that out. Put the bulb in, lock it in place and put the boot back on. Okay, take the light, plug in the headlight bulb and then plug in your side marker. You need to go in and turn it clockwise, lock it in. There are two tabs at the back of the light. They go into two holes in the fender.
You want to put the light in place back here, make sure the little tab go in. Okay, and then just put this, bolt it up here, starting it by your fingers. Then take, this is basically the clip for the bumper cover. You'll then place you'd have to put it in place here, lock it in and line up the light, and get that one started. Same thing over here. Okay, and I'm going to fast forward here. You just start all the four bolts in place and then tighten them up with your 10 millimeter socket and ratchet.
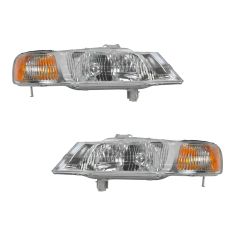
Your light is replaced. Follow up and do the other side. You got a nice, new pair of headlights on there. It actually usually makes your truck or your minivan look just a couple of years newer with the new lights on there. Continue to fast forward as I put the bumper cover back on. Really just a reverse of the procedure. If you did want to see putting the bumper cover back on in real time, check our other videos for the Honda Odyssey bumper cover installation video. Once you've done this, you're pretty much all set with your new set of lights.
We hope this helps you out. Brought to you by www.1AAuto.com, your source for quality replacement parts and the best service on the internet. Please feel free to call us toll-free, 888-844-3393. We're the company that's here for you on the internet and in person.