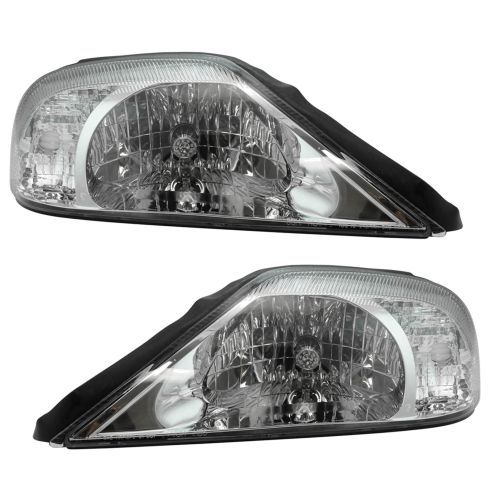
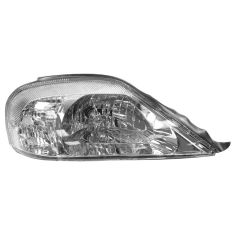
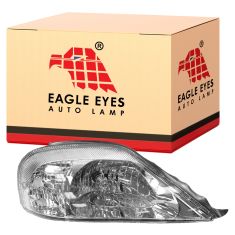
Direct Fit - No vehicle or wiring modification necessary
DOT, SAE, and FMVSS Compliant - Meets on-road use regulations
Matching set for a restored look
Complete Repair in One Purchase - Stop searching for parts individually and complete your repair with a customized kit or set from DIY Solutions.
High-Quality Parts from Trusted Brands - DIY Solutions' kits and sets are selected from the best automotive brands and include hard-to-find and even obsolete parts you may need for your vehicle.
Guaranteed Fit - DIY Solutions ensures its selected parts are quality-tested to guarantee fit and function.
Assemblies may include halogen or incandescent test bulbs that should be replaced before installation.
Attention California Customers:
WARNING: This product can expose you to chemicals including Chromium (Hexavalent Compounds), which is known to the State of California to cause cancer, and birth defects or other reproductive harm. For more information, go to www.P65Warnings.ca.gov
Lifetime Warranty
This item is backed by our limited lifetime warranty. In the event that this item should fail due to manufacturing defects during intended use, we will replace the part free of charge. This warranty covers the cost of the part only.
FREE Shipping is standard on orders shipped to the lower 48 States (Contiguous United States). Standard shipping charges apply to Hawaii and Alaska.
Shipping is not available to a P.O. Box, APO/FPO/DPO addresses, US Territories, or Canada for this item.
Expedited is available on checkout to the United States, excluding Alaska, Hawaii.
Final shipping costs are available at checkout.
How to Replace Headlight and Bulb 2000-05 Mercury Sable
Created on:
Tools used
Socket Extensions
Flat Blade Screwdriver
Phillips Head Screwdriver
8mm Socket
Ratchet
1. Removing the Headlights
Pull up on the tabs on the back of the headlight. Remove the tabs.
Remove the 8mm bolt on the headlight.
Pull the headlight forward.
Disconnect the wiring harness.
2. Changing the Headlight Bulbs
Parking bulb twist counter clockwise. Pull the bulb free from the socket and replace. Twist clockwise to lock.
Turn the cap on the headlight counter clockwise. Pull the connector free. Twist the ring counterclockwise. Pull the headlight free. Reverse procedure to reinstall.
3. Replacing the Headlight
Remove the two screws on the back of the old headlight, that secures the harness.
Remove the harness.
Connect the harness to the new headlight assembly.
Plug the harness into the headlight.
Line the light up and push into place Outside first.
Replace the clips.
Replace the 8mm bolt.
Brought to you by 1AAuto.com, your source for quality replacement parts and the best service on the internet.
Hi, I'm Mike Green. I'm one of the owners of 1A Auto. I want to help you save time and money repairing and maintaining your vehicle. I'm going to use my 20 plus years experience restoring and repairing cars and trucks like this to show you the correct way to install parts from 1AAuto.com. The right parts, installed correctly that's going to save you time and money. Thank you, and enjoy the video.
In this video I'm going to show you how to service a headlight on this 2002 Mercury Sable. I'm going to show you both replacing both an entire assembly as well as just what you need to do if you need to replace the bulbs. The tools you'll need are and eight millimeter socket with a ratchet and extension, or an eight millimeter wrench, a flat blade screwdriver and a Phillips screwdriver. Maybe you're watching this video because you need to figure out how to replace a bulb, or you have a broken headlight, or your headlights are clouded and faded and you don't even realize it. Now the front end of this vehicle doesn't look too bad, but here it is with a new set of headlights. Let's just see that one more time. Here's it with the old headlights, and they're not too bad, but they're still kind of faded and cloudy and now a nice new set of headlights from 1A Auto. That's what it can do for you. It can take some miles off the front end of your vehicle.
To remove one of these headlights, it's actually pretty easy. There are two tabs, one here and one here, and you pull up on these. Pull right up and out, and then you want to loosen an eight millimeter bolt right here. You might want to use a screwdriver right under the tab to pry it up a little bit to get it going, and then pull it out the rest of the way with an eight millimeter socket with a ratchet extension, loosen up that bolt. Now your headlight pulls forward. There's a connector right here. What you can do is kind of pry this away from the light and then pull it out, and then there's a little tab right here. Push down on that tab and disconnect the connection and now your light is free from the car. If you're just looking to change a bulb, you're parking light bulb twists counter-clockwise. Pull it out. This bulb just pulls from the socket. Push it back in, and then to reinstall, just put it in the socket, turns clockwise. Your headlight, turn this counter-clockwise, pull it up and out. Pull this connector off from your headlight and now this ring twists counter-clockwise and comes up and off and your headlight pulls out. To reinstall just reverse the procedure, put that in, lock the ring on, plug this in. You'll secure this first and lock that one. On your old light you need to remove the harness, a couple of Phillips screws here Let's fast forward as I take off those two screws. Remove those from the light and bring your new light over. Plug in your park light, plug back in the headlight. Take your light, plug in your harness and kind of put it in place, pull some of this plastic off the edges. I usually just take this eight millimeter bolt off. You want to feed the outside line in first then get it in place. Put the cap back in and then put your 8mm bolt in here.
We hope this helps you out. Brought to you by www.1AAuto.com, your source for quality replacement parts and the best service on the internet. Please feel free to call us toll free, 888-844-3393. We're the company that's here for you on the internet and in person.
Product Reviews
Loading reviews
4.17/ 5.012
12 reviews
5 Stars
4 Stars
3 Stars
2 Stars
1 Star
8
1
1
1
1
Richard Wayne Sheakley
February 13, 2012
its alot better then having foggy lights and your lights become alot brighter on the roads
James Patrick Kuster
July 4, 2012
Perfect fit and really makes the car look new again. My old headlights had a broken seal and they were foggy from the inside and could not be cleaned - so this investment even makes driving at night much more safe. Once again, I am impressed with how well these products are packed and shipped - NICE
Pleasently Suprised
Robert
February 4, 2017
Firstly, I'm an OEM parts kind of guy. But customer service assured me these assemblies were good to go, with a lifetime warranty. They fit well. Had to adjust up just a little..but I expected that.....there is no left or right adjustment, it's preset.
Overall, I'm very pleased with them. Time will tell as to their durability. I would recommend them if you cannot swing the very $$$$$$ OEM ones. Thank you 1A Auto!
Sable Headlights
Ray
March 15, 2017
Bought a pair for my sable cause the original ones faded out. Bought these fit perfect.
Cheaply Made
Gary
March 19, 2017
I would not by these again or recommend them to novice do it your self-er. They do not have stops on the adjusters and they break easily . The ones I got snapped the adjuster off at about midway to what I thought was the end of the adjustment and this made the lights UN-useable so because I broke them I had to buy another set but not from A1 Auto !
Fast and well protected
E
August 14, 2017
I got my headlights within a few days, a week earlier than originally estimated. They had been packed with some sort of expanding foam that held them very securely. The video on how to install them on YouTube was perfect and the installation went very well. I did not realize that they came with new headlight bulbs, I had already replaced my bulbs before I ordered the headlights. They look great. I am very please I bought them.
Very nice fit
Joseph
February 7, 2018
The replacement went as expected but for one issue. The video stated that the wiring harness was held in place by 2 nuts on each lens. Not true. They were held in place by a push fastener shaped like a washer bu the inner circle was split to grab the post. They were not reusable and new ones were not included in the box. I am still looking for suitable replacements.
Makes the car look brand new
brenda
February 10, 2018
my husband loves them make the whole car look brand new on the outside.. He happy im happy. Thank you, Bre
Not top quality as advertised. Disappointing flaws.
Ron
May 20, 2018
Installed on 2005 Mercury Sable. Three issues: (-1 star each): 1. One of the two wiring harness attachment points was misformed requiring modification to harness; 2. Adjustment screws were 3/4 too long which meant that factory adjustment wrench (I had!) could not be used...had to resort to long-nose pliers to adjust. It worked (barely) and was really awkward; 3. Light pattern on road was like upside down horseshoe...there is a significant ball shadow at base of low beam light on road. Top of pattern is clean, however.
Lights attached to car easily and did provide more light than old ones. Paid extra to buy from 1A Auto expecting advertised top quality. Disappointed.
Adjusters broke almost immediately
Brian
January 26, 2021
After installing the new housings I started to adjust the angle of the lamps. The adjusters broke on both head light assemblies before they were where they needed to be. I cut the factory assemblies apart and took those adjusters and installed them on the new housings. It took a little patience and thought, but it worked.
Headlights
William
March 3, 2024
Perfect fit and it really easy to install them. My mom now has headlights on her car she can see the road with.
My daughter bought her car for $500. Headlights were cloudy and smashed and she could barely see at night. I bought these as a surprise, installed them while she was at work and they work great. Great for, very easy to instal and what a difference at night when driving!!
Customer Q&A
Does the metal piece come off the light bulb or stay on? Cause they point straight to the groundApril 22, 2020
Kaitlyn G
10
Thank you for the question. These are a direct fit. The bulbs that come in these are for testing purposes only and should be replaced with new bulbs. Also, you can adjust these from the back.
April 22, 2020
Christa R
Est ce que c est ok pour mercure sable. 1999 ?December 9, 2022
Paul T
10
This part will not fit your vehicle, but we may have a part that is listed to fit.
Please enter your vehicle's year make and model in the search bar at the top of the page. This will display parts guaranteed to fit your vehicle. Just be sure to verify all of the information shown in the Vehicle Fit tab before ordering.
December 12, 2022
Jessica D
Customer service
877-844-3393
Monday - Friday 8:00am - 9:30pm ET Saturday - Sunday 8:00am - 4:30pm ET
Mercury is a registered trademark of Ford Motor Company. 1A Auto is not affiliated with or sponsored by Mercury or Ford Motor Company.See all trademarks.
Enter Vehicle Year Make Model
Specify your vehicle's year, make and model to guarantee fit.
Year
Make
Model
Options
Drivetrain
This part doesn’t fit a . Select from parts that fit.