Replaces
This part doesn’t fit a . Select from parts that fit.
Specify your vehicle's year, make and model to guarantee fit.
If your vehicle isn't listed, search Wheel Bearing & Hub Assemblies
Attention California Customers:
WARNING: This product can expose you to chemicals including Lead and Lead Compounds, which are known to the State of California to cause cancer, and birth defects or other reproductive harm. For more information, go to www.P65Warnings.ca.gov.
Lifetime Warranty
This item is backed by our limited lifetime warranty. In the event that this item should fail due to manufacturing defects during intended use, we will replace the part free of charge. This warranty covers the cost of the part only.
FREE Shipping is standard on Orders shipped to the lower 48 States (Contiguous United States). Standard shipping charges apply to Hawaii, Alaska and US Territories. Shipping is not available to Canada.
Expedited is available on checkout to the United States, excluding Alaska, Hawaii and US Territories as well as P.O. Boxes and APO/FPO/DPO addresses. Final shipping costs are available at checkout.
Created on:
Tools used
Hey friends! It's Len here at 1A Auto. Today, I'm working on a 2001 Ford Focus and I'm going to show you how to do a bearing hub assembly. It's going to be a very easy job. I want to be the guy that shows you how to do it. If you need these, or any parts, you can always check us out at 1AAuto.com. Thanks.
Okay, friends, so we've got the vehicle supported under its, all its lift points. We're going to bring the vehicle up a little bit, try to keep the wheels so it's just barely touching the ground, we're going to break free the lug nuts, 19 millimeter. If you're going to be using an air gun, you really shouldn't have to do this. But if you're using a ratchet, you want to do it with the wheels still touching the ground.
Now that they're loose, we can raise the vehicle and we'll get busy.
So here we go, time to get the wheel off. Use your ratchet, use your air gun, use your 19, whatever you're doing.
Take off the last one, you want to hold the wheel. It's nice and corroded on there. Let's put one of these lug nuts back on. Just going to give this a little bonk, see if we can get it to break free. Feels like a no. Okay. Something else that we can try doing is grab a pry bar or you can use a rubber mallet if you wanted to. I use a pry bar. I just come from the back side, pry up against the lower control arm and the wheel, use a little leverage, break it free. Easy-peasy.
Some people might try to use a hammer. You could dent your wheel. Rubber mallet could work. All right, we removed the wheel. Now we have a clear view of what we're working on.
Okay, so what we're going to do now, is we're going to take the caliper bolts out. We've got one bolt right there and one down here. Slider bolts. It's a seven millimeter Allen head. It looks something like that. Okay?
Slider bolt number two. Same as the first. You don't have to worry about mixing them up. You can see that there's a little clip right here. The way that this clip works, is you actually have to grab this side and draw it out and away from the caliper right there. Okay? So, grab wherever you need to, just try to go like that. Do the same for the other side.
Now, take your pry bar, take that off. Easy-peasy. Now, we're going to hang this aside and we can move along. So let's hang this caliper. I like to just do something like that. You can pull your brake hose off of the strut if you need to. It's just a little thing right there. Easy-peasy. That'll give you a little bit more slack.
I'm going to replace the brake hose and the caliper but as for right now, let's keep going with what we're doing. Next, what I'm going to do, is I'm going to have my lug nut on here a little bit. I want plenty of room so the rotor can move around and I'm just going to give this a bonk. I'm replacing this rotor so I'm not worried about the braking surface. If, for some reason, you're just taking your rotors off for some reason, you just want to look at them, I don't really know why, you don't want to damage your braking surface. But if you're replacing them like I am, you're replacing your pads like I am, and maybe you're doing your calipers, just do it pretty much the way I am. All right?
I'm just going to bonk right here. As far out from the hub as I can. I want to stay away from these studs. The reason for that is because if I damage the studs, I have to buy myself a new bearing. This is on, so it doesn't come off and hurt me. My safety glasses and my hand protection is on. I'm going to give it a bonk. Bonk! Bonk! Bonk! There we are. That's nice and freed up. Get our lug nut back off of here. There's our rotor. It's quality. We'll set this aside. We can move along.
So our next step, we're going to try to remove this knuckle right here. To remove the knuckle, we're going to need to take out this bolt right here. That's a Torx bit 50. On the back side, there's a 15 millimeter nut so I like to hold the Torx bit 50 with a ratchet, and the Torx bit, obviously, then I'll just blast off this nut back here, 15.
Next, what I would do, is I would take this off right here, the outer tie rod and nut. Give the knuckle a couple bonks so it breaks free. We're going to take off this axle nut right here. That's a 32 millimeter socket. It's a big on. Once we get all that stuff apart, we'll go ahead and we'll remove this right here. It's a pinch bolt for the upper knuckle to the strut. That's a 15 millimeter.
With all that said, let's go ahead and do it. You can start with whatever you want, but I would definitely end with this. I'll start with the axle nut since I've already got my socket on here. 32 millimeter. Comes right off. That's what it looks like. Set it aside. Using a 15 millimeter back here, and my Torx bit, that's what they look like. It's kind of like a star. It's going to go right in here. Safety glasses, of course. There we are. There's our 15 millimeter nut. See if we can get this to turn. It is turning. That's good. It's always great to use some penetrant spray if you have some. Couldn't hurt to put a couple squirts in there.
I'm going to grab a hammer real quick. Just going to give this a bonk. There's our bolt, right there. We're going to remove the tie rod nut. Let's see if it's a 15. It's a little bigger. 16 millimeter on this. Looks like it's an after market tie rod, so, your tie rod nut could be a little different. There's the nut. Neoprene locker on there.
Okay, now we're going to give the knuckle a couple bonks, try to break the tie rod free. So now I'm just going to take the tie rod nut, going to put it on a couple threads here, just so when I bonk this knuckle right here, the tie rod's going to fall down. It won't fall down, hurt me if I'm under there or hit the ground, get damaged somehow. What I'm going to do, is I'm just going to try to hit the knuckle, not the boot or the tie rod. Okay? Definitely not the stud. You don't want to peen that over.
There we are. Pull that down. This is your outer tie rod end. This point, you can turn this if you need to, okay? We're going to leave this in. Now, what we're going to do, make sure the axle pushes through. If, for some reason, yours doesn't push through, it's stuck in there, you would just take your axle nut, put it back on, okay? Not tight or anything, and then just give it a couple bonks. You want the axle to be able to move around. If it doesn't move, well, just keep doing that until it does. You don't want to hit the axle without a nut on there. You'll peen over the threads and you'll never get your nut back on.
Now, what we need to do, get this lower control arm to go down and break away from the knuckle here, okay? We need to get the ball joint stud to come out of the knuckle. So let's take a look at what we're going to do here. Looks to me like what I'm going to try to do is I'm going to try to give this a bonk right up on here. I could try to use an air hammer if I want, or just a regular hammer. You just want to be careful not to hit your axle. Super important you don't rip this boot. If you rip the boot, you can buy yourself an axle at 1AAuto.com. So, I'm just going to use my air hammer, try to drill this down and wear some safety glasses and some ear protection and we'll give it a try.
Okay friends, I've got my air hammer, my eye protection, my ear protection and hand protection. Safety first. I'm going to use the air hammer, flat bit, on the control arm. I'm going to try to drive the control arm down and force the ball joint stud out of the knuckle. Here we go. It's coming down. Easy-peasy. As you can tell, the penetrant did its job. Thank you penetrant. We can pull this away a little bit.
Now, what I'm going to do, is I'm going to take off this right here. This is a pinch bolt for the upper knuckle to strut. 15 millimeter. That's what that looks like. If you want to, you can go ahead an clean that up. What you want to do is, you want to check to make sure it's not rotted and pitting and getting thin. If it's getting thin anywhere, you'd want to replace it. It's integral for this to be nice and solid because when you put this in and you tighten it up, it needs to be able to pinch both sides of this knuckle. Basically, the knuckle kind of looks like this and when you put in the bolt, it tightens, tightens, tightens, pinches the knuckle tight up against your strut. If it's not tight because this bolt is garbage, you're going to have an issue.
Now I'm going to use my big, fabulous hammer. I'm going to give this knuckle a couple whacks. I'm going to try to give it a few bonks and try to knock it down, okay? I want to be careful for this boot, like I said. The axle does move. I can pull it away if i need to. As this comes down, you have to be careful because once the knuckle breaks free from the strut, there's going to be nothing holding it up but your hand so, get a grip, keep your hands away from where you're going to be hammering, and just go ahead and knock it down.
It's coming down. Now we've removed our left front knuckle assembly. So, the next thing that you're going to want to do, is you're going to want to put your knuckle over in a press, okay? Set it up as safe as you can, as level as possible. Sometimes it's almost impossible to get it perfectly level. Just do the best you can.
What we need to do, is we need to press the hub out of the bearing. The hub is the part that has your studs and everything on it, okay? That comes out first. It goes through the front side of the knuckle. Once we get that out, I'll show you what to do.
So, assuming you've got it leveled out, as close as you can, you're going to take something that rides just on the inner edge of the hub right here, okay? This outer area right here is all bearing. You don't want to press on that. You want to press on the center circle. So you can use something like a socket or whatever you've got, as long as it's impact, okay? Set up whatever you need to do. Wear safety glasses, of course. When stuffs under pressure, anything can happen. It can slide. Pieces can come flying out. So, just make sure you're in the safest spot, you don't have any little kids hanging out near here and go nice and slow. There we go. Okay. Just take a peek. Looks like everything's still going good. That knuckle's going to fall down, or the hub, sorry. The hubs going to fall down out of the knuckle here, it's just going to get caught at that point. Just want to make sure that you're clear. There we are.
Okay. So this is what you're knuckle looks like without the hub in it. Here's your hub unit. I'm going to go ahead and replace this because it's not the best condition. So we'll set this aside. Now, we need to take out this snap ring right here. I'll show you how to do that.
So, assuming you've got your snap ring pliers, okay? That's what they look like. You got little tongs on there, I guess you'd say. Those just sit inside the holes on the snap ring. You try to put them inside the holes, just like that. Come on. See if I can get it in. There we go. Now you're going to want to try to squeeze it. If yours is like this one and it doesn't want to squeeze, you're going to have to do something a little different.
At that point, what I'm going to do is I'm just going to heat it up. Just going to give it a couple loving bonks, see if I can get it to break free. Once it breaks free, then I can go ahead and continue with what I'm going to do here.i've got my little torch here. My safety glasses. When I heat this up, it's going to create smoke. You don't want to breath it in, okay? Try to avoid that. It's pretty basic but I'll just state it for the video. I'm going to heat this up and then I'm going to use my punch and I'll use a hammer and I'm going to try to get it moving. Once it's moving, I'll continue.
So here we go.
Okay. Let me give this some spray. Just going to see if I can get it to break free here. I'm just circling the channel where the lock ring goes into the knuckle. See if we can help the penetrant along here.
Let's check it. Okay. Still not coming out of there. So we'll just keep working at it.
So, I've just finished heating it up, sprayed it with a whole bunch of penetrant. I used my hammer and my punch. I got it so the spring clips going to come loose so now I'm just going to use my pliers here, put them inside the slots or the holes, try to take out this clip. That's what it looks like right there. Okay. Here's the holes. Basically, what this does, is it sits inside the groove, inside the knuckle there. So right along where the bearing rides, there's a groove carved into the knuckle, that's where that ring sits and that keeps your bearing from being able to come out. Not that it would anyway, it's pressed in. You're going to have to use a lot of force to get it out, but for safety's sake, they put it in there.
So let's move along. Back to the press.
So now to get this pressed back through, what you can do, is you can take the race from the back side, just put it on the front side here, just like this. Okay. You want to have it as level as possible so whatever you have to do to get it level. Use whatever you have that fits the closest to grab it onto that and then we're going to slowly press it in. Same as before. You want to make sure you're wearing safety glasses, hand protection, and there's nobody standing around that doesn't need to be around. Okay. Now we're going to go nice and slow. Slow and steady wins the race on these, okay?
You're going to feel a little bit of pressure here. Okay. Got quite a bit of pressure here. Just going to let it sit for a second. Maybe I'll grab a little bit of penetrant spray.
Okay, so we still got our pressure on there. It's been on there for a little while. I hit it with some penetrant. Now I'm just going to give this a couple bonks with my hammer, give it a little vibration at this point. Can use an air chisel if you want. Vibration's going to be key. Keeping pressure on it, little bit of vibration, it should pop this bearing right out of here.
All right. Let's relieve pressure. We'll analyze the situation, see if it's been moving at all. Okay. Get this out of here. Okay. Doesn't look like much has been happening. Well, maybe a little bit right there. Kind of seems like the gap there is getting a little thinner where the snap ring's supposed to be sitting. So I think we're making the right move here. We just need to keep pressure on it.
Okay. Let's go with some more pressure. Once I get some pretty heavy pressure on it, I'm going to try it with an air chisel.
Oh, I think somethings moving here. Yup. We're cruising now. Nice and slow. It's easy to get excited, crank it right out of there. It's not a race. Safety first. Okay, the bearing's going to come out so make sure you've got a clear spot for it to fall onto. Nobody's foots under there. These presses are all power, no speed. Boo-yah!
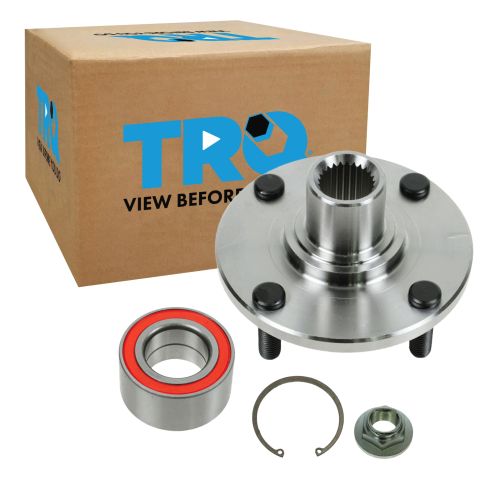
Cool beans. So here we are, friends. A quick product comparison for you. We just removed this stuff from our 2001 Ford Focus. It's fairly easy, a little bit of press work. Not to bad. This is the original bearing. This is the original hub. That's the original snap ring. Over here, we have our brand new quality parts. Comes with a brand new snap ring, brand new axle nut, super important. Make sure you use a new axle nut. You never use your old one. It's up to you if you want to use thread locker, but you shouldn't have to. Right here is our brand new bearing. As you can tell, they're both the exact same and exception of this one's just brand new. Set these aside.
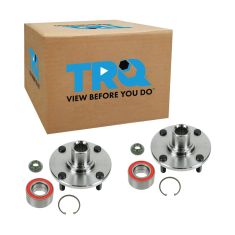
Right here is our brand new hub. It's nice to have a new hub, otherwise you're dealing with something like this. This kit right here comes with all that. With all that said, I don't see any reason why this wouldn't be a quality part to install onto the vehicle so I'm going to go ahead and do it. If you need these or any other parts, you can always check us out at 1AAuto.com. Thanks.
So we remember when we were removing the original snap ring? We were having an issue getting it out? Now it's because of this channel right along here. This channel, it's clogged up with debris and rust and all sorts of things and it just makes a real mess for trying to get this stuff out or trying to get the snap ring out. So what I like to do, is just try to clean it up, best I can. Use a small screwdriver, go around and around and around. Okay? We need to make a nice area for that brand new snap ring to sit into. Right down along here, there's another lip. This is where your bearing is pressed up against, so you want to make sure that that's clean, too. You don't want any big chunks of anything sitting under there. If you do, your bearing won't press down far enough and you'll have an issue, so, do your best. Clean it all up. Course, be careful for any sharp areas. You don't want to hurt yourself.
Once you feel as though you got it all scraped up nice and you don't have any big chunks anywhere, I'm just going to hit it with a little bit of parts cleaner. I'll get out all the rest of the debris that I'm chiseling out here. We'll have it nice and clean and then we can go ahead and start pressing in the new bearing.
Okay friends! We're back at the press. We've got our knuckle nice and cleaned out. I don't see any debris in there. I'm just going to bring it over. I'm going to set it down on a nice, flat plate. I'm going to take my bearing. There's a magnet side for is you have ABS. This particular vehicle does not have ABS. I still like to put the magnet facing towards the inside of the vehicle. We'll just set it right in there, as level as possible. At this point, we're going to use our old bearing, and we want to use the outer casing of it, okay?
If you still have the inner portion of it still on your bearing, you want to make sure that you have that portion out on the part that you're going to be pressing against the bearing because we do not want to press this inner portion at all. We want to only press up against the outer portion. So you want to line this up, as even as you can. Use whatever you have for a block so you can press in. We're going to be pressing against the outer portion, straight up against the outer portion here, down into the knuckle.
We're going to wear out safety glasses, of course. We'll get this ready to go. Okay. Here we go. We're going to be applying pressure. You'll feel the bearing go down nice and smooth for a while. If it feels like it's tight before it's even half way down, it might be sitting a little cockeyed or crooked. If that's the case, you want to make sure you stop and try to flatten it out, okay? This is going down nice and smooth. I don't feel any real pressure at this point. So, as I'm pressing down, it's important to keep in mind that this bearing is going down, down, down into the knuckle. At the bottom area of the knuckle, there's that lip that we cleaned out. When the bearing gets to that point, we're going to start feeling pressure on this rod. Once you feel like you've got pressure, that's the point you want to stop and check your bearing.
Still feels nice and smooth. It's making noise, but I don't feel any pressure yet. Okay, right there. Got some pressure. Feels pretty good. Just going to give this a little bonk. That's just for vibration. Give it a little squeeze. Feels nice and tight. We're going to relieve pressure. Get the old bearing out of there.
Okay. Right here, we can see the snap ring groove going right along the knuckle. Looks like we'll have plenty of room to get the snap ring in there. We'll take a look at the other side. We're pressed completely up against this, going all the way around. Looks perfect. Let's grab our snap ring and we'll move along.
We've got our new snap ring. We're not going to reuse the old one because we have new one, came with our kit. Super exciting. We'll get our snap ring pliers lined up with the holes in the snap ring. Feels pretty good. Give it a little squeeze. Safety glasses, of course, in case it comes flying. Okay. It looks like it needs to set down in the groove on this side right here. I'm just going to grab my punch and my hammer ... grab my hammer real quick. Just going to go right around the line. We'll start on one side, over by the ear.
Looks as though it's not sitting inside the groove still. At this point, you want to be very careful because of the magnet there. You might be tempted to try and take your punch and go right along the edge right here, which is something that you can do. If you have ABS and you go ahead and damage this magnet, you're going to have an ABS light on and you're going to have to replace this bearing again.
So, with that said, we know that we have the bearing pressed all the way down in there. We double checked it, it was sitting along the groove. It's sitting completely up against the back side here, or, I guess, the front side. There's no gaps anywhere around here so I don't feel as though that the bearing has an issue. I think that it's just the clip itself isn't sitting in there. So if you want, we'll just go ahead and take it out. Let's take it out, let's analyze the situation.
Like I said, it's tempting to just use the punch, give it a couple bonks, see what the issue is. Here's something to look at. The snap ring's very thin over here. It's very thick over here. Okay? I can see the line where my penetrant spray was siting along the snap ring here, so that tells me that the snap ring was actually inside the groove there. It was just being deceptive to the point where I was looking at this inside the groove, and it was very thin and then over here, it looked like it had a whole bunch sticking out so it made me think that it wasn't in all the way, when really it was.
Can take a peek in here, anyway. Check along this groove. Just to make sure that it's nice and clear. Feels good. Looks good all the way around so now what I'm going to do, I'm going to reinstall it. Same procedure as before. Get my ears inside the little clips. Get the crud out of there. Now when I go to do it, I'm just going to watch to see if this goes in. Let's see. I'm going to try to spin it. I want to see if the ears themselves ... So, it does look like it's having an issue sitting in right here. Just give it a couple bonks here. Try to drive it in. Side right there is sitting up, okay.
I'm going to be careful for the magnet. This is just going to help it along to get in the groove. Come around this side here. See if I can get an angle. Okay. Check it. Looks as though it's sitting out right here. Right along here. I don't like that. It doesn't bother me to take it apart again. I'm not in any rush. I want to make sure it's right. That's what I'm here for. Just going to go ahead and take it back out.
See if I can work my way around to here. Maybe what I'll do is, I'll take it over to the press and I'll just see if it can go down maybe a teeny bit. Maybe there's something that I can't see. It's better to be safe than sorry. This is important. Let's go back to the press. We'll just try to press it in a little bit more.
Okay, so I brought it back over to the press. I gave it a little bit more. Didn't seem like it moved at all, so I'm just going to go head and put this in. I want to show you, I reinstalled the clip again and I drew a line after the clip was in right where the knuckled was sitting and that's this line right here. So as you can tell, the clip was actually inside the groove there so I was being a little bit of a worry-wart. I like to try to make sure everything's right and I confirmed, now, that it is, so, I'm happy.
Just going to go around. We've installed the bearing. Now let's go ahead and install the hub.
So we're back at the press. We've got our snap ring in there. Everything looks great, as I would expect. I've got my brand new hub over here. I've got a block under there so I can lift it up and the studs are not hitting up against my plate. Super important.
Okay, now we're going to take our knuckle assembly, we're going to place it over our hub, just like that. The hub;s going to be getting ready to sit inside here, except on the lower end. Now what we're going to need to do, we're going to take the race out of our old bearing. This is the race, by the way. It sits inside the bearing. You just pop it out and give it a couple bonks with your hammer if it's stuck. Put it right over the new race, okay? You won't want to press along that, you know, the magnetic ring there or anywhere else. You want to be pressing right in the center because when we press our hub through the bearing assembly, we want to make sure we're holding pressure in the center.
Now I'm just going to use a little lifting block just to take up a little bit of space here. I'm going to apply pressure, as I apply pressure, it's going to be forcing the knuckle down onto the hub assembly. So let's go ahead and do that. We're going to go nice and slow. Want to make sure that everything's as straight as possible. Its super important to make sure this goes down straight. We're bottomed out. Let's take a look at everything. We can turn our knuckle, okay. I'm going to apply pressure. It's going to be forcing the knuckle down. Slow and steady wins the race. Let's keep bringing the knuckle down. Every once in a while, just give your knuckle a little twist. If it stops twisting, you've got some binding going on. At that point, you'd want to stop, assess your situation.
Let's take a peek. You can see we have tons of room here still. When we get to the end, we're going to start feeling a little bit of pressure. That's where the hub's going to be touching up against the bearing race in there. Okay?
When you start feeling pressure, you're going to want to stop. We're getting close. Take a peek. I feel pressure. I'm stopping. Give my knuckle a couple of twists here. I don't feel any binding. I think this feels great. Put that right there. Actually, let's relieve pressure first. That noise kills me every time. I love it.
We'll get our block, everything out of the way here. This is the back side of the hub coming through the back side of the bearing. Front side of the hub, no damage to any studs. Spins perfectly. I'd say we're clear to install this, so I'm just going to take a little bit of Copper Never Seize and go right around here. I'm going to on the splines of my axle and then I like to go on the ball joint stud. This is all just so somebody down the line, if it ever needs to come back apart, I'm not going to be struggling too much.
Do you need to do it? No. It's not integral to doing the job. It's all preference. If you don't have any Copper Never Seize, it's no big deal. Can use something else like your penetrant spray. Whatever.
Now, what I'm going to do, is I'm going to take this little thing, it's just a boot cover, slide it over the knuckle, just like that so my holes line up. That's going to protect the boot and it's also going to make it so if any grease happens to come out of there, it doesn't get on the rotor. I'm going to slide the axle splines through. Try to pull down on this. I'm going to try to get this lined up. There we are. Like it.
Just going to give this a couple bonks under here. See if I can drive it up.
Okay. Cool. Do this. Now we're going to need to do, is we're going to try to lower this control arm, okay? Might not want to go down very far, but we need to get the strut inside here. So, can do whatever you need to do to try to get it lined up whether it's using something like a pry bar. You can see if you can pry it down. I don't know if it's going to go down too much further than it is. I feel like it's pretty much maxed out at this point. So, I'm just going to take this and I go around like that and then just a little bit of maneuverability here. Yeah, baby! Love it. Cool.
Okay, this little piton right here goes inside the slot on the back side of the knuckle. So if you notice that for some reason your knuckle's not going up onto your strut, you might have this misaligned, might be hitting up against the knuckle itself. If it is, just, you know, move it. I don't know your circumstance, I'm on my side of the computer screen. Just going to give this a couple bonks. Okay. We need to drive this up. If you want to, you can use a jack, jack it up, that might help it. That's probably what I'm going to do because I don't want to put too much pressure on this ball joint by whacking it too much. So I'll just grab a jack, I'm going to raise this up, so this hole lines up with the hole inside the little piton right there and then we can put our bolt through.
We've got our jack. I'm just going to lift this up. If it seems like it's binding up, I'll just give it a little shake, wiggle it around, do whatever I have to do. Just going to keep jacking and keep wiggling. It looks like we should be pretty darn close. Might even be it right there. There we go. That's it. Okay.
We've got out pinch bolt. You can use some thread locker if you'd like. For the purpose of this video, I'm not going to worry about it. Just going to put it through here and relieve pressure. Just line up those holes. Maybe your knuckle needs to go up. Maybe it needs to go down. Mine needed to go down a little bit. I'm going to go ahead and tighten that up. I'm just going to snug it and then I'm going to torque it down. There we are. We'll torque this in a minute. We might as well just put everything else in, we'll torque it all at once, right?
Got our ball joint bolt. We're going to put it right through here. Here wee are. I've got my nut. Get it on here. I'm going to hold this back side, still using my Torx bit, this is the 50, Torx bit 50. Just going to hold the back side and snug up this nut right here. 15 millimeter. See if I can get it on there. There we are. I'm going to torque it later.
We can still move this around. Nothing's binding. Feels pretty great. We can do the tie rod if we want or you can leave it apart so you can put the rest of the brakes on first. It's completely up to you. I'm just going to put it on there and I've got my nut with the neoprene washer there. 16 millimeter. I'm going to tighten it down. Yours might be different. This is after market.
We'll torque that after. Let's move along.
Okay, we're going to go ahead and torque up this upper knuckle jam bolt. 66 foot pounds. I'm going to use my 15. There we are. Just going to hit it one more time. Torqued. Let's move along.
We're going to go ahead and torque this down right here. 37 foot pounds, using my 15 millimeter. There we are. Going to hit it one more time. This is torqued. Now we're going to move up here. We're just going to tighten down this nut right here to 37 foot pounds. All right. I'm going to do it one more time. Okay. So we torqued this, we torqued this and we torqued the upper jam nut. The only thing we would have left to torque at this point, would be this right here. I'm not going to worry that, yet. We'll move along to the next step, though.
We've got our axle nut. Just going to start it on here. We'll give it a few good threads. Make sure it's going on. Now we're just going to blast this on, but we don't want to go too tight. We just kind of want to get it so it's close to bottomed out and then stop because we're going to torque this down. Here we are. 32 millimeter socket. Looks like it's getting pretty close. Okay. I'm going to leave it there for now. We'll go ahead and torque it down and that'll get it to the correct specifications. You don't want to over-tighten this, ruin the bearing we just put in there.
Okay, so from this point on, we're going to be replacing everything we took off with brand new parts. I just want to specify that. Before we go ahead and mount our rotor on here, I'm going to put on a little bit of Copper Never Seize. It's going to be important because it's going to help us get the rotor off later on down the line, in case we ever have to take the rotor off to do, maybe, another brake job. Just like that. Nothing too crazy, okay?
Now, we're going to grab our rotor, we're going to have a little bit of parts cleaner on a rag, we're going to clean it off, and we can install it onto the hub. Parts cleaner on the rag, directly. We're just going to clean off the rotor braking surface. This is just going to get off any film that might have been on there from packaging and shipping and all that to make sure that, you know, it doesn't collect any moisture. That looks pretty great. I can't wait to install it. Let's do it.
So here we go. Slide it up on here just like this. I'm going to take one of my lug nuts, just going to put it like that. That's going to make it so my rotor can't move around too much. I don't want any rust to make it's way in between the rotor and the hub. Super important. You get anything in between there, your rotors going to be off kilter, you're going to have a brake pulsation. Okay? Let's do it right. Let's keep rolling.
Okay, now you just give it a spin. Make sure it's not hitting anywhere. Sometimes these knuckles can bend because you're putting them under extreme pressure. So, if it's not hitting, you're doing all right. Now what we're going to do, we're going to go ahead and start replacing the caliper and the flex hose. Maybe you have to, maybe you don't. I'm going to be doing it for this particular vehicle. If you're not, all you're going to do is take your new pads, you'll take your caliper like this, we can clean out these right here. Just take out these boots, clean up in there, same thing on this side, clean up inside there. Make sure you get all your crud out of there, just like that. Once these are clean, you can lube them, and you'll have your sliders. Then you'll just take your new pads, set them all up on there.
I'm going to replace all this for my video so, yeah, keep watching.
We have our 11 millimeter flare head wrench. Goes right on here, okay? 11 millimeter. I'm going to take a little bit of penetrant spray, spray that on there. Let it do it's job for a second. Probably the longer the better. Maybe I should have sprayed it earlier. I'm just going to see if I can get this to break free. Looks like not so much. I'm bending the bracket, so I'm going to try something a little different here.
Okay, so I'm going to take my 11 millimeter, I'm going to try to loosen this up. When I try to loosen it, it's just going to bend this bracket a little bit, so I'm going to take some locking pliers, I'm replacing this flex hose, that's the reason for doing this. If you're not replacing the flex hose, you do not need to touch this.
There we are. We'll just get it moving a little bit. I'll just keep going back and forth. Now I'm just going to make sure it's snug and we can move along.
Okay, so now it's time to prep our caliper. These right here are the caliper sliders. They need to be able to slide freely. They should be greased. This doesn't feel like it has any grease on it yet, so it's ready to be prepped. If you're using your old calipers, and these are rusted or rotted, you're going to want to make sure that you clean them up so they're a nice smooth surface and then, of course, put some lube.
I'll show you what I'm talking about. I have a little bit of caliper grease here, okay? All you're going to do, try to get a little bit right in that boot right there. You can even put it directly on the slider if you want. It's completely up to you. Might be a little bit easier to do it on the slider. But then, of course, you know, you're going to get it all over your hands so, that's something to think about. So I'll just leave that like that.
Now I'm going to take these, going to drive them through, get it slipping. Sounds good. Nice and lubed. Same thing for this one. Either way, I guess we get the grease all over our hands. There's no avoiding that. Cool.
Next thing you want to do, take some more of your caliper grease. First, I'm going to clean this off. Take some more of your caliper grease, you're going to go right around the piston right here. This is the muscle of the caliper. When you step on your brake, if forces fluid into this channel right here, in which turn pushes out this piston. Squeezes the pad up against the rotor, once the inner pad's hitting against the rotor, it makes the caliper slide a little bit on these sliders, and then it presses the outer pad against your rotor. Causes friction, makes your vehicle stop. I'm going to put some right along here. The reason why I'm putting this on there, it's going to help with vibration dampening and noise reduction. It's kind of like a little buffer, we'll say.
Some people will say you can just put the grease all over the whole back of the pad. I don't personally think that you need to do that. The reason for that is because that's just more area for dirt and crud to get stuck onto there so I don't need that.
Now what I'm going to do, is I'm going to take these little ears, I'm going to slide them in. Sometimes you just have to squeeze them a little bit and press. There we are. Make sure you don't get it, any grease on your friction material if you can avoid it. If you do, just use some parts cleaner. We've got our other pad. This one right here is just going to go right on here, okay? I'll show you what we're doing.
Take the slider, push those back so they';re ready. The threaded areas are going to screw into here so you want to make sure that you have these sliders pushed in, okay? Take our outer pad, just going to get it on here, put that down on my cart for a second. Just like that. Pull up on that bar. Take our caliper, just going to slide it right over. There we are. Now this clip is going to be a little difficult. You're going to want to make sure you're wearing your safety glasses, of course. Take a pry bar, of, if you need to use a screwdriver, whatever you need to do, you do you boo boo. Just going to take this, bring it so it comes up and over that way and it sits inside this channel right here. Once it's in that channel, you should have an ear up against the backside of your hub assembly. Sorry, your knuckle assembly and you should have one down here.
That locks your caliper in. It's really not going anywhere at this point. We still have to tighten these up. Your caliper sliders on the back side. I'm going to grab my tool. I have a seven millimeter Allan head. I'm going to use that to tighten this down. Going to leave that like that for a second. I'll go back to tightening that up in one second. I just want to make sure that I have this one started as well so I can still move the caliper around if I need to.
All right, got both of them started. Tighten that up. That's nice and tight. Tight? Oh, yeah! We can move ahead.
So this little rubber plug right here? You're just going to take this, pop it right out of there. You can reuse this. That's going to do right on your bleeder screw when we're done. Just a little bleeder screw cover. I'll set it aside. I've got my flex hose. Brand new. I'm just going to take it, I'm going to thread it right into the caliper. There we are. Okay, feels like it's stopped. I'm going to use my 17 millimeter wrench. Feels like it's pretty snug. Perfect.
Now all we're going to, we're going to grab a collection bucket, we'll have it underneath us. We're going to loosen this up with our 11 millimeter. We already broke it free. This is a little clip right here. This just slides into the slot on the flex hose so the flex hose is going to sit in here like this and then the clip that I just indicated is going to sit in that slot. This line right here, screws up into this once it's in, then we're going to take this and slide it right in there.
So right here's a clip. We're just going to grab some pliers, try to grab onto that clip. Wiggle it. Should want to pull right out. I'll show you what it looks like, here. C'mon baby. Almost there. Oh, yeah! So that's what the clip looks like. Okay? Just a U. Slides right in like this and it sits inside the groove, just like that.
Okay, so you want to make sure you have everything ready now. We've got our bucket under there. Once we break this line free, fluid's going to start coming out due to gravity. As the fluid comes out, it's going to go onto the, into the collection receptacle down there. You don't want to wait too long having this open because if you loose all the fluid inside your master cylinder, you're going to end up having some brake problems. You're going to have to bleed it out. It's a pain in the butt.
So here we go. I'm going to take my 11 millimeter and try to turn this out. Okay, we got some brake fluid coming out. You want to make sure you're wearing hand protection, eye protection. You don't want this stuff on your skin, especially in your eyes. If you do happen to get it on either, make sure you wash it as soon as possible. Okay. We'll get this out of the way. Here we have our line. Can check the threads. Looks good. Let me get this lined up. Now I'm going to try to turn this in. Hopefully I can get it started fairly quickly here. Okay.
Threading in nice and easy. That's always nice. Snug it up. Perfect. If you happen to have any brake fluid on your hands, now's the time to get it off. At this point, we're not in much of a rush.
I'd say we're clean enough. We've got our clip. This just slides right in and it's going to sit in that slot that I showed you before. You can give it a couple bonks. It's nice and locked in. That lines not going anywhere. We'll take our hose, I'm just going to bring it over. It's going to slide right into this bracket right there. There we are!
Now, we're clear to pump up the brakes and bleed out the caliper.
Okay, now that we have this side together, you're going to go over and do the same to the other side of the vehicle, right? And then you're going to go ahead, check your master cylinder fluid. Your master cylinder's right here. You want to top that off with fluid, make sure it's nice and full and then you're going to go ahead and start bleeding the brakes. You can watch the video on how to do that. Basically, you're just going to pump up the brake , give it like three to five nice, slow pumps. Let it sit for a second. You can come out here, open up this bleeder screw, it's an eight millimeter, let it trickle out. You want to see no more air bubbles coming out. When you have regular, just solid fluid, close it up, go ahead and pump it again. It's always good if you have an extra person, you can have somebody in there doing the pumping, holding the brake pedal for you while you open it, okay? There's a bleed sequence for that.
Or, you can go on 1AAuto.com, and get the self bleeding kit and watch the video on that. It's very simple, so let's continue.
I'm going to use my eight millimeter. I'm going to loosen up this bleeder screw. Here we are. We're going to let it do it's thing for a second here. The fluid's going to take a little while because the, you know, we replaced the flex hose and the caliper, of course. So it could take a minute for the fluid to start coming out. If you have a vacuum bleeder, you could help it along with that. Not everybody has access to that so I'm not going to worry about it for this video.
There we go! So we get the fluid trickling out of here. If you shake the hose around a little bit, sometimes you can get a little extra air and also give the caliper a couple little bonks. So this is called gravity bleeding at this point. I would say we got a pretty good trickle going. We can go ahead and close this up and at this point, you would want to continue with a regular bleed.
Now that we've got this bled, just going to clean it off a little bit. I've got my little boot, right? We took this out of the hole in the caliper. Just going to slide it over that. That covers up the inside hole in there, prevents moisture from getting in and freezing up. What happens is, is moisture gets in, starts corroding in between the bleeder screw and the caliper, you go to open up your caliper bleeder and it breaks. So, that's just going to help protect it.
We're clear to move along.
Let's take off that stabilizing lug nut that we threw on there. Okay. We'll grab our wheel. Bring it over. Just going to lift it right up with our leg, use our ab muscles, hold the wheel, put our lug nut back on here. I'm going to grab the other three. It';s time to go ahead and tighten up these lug nuts. 100 foot pounds. We're going to co in a criss-cross pattern. Never around in a circle. Let's do it again. Tight!
We're going to go ahead and torque this down. 266 foot pounds, using my 32 millimeter socket. Getting close. Tight.
Thanks for watching. Visit 1AAuto.com for quality auto parts shipped to your door. The place for DIY auto repair and if you enjoy this video, please click the subscribe button.
877-844-3393
Monday - Friday 8:00am - 9:30pm ET
Saturday - Sunday 8:00am - 4:30pm ET
Specify your vehicle's year, make and model to guarantee fit.
This part doesn’t fit a . Select from parts that fit.
If your vehicle isn't listed, search Wheel Bearing & Hub Assemblies