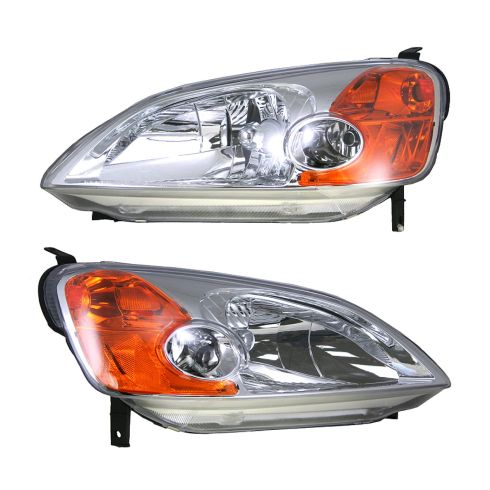
In this video, we're going to show you headlight replacement. This is a 2003 Honda Civic 2-door. Pretty much the same procedure for 2001 to 2005. This is an OE replacement headlight or OU Style replacement headlight from 1A Auto.
You can see, nice, clear, brand new. It's going to go in, if you have a broken headlight obviously or you can see the headlights on this vehicle are very clouded and might not even pass inspection like this. Not a hard replacement, we're going to show you.
New lights from 1AAuto.com, they're going to fix your problem, help you see better at night, help you pass inspection. Items you'll need for this repair: new headlights from 1AAuto.com, flat blade screwdriver, 10mm socket ratchet with extension, and a Phillips screwdriver. I'm going to be showing you with the light out of the car.
If you're just looking to change the bulbs, access the back of the light. Take off the rubber boot, unplug your connection, or you would unplug your connection then take off the rubber boot. Then, inside, there is a wire retainer. Just push it towards the front of the headlight to the side and pull it down. Pull your headlight bulb out. Put the new one in, make sure the single tabs at the top. Then put that wire retainer back in.
Pull the lever right here. Open your hood. Secure it with the prop rod, and there are four clips at the top to remove. There are indents on each side of the outside so that you can just work a screwdriver underneath and pry up the center and then pull the clip up and out. I will repeat that for the other three.
At the front of the wheel well on each side is a 10 millimeter bolt right here you need to remove, and, again, this is on each side. Also, on each side you'll want to pull the wheel well down. This side is very broken on this vehicle but just pull it so it's like this and it's not holding the bumper cover. Underneath there should be a series of these push pins just like the top and there actually may be a couple of 10 millimeter bolts thrown in as well but this vehicle has been run over a few things and then put together with wire ties so you just need to either remove the clips, undo the bolts. I'm not even sure how many of them I could tell you should be here, probably anywhere from 6 to 8 of them but we'll go ahead and do that on this car.
Release each side just by pulling firmly. Then I'm going to have to just pull a little bit and it will come off.
Four bolts hold the light. There's one here, we sprayed it with some penetrating oil on the backside. There's two on top, one herein the fender and one here. Then down around in the front there's one, you'll need an extension, right up in here. You'll want to loosen up the 10mm bolt right under here that holds this bracket.
Once that's loose, pull the light out, and this has some aftermarket ugly wiring on it. Let's see. Something you want to avoid with aftermarket lights, they actually just had to - they just used goop and just glued these lights in because they didn't work right.
Reinstall the light. Put your signal in, twist to lock. Lock it in, twist to lock and then bring the headlight in. Reconnect your headlight bulb. Put the headlight back in. Make sure the outside goes in first. This tab has to go above the fender and then work your way over that way. Push it down and in place. We can start this shouldered bolt, it's got the washer that kind of protruded down some. That goes on the top here. Lift this up into place and start this side bolt in. And then this one up here, goes up from the bottom.
Okay, you can see the light, signal, high beam. Comparison of the headlight beams. The driver's side is the aftermarket light that was on the car, the passenger side is the 1A Auto light. I step in here, right in the middle of the car. When I block the aftermarket driver side, only a little bit of light goes away. Block the 1A Auto side, I would say that aftermarket light is dangerous, at best. Lights from 1A Auto, nice and bright. Going to help you see a whole lot better.
Bumper cover back in place. Make sure you go underneath the latch lever and line it up on the headlights and then put these clips back in to hold it in place.
Reinstall this 10 millimeter bolt on each side. Once the bolt is back up in push your inner fender, or in this case what's left of the inner fender up and in. On this side this corner is all broken so we actually put a plate in there and screwed it down into the bumper cover.
It's not beautiful but it's going to make at least the bumper cover pretty much stay where it should be.