Replaces
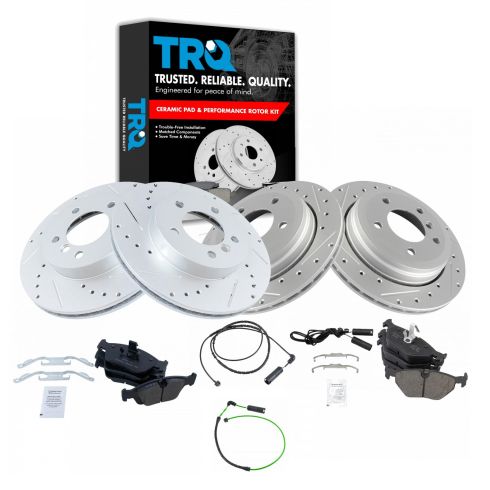
Replaces BMW 323Ci 323i 325Ci 325i 328Ci Front & Rear Ceramic Premium G-Coated Performance Brake Pad & Rotor Kit TRQ Performance BKA12327
$265.95
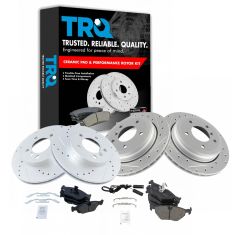
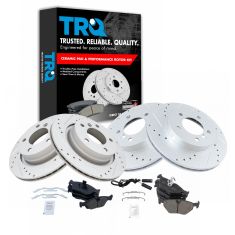
Replaces 2001-05 BMW 325Xi Front & Rear Ceramic Premium G-Coated Performance Brake Pad & Rotor Kit TRQ Performance BKA12497
$254.95
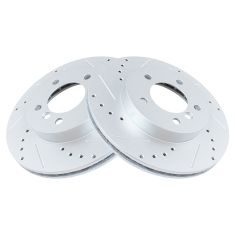
Replaces BMW Front Driver & Passenger Side 2 Piece Premium G-Coated Performance Brake Rotor Set TRQ Performance BRA74695
$109.95
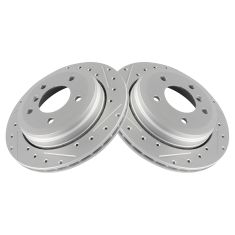
Replaces 2001-05 BMW 325Xi Rear Driver & Passenger Side 2 Piece Premium G-Coated Performance Brake Rotor Set TRQ Performance BRA75041
$84.95

Replaces BMW Saab Rear Ceramic Brake Pads TRQ BFA73318
$46.95
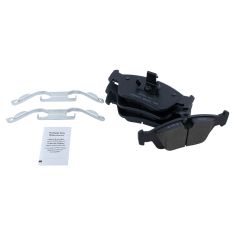
Replaces BMW Front Ceramic Brake Pads TRQ BFA73292
$41.95
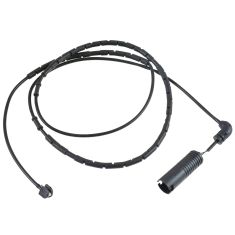
Replaces BMW Rear Passenger Side Brake Pad Wear Sensor TRQ BSA70812
$20.95
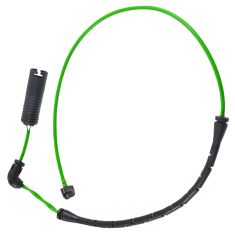
Replaces BMW 325Xi 330Ci 330i 330Xi M3 Front Driver Side Brake Pad Wear Sensor TRQ BSA70813
$18.95
Part Details
Product Features
Attention California Customers:
 WARNING: This product can expose you to chemicals including Lead and Lead Compounds, which are known to the State of California to cause cancer, and birth defects or other reproductive harm. For more information, go to www.P65Warnings.ca.gov.
Lifetime Warranty
This item is backed by our limited lifetime warranty. In the event that this item should fail due to manufacturing defects during intended use, we will replace the part free of charge. This warranty covers the cost of the part only.


Created on:
Tools used
What's up guys? I'm Andy from 1A Auto. In this video, I'm going to show you how to replace the rear pad sensors on this 2001 BMW 325XI. If you need this part or other parts for your vehicle, click the link in the description and head over to 1AAuto.com.
I'm going to loosen up these lug bolts. I'm going to use a 17 millimeter socket and a breaker bar. Now I'm going to raise and support the vehicle. We're using two post lift. If you're doing this at your house, you can use a jack and jack stands. I'm going to take the 17 millimeter socket and the extension just to take the lug bolts out. Now when I go to take the last one out, I am going to hold the wheel so that the wheel doesn't fall. Take that one out, set it aside and grab the wheel. And shake it off.
I want to pull this brake warning sensor out. This vehicle only has it on the passenger rear and then also on the driver's front. Certain vehicles may be different. There's a little retainer right here that goes over the bleeder screw. You can just take some needlenose pliers and try to get this off. Slide that out just like that. The needlenose pliers, just grab it right here. Grab the sensor and pull it up.
The clip actually stayed in there so I'm just going to pull the clip out. If you're going to reuse this sensor, you can put the clip back on. Generally when you're replacing brakes, you're going to replace this sensor as well. But if you have to reuse it, you can.
Then we want to take this wire off. This connects to the pad sensor. There's a clip right here. We can just slide the clip sideways and then pull the wire out. There's other clips, they come out the same way. Just take those off. Just like that. And open this door right here and the connector is inside here. Pull the connector out. There's a little bit of spiders in there. Now just take and push this button down right there, pull the connector off.
Here's the old brake pad sensor, here's the new brake pad sensor from 1AAuto.com. This is for the rear of the vehicle. The sensor themselves are the same. As you can see, the old one's worn down a little bit. It has the same clip that goes in there. And if you look at the connectors, connectors are the same. Get yours at 1AAuto.com, you can do it yourself.
Now we're going to line up, this sensor connector is slotted so you can find the slots and line them up with the connector right here. Lock it in place. Reposition it in this little housing here. Lock that in. We can close the door. Now we can take this, slide this back into these retainers and lock them back down. All right.
Before I lock these retainers in, I'm actually going to install this onto the brake pad. You can take some needlenose pliers to help you. Just slide this in position at the brake pad and push. It'll lock in place. And slide it over here where the bleeder retainer is. Push that back down. And then you can line these all up. Lock them in place.
Now I'm going to take the wheel, slide it in position. Make sure the holes lined up and hold the wheel. I'm going to take my 17 millimeter socket and the lug stud and get one started. Then I can grab the other ones. Now I'm going to use a 17 millimeter socket and a torque wrench and I'm going to torque these lug bolts in a star pattern to 95 foot pounds. You can go right around again just to make sure everything's tight. And you're good to go.
Thanks for watching. Visit 1AAuto.com, your place for DIY auto repairs, for great parts, great service and more content.
Tools used
What's up guys? I'm Andy from 1A Auto. In this video I'm going to show you how to replace the front brake pad sensor on this 2001 BMW 325xi. If you need this part or other parts for your vehicle, click the link in the description and head on over to 1aauto.com.
All right, I'm going to loosen up these lug bolts. I'm going to use a 17 millimeter socket and a breaker bar. Loosen them up. Now I'm going to raise and support the vehicle. We're using a two post lift. If you're doing this at your house, you can use a jack and jack stands. Now I'll take these lug bolts out, just use the socket to help you get them out. I'm going to just hold the wheel with my other hand so it doesn't fall. Take the last one out then I can grab the wheel and slide it off.
Right so I'm going to use some needle nose and I'm going to just grab right here, try to squeeze this. This is that brake pad sensor, and try to pull it out. Just like that, this little spring in there, and then we can take this off here. That's the retainer that holds it on. Take this wire, this little retainer that holds it in right here. It's slotted, push it towards the vehicle and then right here, there's another one. Just grab it and pull it out. There's a little cover right here, just pull on the snaps for the cover. We can slide the connector out. Just like that. There's a little button on the back side of the connector, push that button, slide the connector off. Here's the old brake pad sensor, here's the new brake pad sensor from 1aauto.com. If you look at the connector, connector is the same. The wire length is the same and the sensor is the same. Got the same spring on it, get yours at 1aauto.com and you can do it yourself.
Right so take the new sensor, you want to line this up with the connector. Make sure it goes that same way, slide it in, lock it in place. If it seems like you're struggling to push it in, you're probably going the wrong direction. Slide this connector back in this bracket just like that and this little elbow gets slid right in there. We can close the door. Slide this into this bracket right there and same with this one right here.
Now before I put the wire through this retainer right here, I'm just going to slide it in position on that pad, just take the needle nose pliers to help assist. Just slide that in position just like that and then put this retainer right there, lock that down. Now I'm going to install the wheel. Line it up with the lug holes and I'll hold the wheel on, grab a socket with my lug bolt, get that started. All right now I can lower the vehicle and torque the lug nuts. Now I'm going to use a 17 millimeter socket and this torque wrench that we sell at 1aauto.com. I'm going to torque these lug bolts to 95 foot pounds in a star pattern so that it torques the wheel down evenly. I'll just go around again.
Thanks for watching. Visit 1aauto.com for quality auto parts shipped to your door, the place for DIY auto repair. And if you enjoyed this video please click the subscribe button.