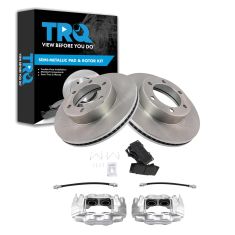
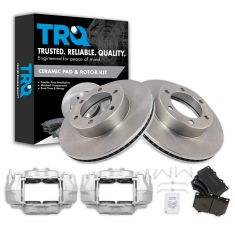
Brought to you by 1AAuto.com, your source for quality replacement parts and the best service on the internet.
Hi, I'm Mike Green. I'm one of the owners of 1A Auto. I want to help you save time and money repairing and maintaining your vehicle. I'm going to use my 20 plus years experience restoring and repairing cars and trucks like this to show you the correct way to install parts from 1AAuto.com. The right parts installed correctly, that's going to save you time and money. Thank you and enjoy the video.
In this video, we're going to show you how to take apart and put back together the front brakes on this 2002 Toyota Tundra, same as most trucks of this era. This vehicle doesn't actually need any new brakes, so we don't replace them, but we do just show you how to take them apart and put them back together. Tool's you'll need are jack and jack stands, 21mm socket with a ratchet or a tire iron, a pipe or a breaker bar for some leverage, regular screwdriver, medium and large sizes, pliers, and a 17mm socket.
Start by using a flat blade screwdriver and sharply pry off your center cap. If you don't have the benefit of air tools, you'll want to loosen the lug nuts while the wheel's still on the ground. Then, raise and support the vehicle and loosen and remove the lug nuts the rest of the way. Fast forward here a little bit. I take the lug nuts off. The wheel is kind of stuck onto the hub. What I end up doing is actually just hitting it from one side from the top and the other side from the bottom and it breaks loose. You can see that there's still really good life left on the pads here. Also, the rotors are in good shape. I'm probably just going to end up taking this apart and putting it back together so you can see how it's done.
If you're just looking to change your pads, what you want to do is take a large screwdriver and force it in here. This is going to turn while I'm prying. Basically, as I'm prying, what I'm doing is I'm forcing these pistons back into the caliper. Turn It all the way. Now I'm going to do it for the other side here too. I'm pulling the wheel over and you can already see that there's some play in there. You pry out on this side and that forces these pistons back in. Now, you can see that there's these pads are nice and loose. Take your screwdriver, push down, on this little tab, pull this out, and this whole clip comes right out. Push your pins out a little bit. Use a pair of pliers, twist and pull the pins at the same time.
There's another little wire. Pull this right out. Use your pliers again. Grab hold of the pads and pull them right out and do the same thing to the front one. When you check your brakes, always make sure you check both sides. I already did check the other side. It's still in good shape. You can see our rotor. It's in really good shape, so I'm not going to replace them, but I am going to show you how to take them off. What you want to do at this point is remove these two bolts. One here and then one down here and they're on the inside of your caliper. Before you remove those bolts, you want to take a screwdriver and pry this clip right out. Once you get that clip out most of the way, use your pliers again.
These bolts are 17mm, so first I'll just try with my ratchet. You may want, if you need a little more leverage, use your pipe and that pulled down nice and easy and breaks the bolt loose. I'm going to fast forward here as I remove that lower bolt. Then, use the wrench and the pipe again to get the upper one and take them almost all the way out. As you pull the last few threads of these bolts out. I'm just laying the bolts to the side. Do this very, very carefully. Pull your caliper up and then, again, carefully. Now you want to just be careful not to bend that hose at all. Over here, remove your brake rotor.
Like I said, this brake rotor's in great shape so I'm not going to replace it. Put your new brake rotor on. Do all of that. Thread these bolts in a little bit so everything's held in place. Tighten them up. Speed it up here again as I just use the wrench and I'm going to tighten those up preliminary and then torque them afterwards. Torque wrench. I'm going to torque these bolts to 100 foot-pounds. Take that little clip. It goes in with this edge facing out. We'll put the pads back in. Once you have that stuff all in, you're going to put this wire retainer in. Push that in there. Take your upper pin and you want to make sure that you have it so the holes face the right way so you can get this retainer back in easily. Put it through.
It requires a little bit of tapping here. Turn those pins a little bit and now put it in and up here. Going to fast forward here as I put the wheel back on and then I hand thread on the lug nuts. You want to make sure you hand thread them on first so you don't cross the threads at all. Now, here I'm just tightening up the lug nuts preliminarily with the impact wrench and then I'll go back and torque them when the vehicle's on the ground. Here, I'm torqueing them to 120 foot-pounds using a crossing pattern as I go. Last but certainly not least, make sure you pump your breaks a bunch of times. Then, before you road test the car, make sure that the brakes hold it in gear and then do a stop from five miles an hour, then ten miles an hour.
We hope this helps you out. Brought to you by www.1AAuto.com, your source for quality replacement parts and the best service on the internet. Please feel free to call us toll free 888-844-3393. We're the company that's here for you on the internet and in person.