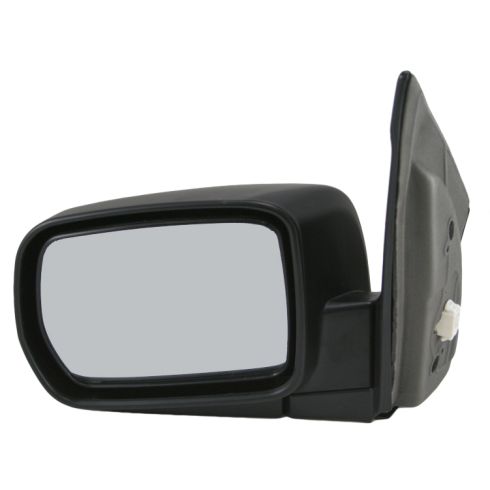
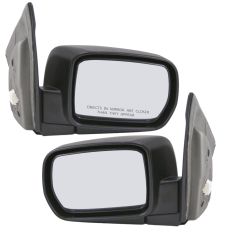
TRQ side mirrors and mirror components are designed to match the function, fixture, and performance of the original version for easy installation. TRQ mirrors are DOT certified, comply with all federal safety standards, and are independently lab tested to ensure our products comply with all government regulations. All products are fit and road-tested in our Massachusetts R&D facility to ensure we deliver on our promise of Trusted Reliable Quality.
Product Features
Direct Bolt-on Replacement: No modifications or special tools required
Complete Assembly: includes same mirror glass, housing, bracket and technology as the original unit
DOT Certified: Built to the highest quality standards
FMVSS-111 Compliant: Validated to be a dealership alternative
Exact fit - To obtain proper fit and function confirm your vehicle has the exact mirror options listed.
Paint To Match Note:
"Paint-to-match finish" refers to a smooth, paintable surface. This item is not painted. Paint offers better coverage and adhesion, but it is not necessary for installation.
Item Condition:New
Attention California Customers:
WARNING: This product can expose you to chemicals including Chromium (Hexavalent Compounds), which is known to the State of California to cause cancer, and birth defects or other reproductive harm. For more information, go to www.P65Warnings.ca.gov
Lifetime Warranty
This item is backed by our limited lifetime warranty. In the event that this item should fail due to manufacturing defects during intended use, we will replace the part free of charge. This warranty covers the cost of the part only.
FREE Shipping is standard on Orders shipped to the lower 48 States (Contiguous United States). Standard shipping charges apply to Hawaii, Alaska and US Territories. Shipping is not available to Canada.
Expedited is available on checkout to the United States, excluding Alaska, Hawaii and US Territories as well as P.O. Boxes and APO/FPO/DPO addresses. Final shipping costs are available at checkout.
How to Replace Side View Mirrors 2003-08 Honda Pilot
Created on:
Tools used
10mm Wrench
10mm Socket
Ratchet
Trim Tool Set
1. Removing the Side View Mirrors
Lower the window
Pry out the sail panel with a trim removal tool
Disconnect the wiring harness
Remove the three 10mm bolts from the mirror
Press the tabs on the white connector to remove the mirror
2. Installing the Side View Mirrors
Insert the mirror into the door
Tighten the three 10mm bolts to the mirror
Connect the wiring harness
Press on the sail panel
Open the door. Lower the window. Remove this trim. There are clips behind it. I'm going to use a plastic prying tool. You can buy these from 1AAuto.com. Once you remove those clips, there's another clip that is going vertically, so it's going to lift up and out, just like that.
Disconnect the electrical connector, push in the tab, pulling the connector out. Remove the 10 millimeter bolts, there are three of them, there's two here: one, two. And then the third one is outside, inside the rubber here. So if you're trying to get this free, and you can't figure out why the mirror is still free. Make sure you have released this one. I'm going to start with a 10 millimeter socket ratchet to get this top one loose. I'll leave it in there a little bit so the mirror doesn't fall. Then I'll remove this one. Once it's loose, I'll just use my fingers to take it out, put aside. This one, the trim is just in the way, it doesn't quite line up straight. You need to use a wobble extension if you have one.
I'm going to use an open-ended wrench, 10 millimeter. Just try to hold it on there so it doesn't pop off. Get that free. This wrench has a ratcheting end, so once it gets to a good point, try to use that. Remove that lower bolt. And then the top one should be loose. I'm also holding the outside of the mirror with my other hand so it doesn't fall. There are two plastic tabs on the white electrical connector. Use our plastic prying tool to push the top one in, then push the bottom one in. The mirror is free. That's why you want to make sure you hold on to it with your other hand, so it doesn't fall.
Installation is the reverse of removal. Take our mirror, line it up, and then push it through the opening of the electrical connector so it locks in. Now it's just seated there on the electrical connector. Going to take my hand and just push it up against the door frame. Take our upper bolt, thread that in, back to my 10 millimeter socket. Once I feel these get tight, I will stop. Install the bolt on the outside here. I feel it get tight, stop. Install the last bolt in the bottom. Since this one is hard to reach with my socket extension, I'm going to use the open ended 10 millimeter wrench. Once I feel it get tight, I will stop.
Reconnect the electrical connection. Re-install your trim panel. These tabs will go into the bottom slots here. And then these clips will clip into the body here. Actually there's a slot groove here that needs to fit into there. Get it slid into there. Trim cover is re-installed.
Thanks for watching. Visit us at 1AAuto.com for quality auto parts, fast and free shipping, and the best customer service in the industry.
MRA05761
In Stock
Product Reviews
Loading reviews
5.00/ 5.05
5 reviews
5 Stars
4 Stars
3 Stars
2 Stars
1 Star
5
0
0
0
0
Franca
January 26, 2017
I received the item at the specified time. Everything was fine. Item in good condition. You are the best. I will recommend this company to friends and family. I will purchase parts from this company from now on. My first experience was fantastic.
Excellent choice
P
November 11, 2017
The mirror was received in excellent condition and was easy to install in about 20 minutes. I would highly recommend to others.
Fast delivery, fine quality and assistance in installing
J
February 16, 2018
The side view mirror was exactly as presented. It arrived when you said it would. Installation was extremely easy, due mostly to a You Tube video done by you that walked me through the process. The installation would otherwise been "less than intuitive." The actual installation took about fifteen minutes, including time watching the video.
Perfect fit
S
July 13, 2019
Quick delivery and a perfect fit! Installation took less than 10 minutes. One word of caution: The lower left bolt is hard to get to; when you finally get it loose, dont let it fall in the gap between the doorframe and the door panel! To retrieve it, I had to pull that end of the panel off and it (the bolt) fell right out.
fast and easy
Richard
April 22, 2021
Installation went as shown on youtube video. Only tools required are a 10mm socket and maybe a 10mm open end wrench. Detach the inside trim with a flat blade screwdriver and access the 3 bolts. Easier if you have someone outside to hold the mirror when installing but not a deal breaker
Customer Q&A
No questions have been asked about this item.
Customer service
877-844-3393
Monday - Friday 8:00am - 9:30pm ET Saturday - Sunday 8:00am - 4:30pm ET
Honda is a registered trademark of Honda Motor Co., Ltd. 1A Auto is not affiliated with or sponsored by Honda or Honda Motor Co., Ltd.See all trademarks.
Enter Vehicle Year Make Model
Specify your vehicle's year, make and model to guarantee fit.
Year
Make
Model
Options
Drivetrain
This part doesn’t fit a . Select from parts that fit.