Brought to you by 1AAuto.com, your source for quality replacement parts and the best service on the Internet.
Hi, I'm Don from 1A Auto. I hope this how-to video helps you out, and next time you need parts for your vehicle, think of 1AAuto.com. Thanks.
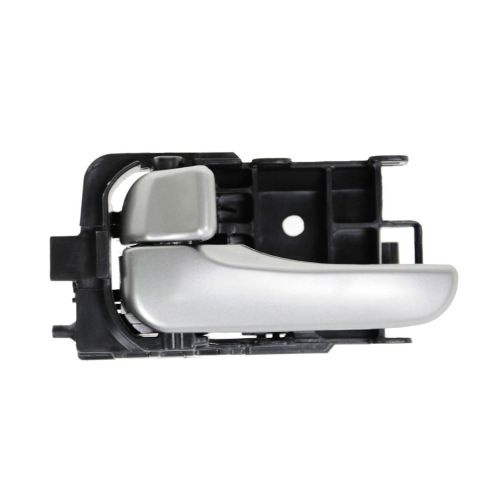
In this video, I'm going to show you how to replace a broken inside rear door handle on this 2006 Nissan Sentra. It's pretty much the same for any 2000 to 2006. Tools you'll need: You'll need a Philips screwdriver and either a 10mm socket with a ratchet or a 10mm wrench
Now, to remove this, there is a little Phillips clip in here. Just turn it lightly with a Phillips screwdriver. If it doesn't come out, you don't want to press on it. It should come right out. If it doesn't come out, you might want to pry on it with a small flat-blade screwdriver. This does end up coming right out. Now, here, you want to pull up on this.
That whole thing comes out and then you pop on this and you can disconnect your window switch, by pressing this button right there. You may find that you need to use a small screwdriver. Press on the button, and pull off. Use your screwdriver here. You'll want to gently pry out on this bevel on the top and on the bottom, and then, on the back here as well.
Right here, there are two bolts. They have Phillips heads in them but it may be easier just to use a 10 millimeter wrench. Once those are off, you can reach right down here. You feel a hole in the door panel. Then, just give a good, quick, firm pull. It releases the clips. There is one more clip right up in here. Once those clips are released, then lift up on the door panel. Bring it right out.
On this inside door handle, just pry this. You'll see some tabs here. You pry up on the tabs and pull out on this little cup here. Pry up, and that comes right out. There's a Philips screw right in here. Remove that. What you'll want to do is slide your handle back and pull it out. Now, twist the handle like this, okay, and look in. Flip that handle. The rod's up. This one actually just came right out. Then your handle's out.
Here's the new handle from 1A Auto. It's a little hard to film this, but basically, all you do is pull the rods out, and have the handle kind of out like this. Put that first rod down in and then, usually, you want to have your lock pushed that way. Pull this rod over. Put it in. Be sure you get it down into the hole here. Then, bring the handle over. The other rod came out, so pull that one back over. Get it in. I've got to make sure I've got both of them in. Now, put your handle in, make sure it's flush to the door, and slide it forward. Put the Philips screw back in. Put this bezel in place.
To reinstall your panel, bring it up, line it up. You've got to really push in the back here. Then, slide it down into place. You just kind of use your putty knife basically to just kind of pry this part right up. Now, just reach down and make sure that your power window harness comes through. Then, you can set all the clips around the edge. Your two bolts: you just reinstall them. A screwdriver is good enough. Plug your switch back in. The front goes down in first. This goes right in. Make sure you press it down firmly, get it locked in and then this back right around the door handle. Make sure it's locked on perfectly. For this, you just push it right back into place.
We hope this video helps you out. Brought to you by www.1AAuto.com, your source for quality replacement parts and the best service on the Internet. Please feel free to call us toll-free, 888-844-3393. We're the company that's here for you on the Internet and in person.