Brought to you by 1AAuto.com, your source for quality replacement parts and the best service on the Internet.
Hi, I'm Mike from 1A Auto. I hope this how-to video helps you out, and next time you need parts for your vehicle, think of 1AAuto.com. Thanks.
In this video, we're going to show you how to remove and reinstall the rear window regulator on this 2005 Nissan Maxima. Same as any 2004 to 2008. We show you the driver side rear door, but the passenger side rear door is basically the same procedure. Tools you'll need include a flat blade screwdriver, a 10mm socket with a ratchet and extension, and some painter's tape.
To remove your rear door panel, there's a little trap door up next to your door handle. Just pry that out. Then, right on the back of your switch panel, you want to pry up and pull this up and out. Then here in the back, pry out on this piece of trim and it comes right out. This switch disconnects with a little button right here, and then there are three 10mm bolts: one here and two right on either sides of your door pull here. I'll speed up as I remove those three bolts.
The two bolts that are back in behind where the door pull is, I try not to drop them down in the door panel, but if you do, just watch for them when you pull the door panel off, they'll fall out. Once you have those, then just grab your panel on the side and give it a firm pull. Down at the bottom, firm pull, and watch for your bolts falling out. Lift your panel up and off. Pull the door panel away, then you have your two cables. Snap them out of the door panel, then pull up and out. Same with this one: snap out, pull up and out.
Down lower, you have your connector for your courtesy light. Just pull it out. There's a little tab right here: disconnect that and the door panel comes off. Even though I'm in fast motion here, I am slowly and carefully peeling that water shield back. You want to be careful not to rip it or tear it.
Here you can see I'm rolling down my window. Obviously my window motor and regulator are in fine shape, but you have to have them in a position where you can take them apart. If your regulator is broken, generally it's the cable that's broken, and you'll be able to move the window up and down by hand. Most of the time what happens with these regulators is they're cable driven, and the cable usually breaks. What you want to do, first there's a bolt right here you can see. There's another one that you access right through this hole, so once your cable is broken, you can just slide the window usually up and down by hand. We slide it into this position, and then remove these two bolts.
Fast-forward as we remove those two bolts. Once you remove those two, then your window will just slide right up, and you want to lift it up. I generally use a little bit of painter's tape, couple strands to hold the window up while I work. Now you want to remove two bolts. This one here and this one here. Before we get too much further, your window motor is plugged in right here. There's a little tab you press here: disconnect it. Use your little screwdriver, you probably can reach in right here, and there are just little tabs on the inside press them and remove that.
Now you want to remove this bolt. Loosen this bolt, and loosen these two bolts. Your motor comes up and out, and then your regulator comes to the side. Pull the regulator out. There it is out of the car.
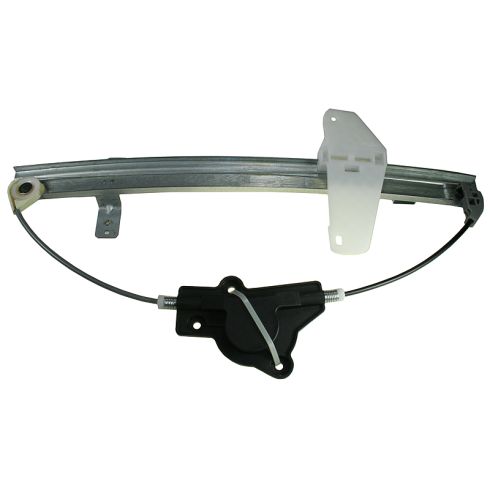
The new regulator's from 1A Auto. You can see mine is in good condition. Usually, like I said, what breaks is this cable here, or one of these plastic director's brakes. Like I said, mine's in good shape.
To reinstall, you would want to put this bolt in here, and then the two bolts in the motor. You just put it right back in like we took it out. Reach in and grab hold of the motor. You want to make sure that you have that regulator against the door. There's that bolt. Put that in place, then bring our motor up. These two bolts are in place, that bolt is in place. I'll fast-forward here again as I just take the other bolts and thread them in first, then use my socket ratchet and extension and tighten them all up. You want to tighten them nice and firm, don't over tighten them, though.
Reconnect your harness. At this point if you needed to, you can plug your switch back in and move your new regulator up and down so that it's in this position, so these bolts are easy to reach. Take the tape off. Let the window down. Pull these and make sure they're both in place. Start this one first. Just start it in and kind of move your window down a little bit down in place. Tighten it up, tighten this one up, and turn the key on to make sure the window works okay. Then, after a successful test, carefully put your water shield back up in place.
Make sure that you put the door handle cables back through the correct slit in the panel, as well as the courtesy light harness. Then unplug your switch, and you should be all set to put your door panel on. To reinstall your panel, you want to take this L-shaped one that goes on the top on in the lock. Put it in, and then spin it around and walk it into the panel. Then this one, same thing: down, spin it, lock it in.
Bring this harness up through for your window. Push your panel right against the door. Bring it up, pinch it, and line right up. Carefully put your bolts in. Speed it up here as I put those two bolts in that hold the door pull. Now take your window harness and plug it back in. Put the front down in first. Then push it down in. Take this trim piece and snap it back on. Put this last bolt in. Then put your little trim door back in.
We hope this video helps you out. Brought to you by www.1AAuto.com, your source for quality replacement parts and the best service on the Internet. Please feel free to call us toll-free, 888-844-3393. We're the company that's here for you on the Internet and in person.