Brought to you by 1AAuto.com, your source for quality replacement parts and the best service on the Internet.
Hi, I'm Mike from 1A Auto. I hope this how-to video helps you out, and next time you need parts for your vehicle, think of 1AAuto.com. Thanks.
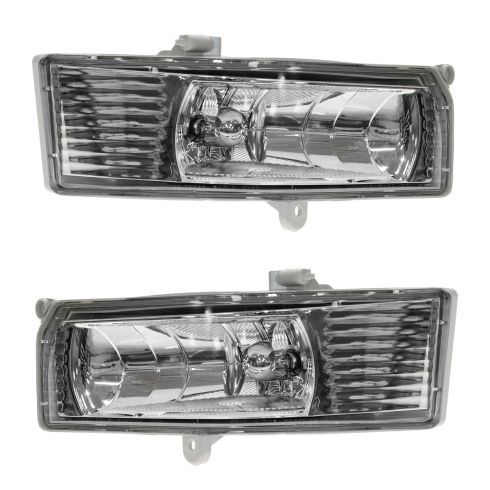
In this video, we're going to show you how to replace the fog light bulb as well as replace the entire fog light assembly. In this case, it's on a vehicle where the mounting brackets have been broken off. The tools that you'll need for this are a new fog light from 1AAuto.com, a 10mm socket and ratchet, and if your mounting brackets are damaged, you'll need an awl and a 1/4" drill bit and drill.
To access your fog light bulb, you want to just remove these four 10mm bolts. We'll fast forward as Mike does this. Now to service the bulb, just twist it counter-clockwise, pull the socket free, push the tab on the harness, and disconnect it. Then your bulb's free. Take your new bulb, connect the harness, and then just twist it back into place clockwise to lock it.
If you want to replace the entire assembly, you just remove this 10mm bolt here and this 10mm bolt right here. If you're looking to replace your fog light, you may run into this. You can see what happened on this car is that there was an impact right here, and that basically broke the light. As we look at our new light, we see a mounting point at the bottom, which would be in here, and a mounting point at the top corner, which would be up here. When we feel inside there, that's broken away and this is broken away right down in here. The mounting point for the top corner is actually still there.
I've got one mounting point still left, so I'll put my light up in and get that hooked into the original mounting point. Try to get the light in the best position possible, and I've got an awl. Basically what I'm going to do is I'm going to use the awl to help me make a couple new holes in the bumper. The best way to fix this, actually, is to get a whole new bumper cover that has the correct mounting points in it, but the owner of the car doesn't really want to do that, so we're just doing the best we can. I've made a mark there. Still I'm going to hold that in position and go up through this top mounting point, hopefully. You can see up in here I've got my mark up here, and then here's my mark for the other mounting point. I've got my drill and I just need to make a hole to put a bolt through. After drilling the holes I've got up in here, I actually tried to fit it, and I didn't really like where I put this hole, so I made another one. It's not work that I'm the most proud of, but there's going to a functioning light that's going to fit in here, and it'll be secure. I'm just using a couple of spare bolts that I have to bolt through the bumper cover and into the mounting point of the light. Do both sides, and then a washer and bolt, then we'll be in business. Use a socket, ratchet, and a wrench to hold the other side. You can see in behind. Again, it's not work that I'm the most proud of, but you've got a bolt holding it there and a bolt holding it on there. We'll reconnect our harness. Now just replace these four 10mm bolts and tighten them up.
We hope this video helps you out. Brought to you by www.1AAuto.com, your source for quality replacement parts and the best service on the Internet. Please feel free to call us toll-free, 888-844-3393. We're the company that's here for you on the Internet and in person.