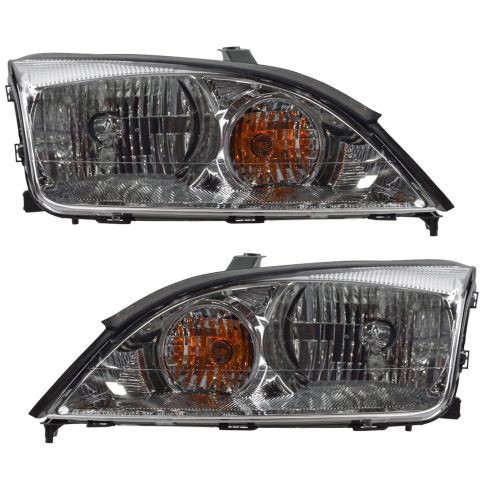
1ALHP00414-2005-07 Ford Focus Driver & Passenger Side 2 Piece Headlight Set DIY Solutions LHT03316

Replaces
2007 Ford Focus Driver & Passenger Side 2 Piece Headlight Set DIY Solutions LHT03316

Product Reviews
Loading reviews
4.47/ 5.0
19
19 reviews
Broken headlight internal
July 23, 2017
The headlight assembly was broken upon arrival, I assume from UPS shipping ! I called customer service and they shipped a new one 2 day air. Customer service was awesome and very helpful !
Good quality replacement!
August 27, 2018
These headlight assemblies were easy to install and work very well. They light up the road perfectly. (And, didn't have to adjust. ) Just perfect illumination. These came w/both headlight bulb and turn signal bulbs. (I however, replaced these w/long GE/Phillips life bulbs.) Overall, very pleased w/these headlight assemblies and 1A Auto. The Focus looks as new from the front!
Perfect Fit!!!!
December 18, 2018
Got these for a friends car and they were a perfect fit and the price was also amazing. The lens are crystal clear and have amazing clarity when driving at night. They shipped fast. Only one thing concerning but did not thankfully affect this set of headlights the packaging was pretty beat up when I got them looked like they where just thrown around and boxes where ripped.
Like OEM -Good fit - worked.
April 29, 2019
Like replacing with OEM. Existing housing was broken.
Excellent Product
July 13, 2019
These fit perfectly and came with all four bulbs! I was able to catch them on sale for $79. They fit perfectly and are a significant cloudy ones on my '05 Ford Focus. Best deal I was able to find.
2007 Ford Focus headlights
July 26, 2019
Fit perfectly. Bright light. Big benefit for night driving.
Big difference
August 7, 2019
I purchased these to replace on a 2005 Ford Focus. The fit was perfect and an easy installation. I was able to access the side bolts/screws by reaching underneath the assembly with a ratcheting wrench. The assemblies arrived promptly. They included bulbs which I replaced but kept as emergency replacements. I highly recommend.
Mid MO
November 18, 2019
All parts as described. Headlights had good mounting points & are really bright. If didnt have to remove front bumper would have been a 10 minute job. Took about 1hr to install. Motor mounts look good too. Really fast shipping. A+
Pefect Fit
November 21, 2019
Installing was easier than I thought. The video helped tremendously. Great product.
Headlights
October 7, 2020
My car is 15 years old. The headlights were damaged and very dull ,I could not see very well driving at nite. Now with the new headlights I ordered from you, I was in AWE. They are so great. I feel better driving at nite now , they are clean , bright, easy to install and were delivered fast. Thank you very much for great service.
Perfect Match
October 13, 2020
Bought these headlights for my '05 Focus SES ZX4. The product shipped quickly and were exactly what I needed. Install was easy and the headlights were an exact fit for the car. Took the old ones out and put the new ones in. Simple.
June 27, 2022
Fabulous.
March 4, 2023
GREAT
December 1, 2023
Fit was as original but LH Parking/Turn signal socket was defective. I used the socket from my old assembly and everything worked as it should.
December 14, 2023
Very nice, $ good fit.
High Quality Product
March 27, 2024
Great Replacement part and video from 1A Auto. I am extremely pleased with all the parts and videos for my 2007 Ford Focus
June 11, 2024
No funcio la luz del lado del chofer
Orejas
June 25, 2024
Excelente producto y sobre todo el servicio que tienen es sper bueno
They are bright.
August 28, 2024
They are bright, the main connector doesn't snap on the plug ( looks like plastic connector is made just a touch to long, so hopefully it doesn't come unplugged. Might have to put a dap of silicone or hot gule on a spot.
Customer Q&A
Will these fit my 2007 Ford Focus SES hatchback?
August 22, 2019
10
Thank you for the inquiry. These will be correct for your 2007 Focus Hatchback given you do not have LED or HID headlights from the factory as these are halogen replacements.
August 22, 2019
Curtis L
Ford is a registered trademark of Ford Motor Company. 1A Auto is not affiliated with or sponsored by Ford or Ford Motor Company.
See all trademarks.


