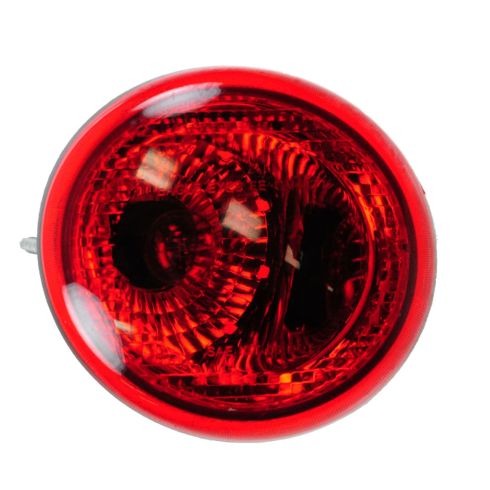
Complete Repair in One Purchase - Stop searching for parts individually and complete your repair with a customized kit or set from DIY Solutions.
High-Quality Parts from Trusted Brands - DIY Solutions' kits and sets are selected from the best automotive brands and include hard-to-find and even obsolete parts you may need for your vehicle.
Guaranteed Fit - DIY Solutions ensures its selected parts are quality-tested to guarantee fit and function.
Assemblies may include halogen or incandescent test bulbs that should be replaced before installation.
Features and Benefits
Direct Fit - No vehicle or wiring modification necessary
DOT, SAE, and FMVSS Compliant - Meets on-road use regulations
Matching set for a restored look
Item Condition:New
Attention California Customers:
WARNING: This product can expose you to chemicals including Chromium (Hexavalent Compounds), which is known to the State of California to cause cancer, and birth defects or other reproductive harm. For more information, go to www.P65Warnings.ca.gov
Lifetime Warranty
This item is backed by our limited lifetime warranty. In the event that this item should fail due to manufacturing defects during intended use, we will replace the part free of charge. This warranty covers the cost of the part only.
How To Replace Taillight and Bulb 2006-10 Chevy HHR
Created on:
Tools used
Flat Blade Screwdriver
10mm Wrench
1. Servicing the Tail Light Bulbs
Pry off the access panel with a flat blade screwdriver
Twist the stop light bulb socket counterclockwise and out
Pull the bulb off of the socket
Push on the new bulb
Twist the backup light bulb socket counterclockwise and out
Pull the bulb off of the socket
Push on the new bulb
2. Removing the Tail Lights
Remove the three 10mm nuts from the stop light
Pull the stop light out from the outside
Rest the plastic mounting piece inside the frame
3. Installing the New Tail Lights
Push the new stop light into place with the locating pins while holding the mounting piece
Fasten the three 10mm nuts onto the light
Repeat Steps 2 and 3 for the backup light
Twist the upper bulb clockwise into the stop light
Twist the lower bulb clockwise into the backup light
Push on the access panel
Brought to you by 1AAuto.com, your source for quality replacement parts and the best service on the Internet.
In this video were going to show you how to service the tail lights on this 2008 HHR , same as any `06 to `10 HHR. We`re going to show you both changing the bulbs if that's all you need to do, or also changing the entire assembly if you need to get a new one from 1AAuto and replace a broken one or something like that. The only tool you'll need to change the bulbs is a small flat blade screwdriver. If you are going to change the whole tail light assembly or backup light assembly, you'll need both the small screwdriver and a 10mm wrench.
It's pretty easy. Use a screwdriver and pry out this little access panel. If you're just looking to change the bulbs, you can see the back of the lights are right in there. Reach in, twist them counterclockwise and pull out. See the bulb right there. These bulbs just pull straight out, and go back in. Do the same thing here. Pull straight out, push back in.
If you're looking to change a tail light because it's broken, you can see that on each one there are three 10mm nuts. I'll change out the stop light. You'll need a 10mm wrench and just put it in there and loosen one of the nuts. You can use your fingers and once they're loose get them. So my experience on this car is once you loosen the nuts with the wrench, it's easy to reach in there with your fingers and take them right off. The light comes right out. Pull the light out. There is a plastic piece in behind here. Be careful not to drop it down in. Just rest it down like that.
Here is our original and a new one from 1A. Obviously, our original is in perfectly usable shape, but we'll just take this as an opportunity to try out our new one, make sure it fits good. We'll just put it in here, and make sure the tabs go in fine. Pop it in on the back. I'm going to spare you all the putting the nuts and everything back on. Put the nuts on and use the wrench to tighten them up. Pulls the light in quite nicely and you'll see the finished result in a second. It fits nicely and looks good. Now we'll put the bulbs in. The smaller bulb is the backup light. It goes down the bottom. Push it in. You might have to turn it a little bit to get the teeth to go into the socket correctly. Turn it clockwise, lock it in, and then do the same thing for the upper bulb which is the stop light and turn signal bulb. Put it in, get everything to fit, and then turn it clockwise to lock it.
We hope this video helps you out. Brought to you by www.1AAuto.com, your source for quality replacement parts and the best service on the Internet. Please feel free to call us toll-free, 888-844-3393. We're the company that's here for you on the Internet and in person.
LHT06425
In Stock
Product Reviews
Loading reviews
5.00/ 5.01
1review
5 Stars
4 Stars
3 Stars
2 Stars
1 Star
1
0
0
0
0
Ricky
December 27, 2022
Very good video
Customer Q&A
No questions have been asked about this item.
Customer service
877-844-3393
Monday - Friday 8:00am - 9:30pm ET Saturday - Sunday 8:00am - 4:30pm ET
Chevrolet is a registered trademark of General Motors Company. 1A Auto is not affiliated with or sponsored by Chevrolet or General Motors Company.See all trademarks.
Enter Vehicle Year Make Model
Specify your vehicle's year, make and model to guarantee fit.
Year
Make
Model
Options
Drivetrain
This part doesn’t fit a . Select from parts that fit.