Hi, I’m Mike from 1A Auto. We’ve been selling auto parts for over 30 years!
Before you do the job you have to take off the wheel. To do that we need to get a 22 millimeter socket and usually a half inch breaker bar, or you could use the lug wrench that comes with the vehicle. We'll just crack these loose before we jack up the vehicle, and that will make it easier to take the wheel off in a few minutes. Now you want to raise and support your vehicle. You can definitely use a jack and jack stands in a driveway. To make it a little easier to film, we're going to be using a vehicle lift. Make sure you use the proper spots on the vehicle to jack it up which we have another video for.
Now we will take the rest of the lug nuts off. We already loosened them while they were on the ground, so this step is really easy. Once the lug nuts are off, you can lift the wheel off the car. You're going to want to take out the two bolts that hold on the caliper. They hold the caliper to the caliper bracket. They're right here and right here and they're 14 millimeter. We'll start by putting a 14 millimeter wrench on the top one and cracking it loose. This one is actually coming out by hand, which is terrific. Sometimes they're a little stuck in there but not in this case. Let me go to this one. This one's coming out too so we're in good shape today.
What I like to do next is grab the caliper and kind of squeeze it, and by doing that it gets the caliper nice and loose and you can just pop it right off. At that point you want to set the caliper aside, make sure that it does not hang from the hose because you'll cause damage to the hose and potentially even the caliper.
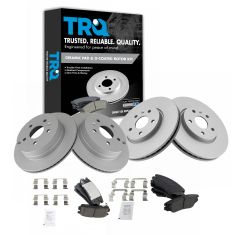
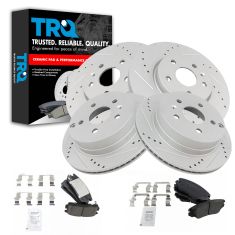
These are your brake pads. These ones are actually worn out quite well. And they're also stuck in the caliper bracket, which is not ideal. Now we'll do the inside one. Now we want to remove the brake caliper bracket from the knuckle, so we'll put a 15mm onto the upper bolt, and we'll crack that loose. We'll do the same thing with the bottom one. You could use a wrench or a socket for this, either one will work. The socket's probably a little bit faster, but I have a wrench in my hand and they say the closest tool's the best tool, so we'll go with it. There's one bolt, alright. Now you can pull the caliper bracket right off.
Okay, so now we want to take off the rotor. One thing worth noting is that you don't want your parking brake to be on if you're trying to remove the rotor, because the parking brake is going to hold the rotor onto the car. So first, make sure your parking brake is off. Second, we're going to take a T30 Torx bit on a 3/8th ratchet, looks like a star, and we're going to put it right here.
Now, a lot of the time, these things are really tight, so what I like to do is take a wrench and go like this and that'll hold the rotor in place. Sometimes it's better if you have a friend doing this. And then you can go like this. The bolt is actually coming loose really easily in this case, but a lot of the times, these things are stuck really tight. Normally what would happen is you turn this and the rotor will turn with it and you won't be able to loosen it. So having a wrench like this to hold the rotor still is sort of a trick to get around that. Now we'll spin this thing out.
In New England, when you get one of these out, it's almost a miracle because they almost always have to be drilled out. It looks like the rotor's going to be stuck on, so now, we're going to put some rust penetrant around here and around the lug nuts, and we'll try and get this rotor off. Get the rust penetrant in there, make sure you rotate it around. All right, this is where the job starts to get fun because you get to use hammers. And what you're going to want to do is hammer right between all of these lug nuts until the rotor comes loose. It's basically just stuck around this hub. It's a really common thing to happen. And if you whack it around here, then it'll come loose.
The one thing you have to watch out for is hitting these threads. You don't want to hit those because then you have to replace the lug nut, the actual lug, or you have to re-thread them which is also a pain. There we go. With that loose, you can pull the rotor off.
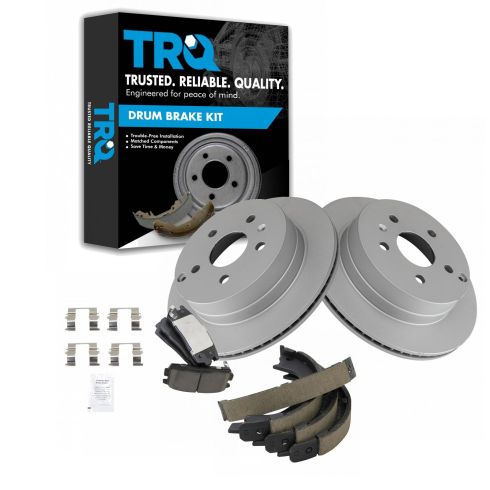
These parking brake shoes are actually in perfectly fine shape, but a lot of people have trouble doing these because they're drum brakes. It's an old technology that a lot of people are afraid of. So we're going to show you how to take them apart so that you can safely replace them on your own.
Right here is what's called a self-adjuster. And this thing actually spins which if you watch this, it spins and it moves the brake shoes out. And that actually tightens up your brakes so that your parking brakes works really well. In this case, we want to loosen it up as much as possible so that we can make sure the parking brakes are loose when we put it back together. So we're going to start by pushing it down, and you can see the gap right in here will get smaller. Right in here, the gap is now gone. That's because the whole mechanism kind of shrunk up. So now that that is at its minimum, we'll take off this spring. All right.
I like to use a pair of needle nose pliers for this, or if you have locking needle nose pliers, those work really well. So now that we got that out of the way, there's a spring and a washer right here, and then there's one in the front side as well, and we're going to go ahead and pull those off next. Right here, all you do is hold the backside, there's a - it almost looks like a nailhead on the back of the brake dust shield. All you do is push this down and turn it 90 degrees, and this thing will pop right off. They do actually make a tool for this, not many people have it because it's sort of an outdated tool at this point in life.
You can use pliers or whatever you really want. Sometimes the socket works. You can see it's a flathead that turns 90 degrees and locks itself in place. Then on the back, you can pull it out, it sort of looks like a nail. Like this. So this goes on here, and you push it together. Hold on. Sorry, my hands are in the way. And then it turns 90 degrees, and it holds it in place just like that with the spring tension. This side is the same story. What we can do is just push down and turn it 90 degrees. It's a little tricky when things are rusted. There we go. All right. And you don't actually have to pull these out, you can leave them right in the backing plate, but this just kind of shows you how it works.
The parking brake shoes sit right in the grooves of the self-adjuster. So you can actually pull this right apart and pull the self-adjuster out, dropping half of it. So this is what the self-adjuster looks like. Down here is another spring that I was hoping we could get away with not removing, but it looks like we're going to have to remove it. And if you just pull it with some needle nose pliers, you should be able to pop it out of there. There we go. Out of the parking brake shoe, and there it goes.
So here's one parking brake shoe off. It’s the front one, and the rear one should be very similar. Hold on, I think it's a little stuck. There we go. And there's the rear. Before you reassemble the whole brake system, you're going to want to clean it all off with some brake cleaner to get all the brake dust out of there. It's just good practice to do.
Whenever you have parking brakes apart, they actually ride on these metal bumps on the backing plate, so you'll want to put some sort of brake grease or anti-seize on these spots. You don't want to go too thick because you don't want any of this stuff to get onto the brake pads or shoes. But you just want it on there so that they can actually move around and not dig into the backing plates. You'll also want it right on the bottom where it meets the actual cable mechanism, and that way, it won't get all jammed up in there. That way, it'll have a long life. Then we can start putting the parking brake shoes right back on.
Start with the rear one. Make sure the spring's in place. All right, now we'll put this right here. Okay. Now there's a spring down here on the bottom that we need to hook into the hole right here, so we're going to do that next. There we go.
So this is the self-adjuster taken apart. We want to get a little bit of anti-seize on this as well, and that will prevent it from jamming up over time. These are really commonly stuck on a lot of different vehicles that causes the parking brake to not work. It does have reverse thread for the record. Just wipe off the excess before you install it on the car. All right, now we're going to insert it in between the parking brake shoes right where it belongs in the top. All right.
Next, we're going to put the pins in each side with the springs to hold them to the backing plate. All right, we'll start by putting the pin in, and we'll make sure that it goes through the parking brake shoe. Just like that. And then the spring. You turn it 90 degrees, and then it's right where it should be. We'll do the same for the other side.
Now there's one more spring in the top that we have to put into place. It hooks in just like the lower one, but it's a bit easier. And with the spring in place, now you can work your self-adjuster up or down. If you're putting the old parking brake shoes right back on, then you can just set this to about where it was before, and that'll be a good starting point. Ours was right around there. If you're putting new shoes on, then you can have it completely bottomed out with no gap right here.
Okay, now we're going to install the brake rotor. You want to line up this hole with this taper hole right here. Set it into place just like that. Now you can take your Torx head bolt and get it started by hand. Then you want to tighten it up. This is one of those times where the rotor is starting to spin, so you'll want to hold it with one hand and tighten it with another.
Right here is the rubber cap that blocks the hole. That gives you access to the parking brake adjuster. And what you want to do to adjust the parking brake is put a flat tip screwdriver into the hole with it just about at 12 o'clock.
At that point, you can spin the adjuster wheel up, so you want to start off with a down and lift up and do it a couple of times just like this. Then spin the rotor by hand, and you want to just barely hear it touching, hear the parking brake shoes touch the rotor. So we'll do a little bit more. As you adjust it, you want to give it a turn or two and then turn the rotor. As soon as you hear the brake, the parking brake shoes touch the rotor, that's when you want to stop because that's when they're just about out enough to actually work really well. At this point, I can hear the shoes touching the rotor, but the rotor still spins freely, so now I can pull, or I can put the rubber plug right back in the hole. That protects it from water intrusion, and it'll slow down the rust that goes on inside there.
You can see that there's some greasy palm prints all around this along with little bit of anti-seize. We're going to go ahead and spray that off with some Brakleen, and that way, when the new pads and the new rotors go together for the first time, it'll be a nice clean environment for them. There won't be any grease or other material messing up the brakes. Be sure to do the backside as well.
Now we want to clean the caliper bracket because you want your brake pads to be able to move freely within the bracket. This one is kind of dirty, so we're going to clean it up as best we can. We're going to be using a parts washing tank because it makes the job a little bit easier, but you can easily just use Brakleen and a scrub brush. Really, you could use a variety of things. You could probably use dish soap if you really wanted to.
Brakleen works ideal for this and so does a parts washing tank. So we're going to use the parts washing tank and the scrub brush to try and get all the debris off of the caliper bracket slides. Before you put your caliper bracket back on the knuckle, you want to make sure that these slides will move freely in and out. If they're stuck in anyway, then you want to pull them out, clean them really well, add a thin coat of grease, and then put them back together again.
Sometimes if you put too much grease in here, it will actually create a hydraulic effect where it'll always want to push the thing out, and you don't want that to happen. So you always want to use a very, very thin coat of grease whenever you're greasing these slides. Ours are actually in really good shape, and they slide perfectly, so we're going to leave them as is and just mount the caliper bracket back on the car.
You want to reinstall your two caliper bracket bolt and hand tighten them first. Then you can go back with your wrench or your ratchet and snug them up. Now we're going to use our torque wrench to torque these two bolts to 92 foot pounds. Now we're going to put a little bit of Anti-Seize on the caliper slides. You don't want to get any on the rotor itself because it will obviously affect your braking. And now we'll slide the rear brake pad in, the back one, and we'll do the front one.
Now we need to compress the piston back into the caliper. You can use a block of wood for this with a C-clamp. Sometimes the C-clamp by itself will work just fine, so we'll go ahead and compress that piston. All right. And now we'll remove the caliper or the clamp, I should say. And we should be able to slide this right onto the brake caliper bracket. Now we can reinstall our two 14mm bolts, and we'll torque these to 20 foot-pounds.
We're now at a point where we can put the wheel back on, and we'll loosely install all of the lug nuts by hand. With the vehicle back on the ground, you can torque the lug nuts to a 125 foot-pounds. Make sure you do it in a star pattern. The last thing you want to do is get in the vehicle and pump the brakes a few times. And that way, the brake fluid goes out to the calipers and pressurizes the whole system. Now you'll feel a nice firm pedal, and you're safe to start the vehicle.
Thanks for watching. Visit us at 1AAuto.com for quality auto parts, fast and free shipping, and the best customer service in the industry.
