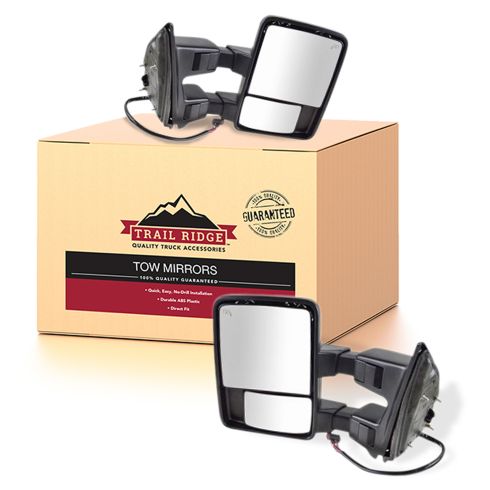
Hi everyone. Sue here, from 1A Auto. Today we have our 2013 F250 PowerStroke in the shop, and we were in a little bit of a fender bender. No, not fender bender. Looks like a branch came out, or something, but we're going to replace these mirrors with our mirrors that we sell at 1A Auto, the Trail Ridge. Now, it comes with everything. These are power mirrors that fold in. they go out for a white trailer towing. If you need this part, or any other part for your car, click on the link below and head on over to 1aauto.com.
You're going to open the door first. Here, we have the passenger panel and we have our little tweeter speaker up here and that's got to come out. We also take the whole panel out, but don't panic, because it's pretty easy on these Fords. They make it nice and simple. I've got a little body trim tool. I'm just going to push in behind here, because it's held on with clips, and just pull those clips right out of there.
Then, we have the connector for the tweeter speaker, down on the bottom. Push there on that tab, set that aside. Now, you're going to come right in the center here, and there's this little plastic door. We're going to pop it out and there's two bolts right there. Those are seven millimeter, so I got my little quarter inch ratchet, take these right out. There's two more, I do believe, down below.
So we have two here, and we come down, we have one, two, two more, and they're all seven millimeter. Now, with this door, we have the four bolts out, two here, and two down here, we've got our tweeter speaker taken out, and we're just going to lift up on the panel. Push down on the lock, just to give it clearance, and then you're going to have a wiring harness, for the actual switch, the window switch, so we're going to take that right out. Matter of fact, I might just bring that right back up, rest it for a second.
So if you need to pull the switch area out, just lift up on this plastic. I used my thumb, so it's not that hard. They're nice metal clips, so there's not those plastic clips that always break. I'm going to just unplug it here. Now, the switch is out of the way. Now, the door panel's free. The next two crucial points is I'm going to take the speaker out, because that harness to that operation of that mirror goes down inside the door panel.
I could take this all out of the way, but that's not going to help me get to it, but the speaker has a nice hole behind it. So seven millimeter socket and there's four of them. We'll take all four out, unplug the speaker, and get it out of the way. Just grab your speaker, pull it forward. There's the connector. Push down on that tab, disconnect it. I'm going to put that up high, because I don't want to damage it.
Now, we can actually see in here and hopefully find this harness. I feel it right there. This one's down. Here it is, right here. So we've got to get this out of the way. I have a little handy tool here, pry bar, plastic. There it is. Now, if that speaker was in the way, I'd be like this. Took two seconds, I think it's worth it. so you have the little red tab, that's a lock tab. Push that back. Now, you can push on that gray tab, pull that connector out.
Here's the plastic on the inside, holding that harness. From the inside, we'll work that out. See if there's any more clips? Nope. So now, we're ready to take the mirror out. There's four mounting bolts. I'll show you, right behind here. Pull down this little rubber barrier, and you have one bolt here, there, and then behind these two plastic caps. Just push your finger in there. They're soft rubber.
So four mounting bolts, and that mirror, and the harness will come right through the outside. So 11 millimeter socket, and I'm going to, because of the door depth, you can see how deep that is in there. I can't put my fingers in there and grab that. I don't want to rely on my socket to hold it, so I've got a little pocket screwdriver here, that has the magnet on the end. Viola.
Now, I'm going to stay on the outside of the door, so that I can hold this mirror and I'm going to find that last nut, lift the mirror up, take the pressure off of it. I can't see, so I hope that I don't drop this. I think it's right there. Now, with both hands, I can grab this mirror, lift it up, wiggle it out, so just pull it right up. Then, just guide it through, once it's in, secured in hands. It weighs about as much as a newborn baby.
Here, we have the mirrors. The factory one, that I just took off with, the busted marker lamp, and the blinker lamp. Here, we have ours, that we sent from 1A Auto. It is a Trail Ridge brand. They are set up so good for aftermarket setup, it's identical to the factory, you can't get any closer, for a fraction of the price.
Pigtail matches. Comes with a safety lock clip on it. The four mounting bolts. This mirror does exactly that the factory does. It goes out for towing, and in for non towing, it folds itself in. it has the sockets and it comes with for 194 amber bulbs. It comes with the trim piece. It comes with the new, which I like better, is the gray smoked lens, other than the amber lens.
If you need this part, or any other part for your car, click on the description below and head on over to 1aauto.com. It comes with directions and it comes with amber bulbs for four of them, for both sides. We're going to put these right in. the reason they're amber, and the original might be a clear 194s. These are amber, because our replacement is a smoked lens instead of an amber lens.
When this actually turns on a blinker, or a marker light, the orange actually shines through. So you'll be legal in several of the states, by law. Line it up, push it in. There we go, that one ... Now, I can really grab onto that. It's a tight fit.
So the mirrors, I have the kit here. We sell it as a kit or individual mirrors. We bought the kit, so we could get the chrome piece and the market lights. They do come with the light, but there's a left and right. The way you can tell on that, is this tab. There'll be one on the lower side and one on the other lower side.
If I grab the other one, you'll see that the tab is actually up higher than the other one. So this is meant to go on the driver side and this is the passenger side. So you have a two tabs. The gray one is the two tab one. The reason for this indication, there's three on that one. There's three tabs on that one, cut out. The reason for that is one's a marker and one is an actual turn signal bulb, so they want to be on the top and the bottom, in the proper position.
We're going to line this up. make sure you get your wires inside, right inside there. Line it up, just like a pocket door, and slide it in, it snaps right in. Next, we have the chrome piece at the top. It's got four tabs, two side guides, and the bottom tabs. That's going to go just like this. Snap it down, push it in. Done.
Now, it comes to installation. We have the whole area. I just wiped it a little clean. Sometimes, some dirt gets underneath there, which is understandable. These are storage for shipping. These are just for safety. You want to make sure you pull those off, discard them. When you get your new mirrors, and you take them out of the box, you'll notice the foam is sitting up like this.
That's because the packaged mirror ... the nuts, for the studs, is down below the foam. So don't forget to take these all the way off, all four of them. It comes with the new nuts. Place them down. I'm just going to put it there for a second. Do this to all four and take the new supplied nuts with the washers. Make sure you use the ones that it comes with, not the old factory ones.
See how I'm going to push the new foam piece down around that bushing. We have to fish the wire through and that was through that square cutout in the body. Bring that right down. Fish that right through. Line up your four mounting holes. I'm going to use the magnet to find the bolt, the stud sticking out. Without looking, hopefully I center that, start that.
I just need to start one of them. Once I start that, I can let go. Come right back over to the other side. Now, we're going to start the other three bolts. I'm still going to use my magnet to start them. The new mounting nuts for the mirror are 10 millimeter socket, not 11. Now, I'm going to bolt this down. I'm going to alternate back and forth, just like if I'm building a flat object down.
I want to keep working it around, because there's a water cushion behind here with a seal. The idea is to seat it equally so there's no gap. Looks good. I took this off our old original factory mirror. It's just the clip that holds the harness on the inside of the door panel through that mounting hole. You just take it off the old mirror and mount it on here. I'm going to use electrical tape only because you ...
If you use a plastic tie, just make sure you don't squeeze the harness too, too tight. You just want to use tape preferably. Even the manufacturer, that's what they use, is electrical tape. It doesn't have to be tight, just has to be on. Now, we're going to run that right through that hole. There's the clip that I just put on and put it right through there.
Line it up until I hear a click and the red tab falls right in place. The reason for this is because if it's free floating back there, the window goes up and down. Here's the window guide, in the front. You don't want that harness hitting, and rubbing, and wearing it to the wires. We should be all set there. Now, we're going to reconnect that speaker.
I almost ... See what I did? Learn from my mistakes. Make sure you put that up first. Now, we got the connector for the speaker. Line it up, click it in. Perfect. That was four of them. It's a seven millimeter socket. I like to start all four before you snug it down. Two. I'm going to put these rubber boots on so don't forget. Just guide it on the side, on one side, and then push down. Pops right in.
Don't worry about this. It will stick, because when you put the tweeter speaker on, it'll stay up in there. Reconnect this before we put the panel back on. There we go. When I put the panel on, as you can see, the design of it, these are all hooks. It's really a nice design. No plastic pieces to pull out. It just lifts right up, nice and sweet. It'll indicate, put the bottom indicators on. We got the window switch harness.
Okay. Now you've got your door lock, the actual button. That's going to go into that slot. Okay. You can feel how this basically falls right in. Nice design. Now, we're going to take the four mounting bolts. The two here and the two on the bottom, put it together. Now, we're going to reconnect our window switch. Just match up the connectors, put it together. This is the easy one, it's just two clips.
Once the wires are cleared and lined up, just snap it down. We're going to put our cover on these bolts. You've got two hook style clips and then two flat clips. I'm putting the hooks on the top. Guys, up in. Then, it just snaps on the bottom. Now, we'll move over to the tweeter speaker. I'm going to connect it first. See that connector on the bottom? Line that tab up with that lovely sticky paper.
You get the two middle tabs, one here and one there. Then, I just do a little quick snap in. That's it, we're done. Let's go to the other side. Now, we're going to do the driver's side on this truck. The only difference is the actual window switch. We have the switch that moves the mirror around, in and out, folds the mirrors in, and this brings them in and out for the trail height. Then, you also have the heated seats right here.
We're just going to lift this right up with a body tool and disconnect it. Once this is disconnected, everything is pretty much the same as the other side. Now, our mirrors are installed. The mirrors come with this little tag on it. I left it on so that we could see where it's mounted. Basically, it's telling you that you have now installed some power factory mirrors.
Mirrors that are aftermarket, but just like the factory, the sense that they have the telescopic and they fold in. You need to program the module to do it three times with the actual module on. They do manually move in and out for safety reasons, but try to refrain from doing it manually as much as possible. Now, we're just going to fold them in.
We're going to do this three times. Then, in. Let's make sure that the actual glass moves. I'm going to fold them in. I'm going to do this three times. Now, you have your beautiful new Trail Ridge mirrors and you're ready to go.
Thanks for watching. If you want the parts to do it yourself, check out 1aauto.com, the place for DIY auto repair.