Replaces
Part Details
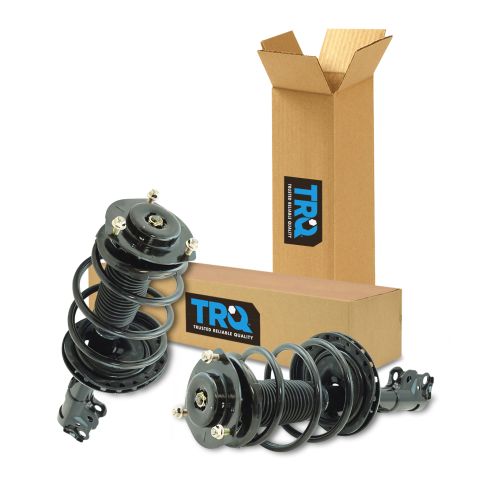
TRQ fully loaded shocks and struts are manufactured using premium raw materials and calibrated to restore original ride comfort. TRQ shocks are fully loaded featuring a pre-loaded bearing plate, upper and lower spring isolator, upper spring seat, coil spring, boot kit, and premium strut. TRQ recommends replacing your shocks or struts in pairs to ensure even wear of components and improved ride comfort. All products are fit and road-tested in our Massachusetts R&D facility to ensure we deliver on our promise of Trusted Reliable Quality.
Product Features
Replacing struts used to require specialized tools to compress, remove, and transfer the old spring and mount. Our Pre-assembled, complete strut & spring assemblies come with all new parts and make the job much quicker and easier for the do-it-yourself mechanic.
Strut & spring assembly contains:
Item Condition:
New
Attention California Customers:
 WARNING: This product can expose you to chemicals including Chromium (Hexavalent Compounds), which is known to the State of California to cause cancer, and birth defects or other reproductive harm. For more information, go to www.P65Warnings.ca.gov
Lifetime Warranty
This item is backed by our limited lifetime warranty. In the event that this item should fail due to manufacturing defects during intended use, we will replace the part free of charge. This warranty covers the cost of the part only.
FREE Shipping is standard on orders shipped to the lower 48 States (Contiguous United States). Standard shipping charges apply to Hawaii and Alaska.
Shipping is not available to a P.O. Box, APO/FPO/DPO addresses, US Territories, or Canada for this item.
Expedited is available on checkout to the United States, excluding Alaska, Hawaii.
Final shipping costs are available at checkout.

Created on:
Tools used
Hey, everyone. Sue here from 1A Auto, and today we have a 2013 Toyota Camry in the shop. I'm going to show you how to replace front strut assemblies. If you need any parts for your car, click on the link below and head on over to 1AAuto.com.
So to take the tire off, you need a 19 millimeter socket. Take the tire off. We have to take the ABS off, because I have to take it out of the knuckle housing here. And I've got to take the wire off the strut. So I'm just going to use a body tool to get underneath this clip and see if I can slide it, just detach it. There we go. I can reuse it. Sweet.
So now if I turn it this way, you'll see, it looks like it could be a 10 millimeter bolt. I've got to get a 10 millimeter, and disconnect that ABS sensor where it mounts in the knuckle. Break that free. Let's hope it comes right out. Wonderful.
I'm going to put the bolt back in the ABS mounting hole. I just like to do that so it doesn't get lost with the whole knuckle being out. It's just easier.
Now we've got to take the sway bar link and detach it from the strut. Now I'm going to take the strut away from the knuckle. And these are 22 millimeter, wrench and socket. You can do this by hand or use an air tool. There's two bolts.
I'm going to take the flex hose bracket and ABS wire bracket off of the strut, 12 millimeter socket. Now we can lower it and undo the top of the strut bolts.
So these are the top three mounting studs for the strut tower, which is the strut mount right here and the strut assembly. This is a 14 millimeter socket. Break them free. I'm not going to take them all the way out yet until they're all free. Now, remember, I have nothing attached on the bottom part, so the last one is going to be rather taunt, because I have to hold the strut with one arm at the same time. Set this aside. I'll just reach through the fender well here. See how I can hold onto the strut and move it? Now I can freely use my right hand, or leftie, and lose the nuts. I'm going to put them back up here. The new strut does come with new mounting nuts, so actually, let's discard them. Now I'm going to reach underneath here, and there is your strut assembly with spring and mount.
Here we have our factory strut on our 2013 Camry. This is the right front strut. And this is our replacement from 1A Auto. Bracket is identical, mounted--it's even got the sway bar link bracket nice and welded. Same amount of coils. It comes with a new strut mount, new mounting bolts, new bushings inside, the rubber bushing inside, with the dust boot cover. And a nice rubber seat here. Same ride height as the factory. If you need this part or any other part for your car, click on the link below and head on over to 1AAuto.com.
So now with the new strut assembly, I'm going to bring it right up through the fender well and line up the three mounting bolts. I already have the new nuts in my hand here. Just go onto the mount. And then you can let go. And then we're going to torque that to 63 foot-pounds. 15 millimeter socket. This back one, you just have to move the cowl a little bit. See how the ear pops up? Just make sure it goes back into the slot. Got one here, and then one over there. There you go.
I know that when I took that out, the nuts were in the back. The bolts went this way. I'm going to put the top one in. There is no camber slot or cut out, so I know that when I want to do an alignment, I want this strut pushed in as far as it can. It's pretty much there because there is no, at all, ovalness or cut out. So that's going to be pretty close. Put the nuts back on.
So now we're going to tighten the strut to the knuckle. The two bolts that mounted here. It's a 22 millimeter wrench and socket. I'm going to use my half inch air gun. The torque specs is 214 foot pounds, and, frankly, I don't think everybody wants to see me try to do that. So I'll use my judgment in the sense that I'm not going to reef on the air gun. I know what the air gun can do for foot-pounds, so I know it's tight, and it'll squeeze. Knuckle's good.
Now I'm going to put the flex hose bracket with the ABS wire to it, back on the strut tower. Now this has nice little divots in it where it's indicated. See the metal tab, how it's off center, it has an angle? It's going to go right in that spot right there and mount right like that. And now I can take me flex hose and sit it up just like that. I started that by hand. 12 millimeter socket. Tighten that down. Now we have the ABS wire with the sensor on it. There's that little plastic clip that I took out of the old one. So that plastic clip goes right into that premade slot. Clips right in, bring it around the back, now you can line it up in the actual hole in the knuckle for the ABS sensor. That fits right in there. Make sure it's flush and then put the mounting bolt in. This is a 10 millimeter socket. Good to go.
19 millimeter socket. I'm going to hand tighten all the lug nuts, then I'll lower it down and torque it. I'm going to start at the bottom and I'm going to go in a star pattern. And the wheel torque for this Camry is 76 foot-pounds. Double-check everything
Thanks for watching. Visit 1AAuto.com for quality auto parts shipped to your door. The place for DIY auto repair. And if you enjoyed this video, please click the subscribe button.


