Brought to you by 1AAuto.com, your source for quality replacement parts and the best service on the Internet.
In this video, we're going to show you how to replace a serpentine belt tensioner on this 2006 Chevy Malibu. Your serpentine belt tensioner might be going bad if notice that your belt's a little bit loose, or maybe your alternator squeaks a little bit. Tools you'll need for this repair are flat blade screwdriver, 10 and 15mm sockets with a ratchet, T25 Torx driver, 3/8 inch drive ratchet handle and piece of pipe for some extra leverage.
You're going to want to remove your intake tube. Use a flat blade screwdriver to loosen this clamp here. Pull out this tube, carefully. Use a 10mm socket with a ratchet or wrench and remove this bolt here. Then, over here, use a T25 Torx driver and remove the two screws that hold the top of air box down. Take this out of place. Just pull your tube off and you bring it here. Underneath, you can see, right here, there's a little tab, a little safety tab, pull that out and then press this tab here, disconnect that and take your intake tube off.
Now, we're going to remove two 10mm bolts, one here and one back here. Hit the fast forward button here as I just remove those two bolts and those are 10mm bolts. Removing those two bolts, now, allows you to pull your air box up and out. Now we want a 3/8 inch drive long ratchet and we're going to take the ratchet and here's our tensioner and down at the bottom of the tensioner is a 3/8 inch square hole. I've got my ratchet down in there and I got a piece of pipe. It gives me extra leverage. Move that tensioner counterclockwise. It takes the tension off the belt. Slip the belt right off my idler pulley there, and let that come back nice and easy.
Now, to change my tensioner, it's just a 15mm bolt right here. Use a little fast forward as I remove that bolt. Your tensioner comes up and out.
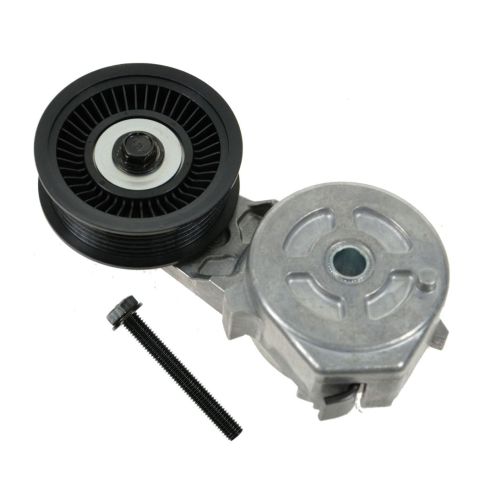
Here's our old tensioner and a new tensioner from 1A Auto. There are just minor cosmetic differences. It's going to bolt in there exactly the same. Take the bolts out of our old one, and put our new one in there. There is a little nub here and there's actually a hole right here around one-o'-clock. Jjust put your bolt in, make sure you get that nice and flush, and just tighten the bolt in. Speed it up here as we start that bolt and then start tightening it up with our wrench. Tighten it up to about 35 foot-pounds.
At this point, you're ready to put the belt back on. If you wanted to replace your belt, you can just check out our other videos and there's a couple extra steps that you do have to do, as you can see we did augment our tensioner with a new belt but if you don't replace your belt it should just be in the same place, basically, all routed, other than under the idler pulley that's just above the tensioner. To reinstall, put my wrench right down in and make sure it's secure. Pull it up as far as I can and take my belt put it right around that idler, slowly let go of my wrench, and we should be all installed and looking good. Speed up. Make sure you put that damper back on with the two 15mm bolts. Put those in and tighten them up nice and firm, to probably about 35 to 40 foot-pounds.
Now, you're going to want to put your air box back in place. There's two round rubber nubs that go in the two holes in the front here. Tilt it down, get those to take place, and then you have to move your A/C line out of the way a little bit, and make sure it pushes forward and down and a long bolt goes into the back. We'll speed it up here as we tighten up those bolts and get that air box in place.
Bring our air duct back over and plug in the sensor. Now, remember this little safety plug. You just want to turn it over and put that in place. Put our duct down and make sure it's on the engine correctly and all the way. To hook up on your air filter side here, make sure it's tilted way down and then there are three teeth that go in. Make sure it goes on correctly. We'll speed it up here as we put those two T25 Torx screws in place and then the bolt for the air duct near the radiator. Actually, pull this rubber grommet off the hose, put it into the intake first and push the hose down into it, and make sure we tighten up our intake clamp here.
We hope this video helps you out. Brought to you by www.1AAuto.com, your source for quality replacement parts and the best service on the Internet. Please feel free to call us toll-free, 888-844-3393. We're the company that's here for you on the Internet and in person.
