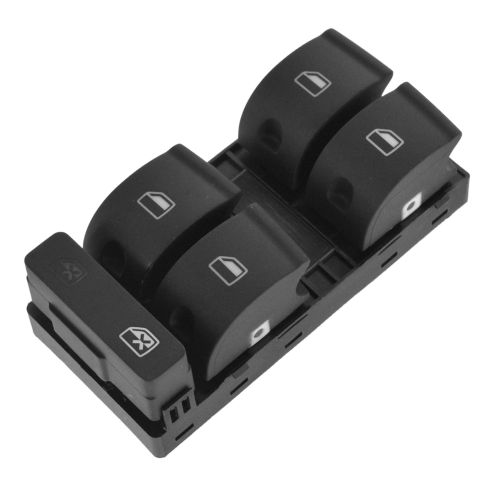
1AWES00214-Audi A4 A4 Quattro S4 Front Driver Side Power Window & Door Lock Switch TRQ SWA60358

Replaces
2007 Audi S4 Front Driver Side Power Window & Door Lock Switch TRQ SWA60358

Product Reviews
Loading reviews
4.94/ 5.0
18
18 reviews
Very Satisfied
January 24, 2017
while the switch is not OEM, it looks, fits & works just like the OE.
the $ saved vs purchasing the OEM is significant.
even better, was the utube video for installation.
the instructions are spot-on.
the production quality of the vid is also excellent.
even though i had my own foreign car repair shop back in the 90's, it was still very helpful
the entire process took less than 30 minutes with no surprises.
Like a glove
March 1, 2017
Exactly as the video showed, and it was a direct match...as well at a substantial savings over OEM...
Great Service and Support
March 2, 2017
Excellent service from placing an order, delivery time and installation support!
Master Power window switch
July 8, 2017
Watched video, part fitted & works great, could not have done it without that video
Perfect replacement!
July 27, 2017
After living with a sporadically failing switch for years, my only regret is not doing this sooner! The installation video made it very easy (last step to removing old switch took some wiggling to unhook the clips on other side) and it was well worth the price and effort! It's nice to have all functions back again - auto up/down and child locks - like a new car!!
Replacement fits perfect.
June 26, 2018
The installation video that goes with this replacement part was very well done. Thanks 1-A for being the best.
100% Satisfied
August 10, 2018
Ordering online was so easy. This was the first time using 1Aauto and I couldnt be happier. My order arrived on schedule and was so easy to install. I will definitely be using 1Aauto for future needs and recommending to all my friends.
Master window switch
September 21, 2018
Part looked and fit like an original part,work good, customer was happy I was able to save them a lot of money. Highly recommended.
Perfect fit, works great, easy to install
November 5, 2018
These guys are doing God's work. From the easy to understand website that tells exactly which model the part will fit on, to the awesome YouTube tutorial they put together. Sure you can find this part for a bit cheaper elsewhere online, but you don't have the certainty that it's quality - and the fact that they took the time to make the tutorial in the first place is what made me want to buy directly from them. Probably saved a few hundred bucks doing this myself. And I'm not very mechanically inclined
A4 window control switch
December 19, 2018
Control switch worked perfectly. Appreciated video for install. Will be buying more products!
Master window switch
July 4, 2019
Looked up part by year make model. Took about five minutes. Arrived a day earlier than what was expected. Plug and power to the windows. Oh yea the how to video was on point. Thank you
Excellent replacement part
August 18, 2019
Part matches old part, the installation video guided me through the entire process. Do not hesitate if you master control switch goes bad. Use 1aAuto and fix it!
Great fit & fast delivery
February 4, 2020
Part was perfect and working great. Videos help for first time doing the jobs.
June 30, 2020
Worked perfectly
Works well, great video
August 19, 2020
I'm not a mechanic by any stretch of the imagination. I watched the video and installed the switch with my 15 year old son. The video made it easy. Great bonding experience. The switch works great on 2007 Audi A4 and looks like the original.
Window switch replacement and DIY help video PERFECT
February 27, 2021
My switch array for my power windows broke one day and I thought it was going to be complicated and expensive to fix. Luckily 1A Auto's DIY video was one of the first search results and perfectly explained the repair steps. Their replacement switch looks exactly like the original Audi part. It functions perfectly with a very nice *click*. Shipping was also precisely as described and came right on time in the middle of a major snow storm in February. I will be going back for all my replacement parts.
Great sevice!!!
June 1, 2021
It was was easy to order and shipped fast.
Easy to install!
October 19, 2021
Works great!
Customer Q&A
No questions have been asked about this item.
Audi is a registered trademark of Audi AG. 1A Auto is not affiliated with or sponsored by Audi or Audi AG.
See all trademarks.


