I'm gonna take off the passenger's side front tire. I'm gonna use a 17-millimeter socket. And when I go to remove this last lug stud, I'm just gonna hold the wheel to prevent it from falling. I'm gonna grab the wheel and slide it off. We're gonna take the shield off. There's all these screws all are along here. They're 8-millimeter. They should be one there, one there, and then the same on the other side. Use an 8-millimeter socket to take all of these out. Should be one right there as well. All right. And then just pull this down, slide it back and I'm gonna find the coolant drain right over here and I'll just use a Phillips head screwdriver. Make sure you have a drain bucket underneath. There we go.
Now, I'm gonna remove these screws from the inner fender well, right here and here and under here. Pull back on the inner fender well to gain access to this panel right here. There's a 10-millimeter bolt, take that out. I'm gonna take this sway by bushing out of the way. I'm gonna use a E12 socket, like a star socket to take this bolt out here. Get that out and take this bolt out up top and just take the bracket off. I'll just use a straight blade screwdriver. Just pry it out. I'm gonna take this sway bar link off on the sway bar side. We'll use a 15-millimeter socket and an 18-millimeter wrench to prevent the stud from spinning. Take that off and then I can slide that off and then I can take the bushing off a little bit easier and just slide the bushing off. That'll give me a little bit more room right there.
We have the radiator out of this vehicle for another job that we're doing, but the thermostat is located right here. You don't necessarily have to have the radiator out to get to it. There is a lot more room so you can see you can reach your hands in there, but a lot of it you can get from the side right here, but the thermostat is right there. Taking the sway bar bushing out and one of the links off helps out a lot. I'm gonna take a straight blade screwdriver, loosen up this worm clamp right here on the backside of the thermostat. I'll just grab that clamp. And if you can grab the hose, try to wiggle it off. I'm gonna have a drain bucket underneath to catch any coolant. Just fold this hose out of the way. I can access this hose and I'll just take a straight blade screwdriver, loosen up this worm clamp. It's a little bit harder to get to. Now, I'm just gonna use a pick and try to get under here and move the clamp over and try to get under the hose without ripping the hose. Let's try to use a pry bar or a screwdriver and just try to get it off a little bit. There we go.
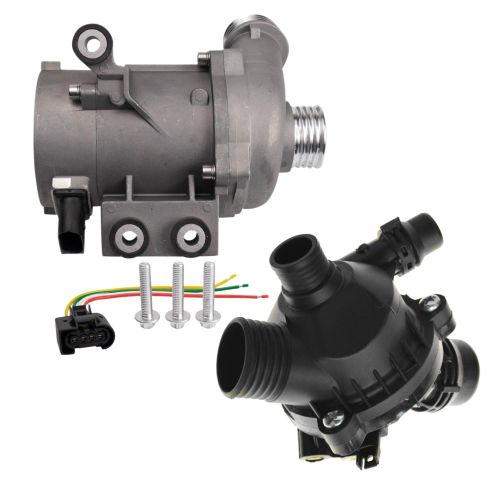
Now, towards the front of the vehicle, we're gonna take these hoses off and use a pick. Just get underneath, there's a clip right here. Just slide that out just like that. Scrap that hose, just shake it off. Slide that out of the way. Now, I'll take this hose off, use a pick to get underneath the clips on the top side of this hose. I'm just trying to find it. There we go. I'll just slide it up and grab the hose, just wiggle it off. There we go. And this hose because the radiator is not here, I can take this out. Otherwise, the radiator would still be attached. From underneath here, we need to disconnect this wire right here. Just use a little pick to get underneath there. Let's try not to pull just the wires. If you can try to get the connector itself, slide that connector off. Now, I need to take these two bolts out. I'm gonna use a 10-millimeter swivel socket. If you don't have a swivel socket, you can try to get in there with a universal joint and slide that one out. You can grab the thermostat housing and just twist it and you can slide it out right there. Slide the new one in and try to get these bolts lined up and just snug those bolts up. That's good. All right. Take this connector, line it up and lock it in place. That's good. And take the lower radiator hose and just line this up. It is slotted so it only goes on one way, and lock it down in place.
I'm gonna take this hose, position that clip back where it goes, and slide this over, lock it down and take this upper hose, get that in position. Push that all the way on and push the worm clamp in position and take the screwdriver, tighten up that worm clamp and pull this other hose back in position. Slide that on and the worm clamp and tighten this up. Let's put this bushing back on. Slide the sway bar up and flip it around. All right. Get it close to where it needs to be, put this plate on. Now, the threaded part is gonna go down to the ground and the other part is gonna go up, then slide that on. Take one of these screws, put it underneath, get that started there. Take the other one from up top and tighten those down. And just take this panel, slide this back in position. Take this bolt and get this started right here. And if you have that nut that goes over here, over that stud, put that nut on. This vehicle doesn't have it. Tighten that up and slide the inner fender well back in position.
All right. Get these screws in and snug those up and put this screw in right there and right here. Another screw right here. And if you have push pins or other screws, put those right in there and tighten them down. Put the sway bar length back in, put the bolt back on and then torque this to 48 foot-pounds. And put the drain plug back in and just snug it, not too tight. Now, reinstall this panel just to get it lined up. That's good. Take all the bolts, I'll get those all started first. Now, just go around and tighten them all down. Put the wheel on. Now, I'm gonna torque these lug bolts to 110 foot-pounds in a star pattern to tighten the wheel down evenly. And then just go around again. And you wanna fill the system with the appropriate coolant. There is a bleeder screw right here. If you need to access it, you can take this piece off right here and then you can loosen that up and when coolant comes out of there, then you can close it up and make sure this is topped off right here. There's a little key here telling where the min and the max is.
At this point, I'm gonna start the vehicle up, let it run, let it idle for a little bit, let it stabilize, then I'm gonna put the coolant cap on before it gets to operating temp. So, the coolant level dropped a little bit, so I'm gonna top it off, put the cap on, let it run, let it heat up. Make sure you're constantly monitoring the temp gauge. It's always a good idea to turn the heat up while you're warming this up and just make sure you feel heat coming out, especially when the temperature gets up. If you see the temperature is already up there, just make sure the heat is coming through. You can always hold the RPMs up a little bit while you're doing this. Just constantly monitor that. Just make sure the attempt doesn't go in the red. After the vehicle has run for about 10 minutes, it's warmed up and you actually feel heat in the dash, then you can shut the vehicle down and let it cool down. You don't wanna take this cap off while it's hot. Once that's cooled down, take the cap off and adjust accordingly.