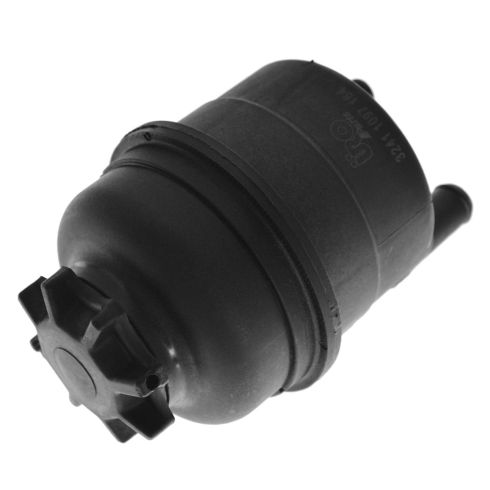
What's up guys? I'm Andy from 1A Auto. In this video I'm going to show you how to replace the power steering reservoir on this 2001 BMW 325xi. If you need this part or other parts for your vehicle, click the link in the description, head over to 1aauto.com.
What we want to do is suck some of the fluid out of the power steering reservoir. We're going to use this fluid transfer pump. Take the cap off. We actually sell these pumps at 1aauto.com. Suck as much fluid out as we can get. With this pump I can actually get a good amount of the fluid out. Normally if you have different hoses, they can't get as much fluid out, so this works actually really well.
I'll just take the cap, reinstall the cap so I don't get any dirt in there. We're going to remove this piece. I just want to take some side cutters. Remove these push pins. Be careful not to cut them. Pull that out. Now we'll just grab this, pull this aside. There is a couple of clips on there. If it's not coming out too easy, just take a straight blade screwdriver and push those in. Disconnect the mass air flow sensors, push down. Wiggle the connector off, set that aside, take a straight blade screwdriver, loosen up this worm clamp right there, just like that. You can take that snorkel off right now.
Next, I'm going to take these two 10 millimeter bolts out. You could take this top cover up first if you want to unclip it, pull that off, pull the air filter out. But I'm going to keep that all together, use a 10 millimeter socket extension and electric ratchet. If you don't have an electric ratchet, you use a regular ratchet. Loosen these up. Take those two bolts out. Now you can grab the air box all as one and just slide it up.
I'm just going to loosen this bolt up right here. I'm going to use a 10 millimeter socket extension and ratchet. Just loosen it a little bit. I'm not going to take it out. Then I'm going to take these two bolts out for the bracket. I'm going to use a 13 millimeter socket extension and electric ratchet. If you don't have electric, just use a manual one. Take those both out. Use a magnet, grab that other bolt. Now we can grab this housing and slide it over here. Now when I take these lines off, I'm going to leak some fluid. You can try to use some kind of a tray to grab the fluid or a drain bucket that fits in there. I'm just going to use these absorbent pads. I don't want to get any of the fluid into the alternator. So stick these underneath here.
So you are going to have to cut these clamps off or try to spread them apart. I'm just using a right angle pick just to try to spread these apart. You're going to have to replace the clamps when you're done. There we go. Try to separate that. See that worked pretty good. Just move that clamp completely. We'll do the same with the other one. Now we should be able to twist these. These have been on for a while. These are different sizes. There's the fluid. So you're not going to get them mixed up, so the new one's going to have different sizes there as well. I'm going to take this bracket off. If you need to, loosen up that bolt a little more. Keep in mind where the big hose was that goes right in this area of the bracket. Set that aside.
Here we have the old part. Here's the new power steering reservoir from 1aauto.com. The shape is the same. The ports are the same. These have little caps on it to keep the dust out during shipping. The cap is the same. On the inside there's actually a filter in there, so it's a good idea to replace this every once in awhile. Get yours at 1aauto.com. You'll be ready to rock and roll.
The new reservoir, slide it through the bracket. Slide that on like that. Looks good. I got a new clamp. I am going to slide this over the hose before I put this on. Do the same with the little one. Just like that. Take that protector off. Slide the big hose on, and do the same with the little one, just like that.
So we want to position the hoses kind of how they came off. So what you can do is line the bracket up and position them in the proper location and we'll take a screwdriver. Tighten up this worm clamp, not too tight, just snug. It is plastic, so just snug that up. That's good. We'll do the same with the other one. Right now I can take these absorbent pads away, slide this back in position right there. If you have to adjust the hoses, you want to do that now, make sure it's not hitting anything down below. Take this bolt, put this one in here, and then same with the other one.
I'll take my 13 millimeter socket extension and ratchet. Tighten it up, just snug. That's good. Then we'll take it and tighten this bolt up. Not too tight, just snug. You don't want to crack it. Move those. Can reinstall the air box, put that back in position. Move this clamp over here, install these two bolts here and here. Take a 10 millimeter socket extension and ratchet. Tighten these bolts up. Just snug. That's good.
Use a straight blade screwdriver. Tighten up this worm clamp, snug and plug this connector to the mass airflow sensor, lock it in place. Take this intake, put this back through the air box, clip it in place. Take the push pins, get these lined up. I'm just going to get them all started first and then lock them down. Lock it down.
All right, now we're going to add some fluid. Take the cap off, set it aside. Take a funnel, make sure you check your owner's manual for the appropriate type of fluid. Sometimes it actually says on the cap, what type of fluid. So you want to check underneath the vehicle, make sure you don't have any leaks, so everything's dry. That's good.
So just going to check the fluid level. Now a lot of the fluid came out when we were changing the line, so the fluids a little on the high side, which is okay. What we're going to do is we're going to start the vehicle up and turn the wheel back and forth. Stop to stop. It is going to aerate the fluid a little bit. So you're going to have to let it sit and recheck the level. Top it off again.
Now I am going to have the wheels up off the ground. That's just going to make it so there's no a pressure on the steering rack when I'm doing this. All right, so I'm just going to stop to stop. I'm just going to do it about eight times. Then I just take the cap off. It's down a little bit. It actually didn't get too air aerated, which is good. Use a little more, just use the funnel, so we don't spill it. Yeah, that looks perfect. A little bit on the high side, but that's okay. I'm going to put it down in the ground and do the same thing on the ground and then road test it and recheck my level and adjust accordingly.
Thanks for watching. Visit 1aauto.com for quality auto parts shipped to your door, the place for DIY auto repair. And if you enjoyed this video, please click the subscribe button.