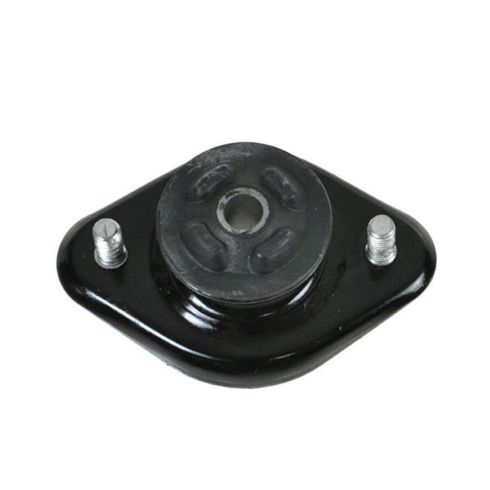
What's up guys? I'm Andy from 1A Auto. In this video, I'm going to show you how to install this shock mount kit that comes with the bump stop for both sides of the rear of this 2001 BMW 325Xi.
If you need these parts or other parts for your vehicle, click the link in the description and head over to 1aauto.com. All right, I want to loosen up the lug nuts or lug bolts. I'm going to use a 17 millimeter socket and a breaker bar.
Now, with the vehicle lifted up, I'm going to take them off with the same socket and a ratchet. When I go to take the last bolt out, I'm just going to use the socket. I'm going to make sure I hold the wheel because I don't want the wheel to fall because once I take these lug studs out, the wheels are just going to fall. I grab the wheel, slide it off.
All right, I am going to crack this bolt free before I support this, but I do want to support this rear suspension before I take this shock off completely. Otherwise it's going to drop significantly. That'll support the spring from... for the suspension.
So I'm going to use an 18 millimeter socket and a breaker bar, loosen this bolt up and it's pretty good. At least it's not frozen in there.
Now I'm going to lower the vehicle and support it with a Jack stand. Right, so I'm going to support it right here. I want to put it somewhere where it's not going to slip off. If you put it over here, you put it right here just be careful to make sure it doesn't slip off. I'll put it right there. It's going to support it a little better and it shouldn't move. So, I'll just lower it a little more, and that's good.
Just enough to support the suspension from going further down. From inside the trunk, your vehicle may have a battery cover, you may have to remove that. And there may be some clips in this panel right here, right there. This vehicle does not have those. So I'm just going to peel this out, pull this away. Then you can access the top part of the shock right there.
Now we're going to take these two nuts on the sides out and then we can take the whole shock out with the mount. I'm going to loosen these two nuts up. I'm going to use a 13 millimeter socket and this air ratchet, we actually sell this from 1aauto.com. You can use a regular ratchet. That would work fine.
First, I'm going to break the nuts free and then loosen them up. So I'm going to take this bolt out. This is an 18 millimeter socket and I'm going to use this air ratchet. You can use a regular ratchet. Take that bolt out. You can slide the shock right down.
So there's a couple of different ways we can get this mount off. What I'm going to do is use some locking pliers. I'm going to lock it on the shaft up here. If you are reusing the shock, locking it up here is not going to affect it because the shock's not going to bounce all the way up to there, so that's not a big deal.
Or you could take a wrench, put a wrench on this nut, loosen it up, and then find another smaller wrench that fits on the end of this and try to take that off. The problem with that is a lot of times these strip out. So, we'll do it this way. Lock those on there and I'm going to use this impact wrench and a 17 millimeter socket. Take this off.
There we go. Take the nut off. Then you should be able to take the locking pliers off. You should be able to take a hammer. This is really rusted, normally this should just slide off, but I'll just take a hammer and knock it off.
There we go. Just put it on something solid. Hammer that off and there it is.
Here's the old mount. Here's the new mount that comes with the bump stops and boots and a kit. You can get these at 1aauto.com.
The mounts have the same studs, it has the same rubber bushings, flip it over, looks the same. Get yours at 1aauto.com and you can do it yourself. It's a good idea whenever you're replacing shocks to exercise the shock like three to five times, just push it in, let it extend out and do it again.
Take this boot and this is going to go on this side of the bump stop, and that goes on like that. Take this, go down the shock. Just like that. I'm going to take this washer. It'd be nice if you had a new one. Just slide that on. Take the new Mount, stall them out, and then this washer is going to go on the top like that.
Take the nut, install the nut. And then I'm going to take a 17 millimeter ratchet wrench, put that on the nut and then I'll just take a six millimeter wrench and hold the shock from spinning the stud. Tighten this up.
And I'm going to use the 17 millimeter socket and a torque wrench. We sell this torque wrench at 1aauto.com. We're going to torque this nut to 21 foot pounds.
I can use a pry bar to prevent this from spinning. Just tighten this up. So when you're going to torque that nut if you're having trouble with the shaft spinning, you can take some locking pliers. And because you're putting the locking plier as a pry, the lower part of the shock is never going to hit that, so don't be nervous. And I can torque this nut.
From underneath, I'm going to try to line the mount up, up top. There is a gasket that goes on top of here, so it's a good idea to replace that gasket. Slide that into position.
And then I push up on the shock itself. Take the bolt, you put a little lubrication on the bolt to help you get it in properly. Now I'm going to tighten this bolt up. I'm going to use an 18 millimeter socket and an air ratchet. You can use a regular ratchet as well. I'm going to use a 18 millimeter socket and a torque wrench. I'm going to torque this to 74 foot pounds.
Now, from inside the trunk, I'm going to put the nuts back on top here and then we'll tighten them down. I'm going to use my 13 millimeter socket, my air ratchet. You can just use a regular ratchet if you don't have an air ratchet.
Now we can take this panel, slide this back in position. If you have those retainers, push those retainers in. Slide that back just like that.
Now I can raise up on the suspension. Now I'm going to take the wheel, slide it in position. Make sure the hole's lined up and hold the wheel. I'm going to take my 17 millimeter socket and the lug stud, and get one started. Then I can grab the other ones.
Now I'm going to use a 17 millimeter socket and a torque wrench, and I'm going to torque these lug bolts in a star pattern to 95 foot pounds. Go right around again, just to make sure everything's tight and you're good to go.
Thanks for watching. Visit 1aauto.com for quality auto parts shipped to your door, the place for DIY auto repair. And if you enjoyed this video, please click the subscribe button.