Replaces


Part Details
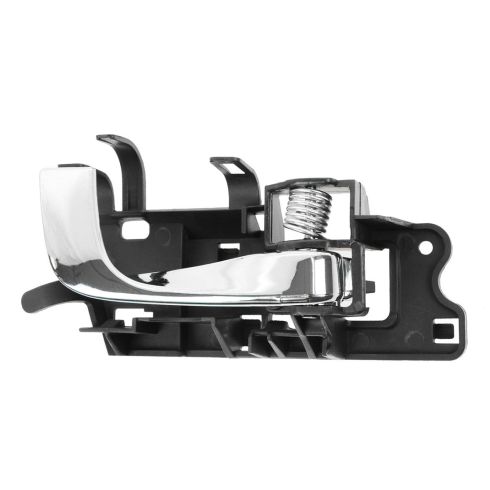
This replacement interior door handle is just what you need to get your vehicle in good working order again!
Specifications:
This interior door handle is a great replacement and has good cost savings over a dealer unit.
Handle is the original color shade.
Pro Tip: Replace Handles in pairs or sets. Fading from the sun or age can make your Vehicle Handles and Bezels appear a hue difference next to new Handles.
Lifetime Warranty
This item is backed by our limited lifetime warranty. In the event this item should fail due to manufacturing defects during intended use, we will replace the part free of charge. This warranty covers the cost of the part only.
FREE Shipping is standard on Orders shipped to the lower 48 States (Contiguous United States). Standard shipping charges apply to Hawaii, Alaska and US Territories. Shipping is not available to Canada.
Expedited is available on checkout to the United States, excluding Alaska, Hawaii and US Territories as well as P.O. Boxes and APO/FPO/DPO addresses. Final shipping costs are available at checkout.

Created on:
Tools used
Brought to you by 1AAuto.com, your source for quality replacement parts and the best service on the Internet.
In this video, we show you how to remove and reinstall your front inside door handle on this Cadillac CTS. We do the driver's front door. It's pretty much the same for all four doors. Tools you'll need are a putty knife or a similar flat blade tool, a Philips screwdriver and a 10mm socket with a ratchet and extension.
I use a little household putty knife. Take a paper towel and just wrap it and then you're going to put it up in, underneath and pry up and pull out on this handle. Then up in here, pry up and pull out. The handle comes out.
Behind here, there's a little tab. Pull up on that tab and pull the lock connector. Make sure to leave it unlocked. Pull that off. Then this bezel just comes right off. Carefully, just use the very corner right here on your lock button. Pry out very lightly. This thing comes right up and off. Then again, just carefully, there's a little plug right in behind your door pull here, and inside that plug two Philips screws. We'll speed it up here as we're just removing those two Philips screws. Once those screws are out, start up here at the top and pull. Work your fingers in behind and just give little sharp pulls, tugs. That's out and off.
To remove the inside door handle, there's a 10mm bolt right here. Remove that. The panel slides forward. It comes off and then it just goes down and off of the rod like that.
Take your inside door handle, put it face down. The lock goes like that, right up and in. Put it in the door and push it backwards. Put your bolt back in. It has larger line-up pins here and down here that go into holes. Basically just line that one up there. Line that one up there. Push the top on. Line that clip up. Make sure you can look down and you can see the connector going together. Now put in our two Philips screws. Again, we'll fast forward just to speed through putting those screws in. You want to get them tight. They don't have to be extremely tight, but you want them nice and firm, so they hold the door panel in place well. This trim plate just goes back in and pushes into place. Put this panel back on your door handle, reconnect your lock switch. Just put it back into place. It locks in. Then last but not least, for the lock button, put it down until that touches there and push in the lock.
We hope this video helps you out. Brought to you by www.1AAuto.com, your source for quality replacement parts and the best service on the Internet. Please feel free to call us toll-free, 888-844-3393. We're the company that's here for you on the Internet and in person.
Tools used
Brought to you by 1AAuto.com, your source for quality replacement parts and the best service on the Internet.
Hi, I'm Mike from 1A Auto. I hope this how-to video helps you out, and next time you need parts for your vehicle, think of 1AAuto.com. Thanks!
In this video, we're going to show you how to remove the interior door handle on a 2006 Cadillac CTS.
Here are the items you'll need: 10mm socket, ratchet, socket extension, flat blade screwdriver, and a Phillips screwdriver.
Using a flat blade screwdriver, we've wrapped it in some tape here to keep it from scoring the interior. We want to pry out on this trim panel around the door handle. Release this little tab on the connector at the top. Remove that connector from the door lock switch. Using that same screwdriver, going to pop out this cover underneath the interior door handle here, so we can access these two Phillips head screws. Remove these two Phillips head crews with a number 3 screwdriver. Using a small flat blade screwdriver, pop out this tab on the door lock, and remove it from the door lock rod. Make sure that your window is rolled up. Simply pull out on the panel now. Release it from the door.
Using a 10mm socket and ratchet, remove the bolt from the back of the interior door handle. Pull forward and back to release the handle from the door. Rotate it off of the hook for the door latch rod.
Insert the hook into the grommet on the interior door handle. Pull out, and set it into its holes. Push back to lock it into place, and reinstall the 10mm bolt.
Be sure to align the connector here and the door panel. Line it up. Make sure that the door lock rod is pulled up. Snap all the retainers back into place.
Install the door lock pull. Clip it back in. Reinstall the two Phillips head screws behind the door handle. Snap the plastic cover back into place. Reinstall the connector for the door lock switch. Pull out on the door handle. Set the trim on. Snap it in.
Thanks for tuning in. We hope this video helped you out. Next time you need parts for your car, please visit 1AAuto.com. Also check out our other helpful how-to and diagnosis videos.

81833

