Brought to you by 1AAuto.com, your source for quality replacement parts and the best service on the Internet.
In this video, we're going to show you how to remove and reinstall the front door handle on this '99 Intrigue. Same as any '98 to '02 Intrigue and a similar process for other GM vehicles as well. Tools you'll need are Phillips and flat blade screwdrivers. You may need a small flat blade screwdriver, a T30 Torx driver, door panel clip tool or putty knife, and a 10mm wrench or a socket and ratchet with extension.
Start here, take this panel, and lift up carefully. Pull it down and, underneath, disconnect the two harnesses. Disconnect your mirror harness. Using the little flat blade screwdriver, push the little tab, push down, pry it up, pull it out. Use your screwdriver again and right behind your door handle you'll see a little slot. Put your screwdriver in and pry it out. Pull this little panel out. There are three screws. There's a Phillip screw, right there. This bezel comes off and you have to disconnect your switch. There's a T30 screw here and another T30 screw underneath that door pull. Speed it up here as I use a T30 Torx screwdriver to remove those two Torx screws and a Phillips screwdriver to remove the screws for the door handle bezel. There's a little thumb tab, pull it back and off. You want either a putty knife or, if you have one, a door panel clip tool. Put the knife in under it, slide it until you feel a pin, give it a good pull, slide until you feel the next one, and keep going up. There's usually one up in here. Pull it out and then for our speaker here, disconnect it. Press the little tab. Disconnect the speaker. The door panel's off.
You want to make sure your window's all the way up. Pull this back to about there. Right inside the door you're going to see a little gray clip right down here. Use a little screwdriver to get in behind it and open it. Pull the rod right out. Up here, is a 10mm bolt there, and a 10mm bolt you can access right through there. The best tool for this job is a 10 mm socket with an extension, a nice long extension, so you can go right through this hole and access that bolt. I will speed it up here as I remove those two bolts. If you don't have a ratchet socket and extension, with just a 10mm wrench, you can get your hand in there and get those bolts out as well. Now, you want to take your door handle, and pull the bottom out. Pull it down. It's a little tricky here. I need to get the front down and then rotate it up. Get that lock mechanism out. Then, you have your lock rod here. You just kind of want to spin it off that lock rod and pull it up and out.
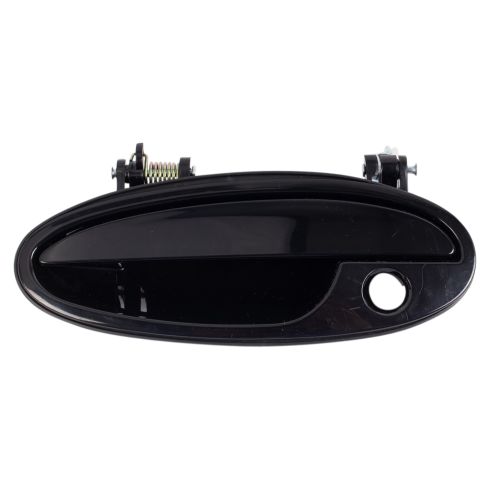
Here's my original handle, and a new handle from 1AAuto. Obviously, it comes molded in black. On a vehicle that's older, you may not really care about that. You may just want a working door handle. You can install it and, obviously, it will work just fine. If you wanted to paint it to match,you can do a variety of things depending on how much you want it to match. You can do everything from go to a hardware store and find a color that's close and paint it or if you want it to match closely go to an automotive part store that has a paint department. They can use your paint code or your VIN, mix you up some paint that will match closely, put it in an air charged can, and you can spray your handle. When you do spray the handle, you probably want to take off this gasket because you don't want to paint it. You will need to change some stuff over. For the rod, just like the lock rod, just kind of twist it and pull until it comes out and it can go into the new handle. Push it through with some force. Then the other thing you need to switch over is your lock cylinder. To get the lock out, you take this clip, you pry down on it. As you pry down on it, the lock comes out. Then it simply just snaps right into the new handle. Your handle is all ready to put in place. This handle matches the car and it's still is in fine shape, so I'm going to switch everything back over and just reinstall the old handle.
Put your rod in, reconnect your lock rod. As you put this down in, just make sure it doesn't get tangled in any of the other rods that are in there. Bring it up. Put that in. Just kind of pull the front out. Twist that down. The front's in. Lock it in place. Make sure your gasket fits nicely around here. I'm going to kind of speed up here. I'm putting the bolts back in on the inside. Just one note, make sure that after you've put the handle back on and kind of clipped it in place, just check that latch rod to make sure it's not hung up in the wrong place or anything. Both bolts are in. Now, just make sure this rod does want to be behind that weather strip. Put it into place and lock the clip back on. Now, I'm just removing that switch panel. I'm putting my water shield back up into place. I'll do a test and make sure the door unlocks before you close it. Then try a couple of shuts and opens and make sure everything is working good.
Then we'll keep the fast motion going as we put the door panel back on. You'll probably learn enough just seeing it here. But if you want to see this in regular speed, just check out our other videos.
We hope this video helps you out. Brought to you by www.1AAuto.com, your source for quality replacement parts and the best service on the Internet. Please feel free to call us toll-free, 888-844-3393. We're the company that's here for you on the Internet and in person.