Brought to you by 1AAuto.com, your source for quality replacement parts and the best service on the Internet.
Hi, I'm Mike Green. I'm one of the owners of 1A Auto. I want to help you save time and money repairing or maintaining your vehicle. I'm going to use my 20-plus years experience restoring and repairing cars and trucks like this to show you the correct way to install parts from 1AAuto.com. The right parts installed correctly: that's going to save you time and money. Thank you and enjoy the video.
In this video, I'm going to remove and then put back on the rear door handle on this 2002 Chevy Impala. This procedure is the same for a whole bunch of different GM vehicles that use this style handle. Tools you need are a Phillips screwdriver, a T30 Torx driver, a door panel clip tool or a putty knife, and a 10mm socket with a ratchet and extension.
To start, you're going to remove three screws: a Phillips screw right behind your door handle, and then two T30 screws right down in there. We'll fast forward through removing those screws. Obviously, the top one is with a Phillips screwdriver. The T30, you'll need a T30 Torx driver. It's, basically, kind of little bit of a star bit. Once you have those screws out, then you pull this up and out. There's a little clip at the front. There's a connector, I'm just grabbing my screwdriver and pushing in on a little tab with the screwdriver, prying a little bit and pulling at the same time. You can see there's a little tab you have to push on. Once that trim's removed, there are two more T30 screws right underneath. We'll fast forward through removing those again. Now, remove the little rear trim piece right up here. It just has a one clip on it. Just pull it, give a good tug. It pulls free. Now use either a door panel clip tool or I'm just using a putty knife. Basically, you just kind of slide it until you slide up against something, which is the pin. Then, give it a little tug. You can hear it snap a little bit. Slide it back. Find the next pin, give it a tug. Find the next pin, give it a tug. You could see, it's actually the first time this panel has ever been off so it does take a little bit of work, and force. Slide the knife or tool up again. Against the pin, good tug, and, eventually, you can kind of work your fingers underneath and pull. I reposition here, trying to release a couple of these other pins in the back of the door panel here. Give it a tug and it comes free. It's off. Now, you're going to want to pull back your insulation. It's fairly easy. It is stuck on there with some pretty heavy duty adhesive. Pull very lightly. You don't want to tear this and what you can do eventually is you pull it down. I'm just going to take my putty knife and just work it on to the adhesive, basically cut the adhesive and pull it down.
Now you can remove this plug right here. You'll see that my shield is puledl down. You don't have to pull it down that quick that far. I did do this for a couple of different videos that I did. Inside the door, there's an orange clip here. What you want to do is just, basically, reach in, take it out, and then take your latch rod out. There are two 10mm bolts holding the handle on. One is right there through that hole, and one right there through this rear hole, kind of hard to see. Get the right light in there. There it is. You'll need a 10mm socket and a ratchet and an extension, what you'll see be used here. Speed it up a little bit. With those bolts out, with one hand, I'm reaching in to the door, pushing up on the inside of the door handle and with the other hand, obviously, kind of pulling it out. It should just pull right up and out.
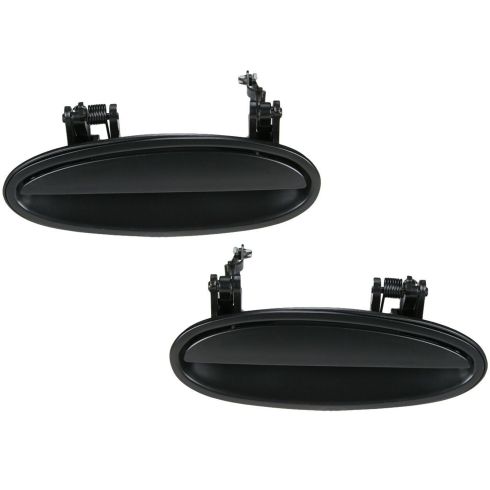
For the new handle . obviously this car doesn't need a new handle, but . you will just swap this lock rod onto your new handle. Make sure it has the locking clip. Handles from 1A Auto will be black. You can paint them to match by yourself. The best way to do that is to go to an automotive paint store and they can probably match with your paint code. Put it back in. Install it into the door and push. I find it easiest to take the first, the one that's closest to the big hole where you can fit your hand, and just start that one by hand. After starting that one, then what I'll do is, I put that back bolt into my extension socket, feed it in there and then use the ratchet to tighten it up and tighten up the other one. Now go back inside the door. With that little orange clip, make sure your rod is down in place, it should be in a little groove there. Push it in and then snap the clip on to it. Last but not least, take that plug and put it back in. Snap into place.
Once you've done your project, make sure your insulation is on there well. The door panel has 2 locating pins, the green pins. They are longer than the other ones. You just locate them. Get them into the correct hole first. See I do that in the front; and then the rear, same thing. Make sure the green pin goes in the right hole. That locates the door panel, push it on. Use a little fist bump to set the pins. I'll put this trim on with a clip. I noticed that the door panel is sticking out a little too much so just a little adjustment with the palm. Now, you can go into a little fast forward here. You want to put the T30 screws in and tighten them up. Now before you put that in, just make sure that you uncover that little hole where the screw goes in. That makes it a little easier than trying to put the screw through the insulation. Then, don't drop your screw, put that in there. Okay, get that nice and tight. Then, plug in your harness. Push the bezel down in and then install those two T30 screws. You should be all set. Get them nice and tight.
We hope this video helps you out. Brought to you by www.1AAuto.com, your source for quality replacement parts and the best service on the Internet. Please feel free to call us toll-free, 888-844-3393. We're the company that's here for you on the Internet and in person.