Hey friends, it's Len here at 1A Auto. Today we're going to be working on our 1996 Dodge Ram 1500. We're going to be showing you something super simple, a front brake job. It is super easy. I can do it and you can do it too. As always if you need these or any other parts, check us out at 1aauto.com. Thanks.
Okay, so now we've got it up in the air. If you're going to be using an air gun, obviously you didn't have to probably break all the lug nuts free. I'm going to remove all five of these lug nuts.
All right. Get this out of here. Okay, so now that we got the wheel off, one of the first things we need to do is push back this caliper piston. You can use a pry bar if you can get it to fit in there. My pry bar didn't really fit in very well, so I'm just going to go with this and slowly do this. Some people would choose to open up their bleeder screws before they push back their pistons.
It's all your prerogative. What you would do is you would just turn this right here. As you could tell, this one really doesn't have much of a bleeder screw left, so we don't have much of an option. You know, you could try and get this out. Odds are you're probably going to break it and you're going to be buying yourself a caliber. So keep that in mind. If you pushed back nice and slow, you really shouldn't have too much of a problem, especially on a non ABS vehicle. So now that we have that caliper piston pushed back, this moves around a little bit. We're going to take these out. So next we're going to take out the caliper sliders. To do that you're going to use a 10 millimeter Allen head. If they're rusted, just put it in there, give it a few taps.
Hopefully we'll be able to get this out. Oh, yeah. Got it. Something this old, I mean this thing's a '96, so if this has never been replaced I'm sure it's been out a couple of times at this point. And you know they just get worn, stripped sometimes. So I'm just going to get it completely out of here. Show you what it looks like. So there it is. This is the slider and this is the bolt that goes through it. Let's see if I can get this. There we are. There's the threaded end and that goes down and screws into the bracket. Let's get this off of here. There we are. This is the second one. Set that aside. I'm going to get this caliper off of here now. Sometimes you might need a pry bar. We'll see. I'll just give it a little wiggle. All right, it came off easy peasy. So here's your caliper. Obviously your pads are on there. We're going to get the pads right off of here.
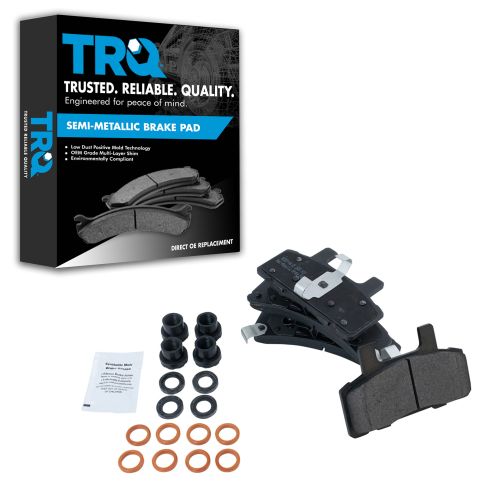
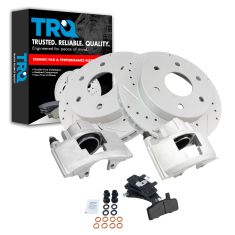
Here we go. Get that one off of there. Now that that's off we can see right along here just to make sure that there's no fluid coming out. If you see any moisture coming out from around there, more than likely it's brake fluid, in which case you have a bad seal in here and you need to replace your caliper. We'll set this aside. Let's get this off of here. All right, let's put it aside and do a quick product comparison. Okay, friends, a quick product comparison for you over here. Right here we have our front brakes from our 1996 Dodge Ram 1500, we just removed them. You get your rotor and your pads. Over here you have your brand new quality 1A Auto parts. As you could tell, these parts are very similar and exceptional. These ones look much better, but to continue we'll just do a little comparison side by side. You got the same length.
You got your squealer on there or wear indicator. Call it what you want. You got the clips that hold it to your caliper. The inner pad. You get the clips that hold it to the piston. You got these areas right here. Keep it from shifting around inside the caliper. Same thing, same length, looks great. For the rotor, this is the important part you need to pay extra attention. Make sure this is level right here, okay? That tells you that the thickness of the rotor is the same or at least close. Put this up on here. Pay attention to the diameter. That's the circumference here. Okay? Make sure that you're dealing with the same exact rotor.
If your new rotor is sticking all the way out here and your new rotor is way inside, obviously you have a different rotor and something's a little wrong. It's not jiving right. Okay? So you make sure you got it this way. We made sure we had the same thickness. One last thing is you want to check the hat depth. To do that you just turn them upside down on a flat surface and you make sure you got the same level surface right here. That feels really good. Just a little bit of a ridge, but that's because my old rotor, well, it's not really in the best condition.
Our rotors come cross cut. You can see that on the braking surface you got cuts going this way and cuts going this way. That's awesome. It's going to help with friction. It's going to increase friction for your braking and it's also going to help with cooling. You got brand new cooling fins in here. Okay? No rust or anything like that like with these ones. These probably don't cool very well. With all that said, I don't see any reason why these wouldn't be quality parts to install into this vehicle, so I'm going to go ahead and do it. As always, if you need these parts or any other part, always check us out at 1aauto.com. Thanks.
Okay friends, so it's time to clean up this wheel bearing hub here. Okay. This is right where the road is going to sit, so you need to make sure you have it nice and clean. You have a couple options available to you from 1A Auto. We offer these nice brushes right here. You can go like that. If you've got all day it'll probably come out nice and clean, or you can go with something like this. This is also available at 1aauto.com. It's really awesome. You get yourself a little standing disc right here and you put it up against this. Pull that. It's going to be great. Make sure you're wearing safety glasses.
Okay, so as you could tell that's pretty darn clean right there, especially in comparison to here. Something to note, if you are using this, you won't be able to get down inside in between here. So if you can, pick yourself up one of these brushes anyway. I would go with both because to do the whole hub with this brush, this is going to take a little while. 1A Auto made these extremely affordable and as a team they work great. So let's move along. Now here we are. That looks pretty decent, practically new. Matter of fact, it is. Let's continue. We're going to use a little bit of copper never seize.
That's just right on the mating surface where the rotor is going to sit. We'll grab our rotor, get the rotor up on here just like that. Awesome. I'm just going to do something to make it so the rotor can't move around. I just have a spare nuts laying around. And I take my lug nut, slide it right like that. That just keeps the rotor from flopping around and any potential rust from falling down in between here and the hub behind there. So we're just going to clean up our sliders so that way there'll be able to slide around nice and easy and we'll be able to continue.
Looks fairly new right there, especially in comparison to this one. We'll get the last one cleaned up just the same as the first one. We can move along. So we've got our sliders cleaned up nice. Those look great. Put that there for now. They move around very well. If you wanted to, you could try to put a little bit of grease here and then just try to work it back and forth a million times until hopefully it made its way down in there. It's completely up to you. But what we are going to do is put some caliper grease going along the outside of the slider where it goes into the boot. All right. So I'll grab the other slider that I just put on the floor and I'll put a little grease on these. So let's start with just going along in here.
Same thing on this one. Take this, go like that a bunch of times. Every time this goes up and down it's going to continue to work this way. And that's just going to help keep moisture out of there. So that way these two pieces will be able to flow together for a long, long time. I would say that that's pretty good. The rest of it's going to have to figure out its way over time. I'm going to take a little bit more caliper grease. I'm going to go across here. That's pretty decent. Put on a nice coat. I don't need to do up where my fingers are because as I push it in, it's going all spread. Get our boot. It's going right up in there. Should slide right in. Do the same for the other one.
There it is. Awesome. You have your caliper piston right here. We already checked to make sure there was no leaks. We remember that was good. When we apply caliper grease, it's always a good idea to try to put some in between the mating surfaces between the caliper and the pad itself. Some people will take their pad and they'll just smudge the grease all over the whole thing. It seems like maybe it's a great idea, but ultimately I would say that it's not, only because all that grease is just going to collect dirt. So to save on grease and how much crud is stuck on the pads overall and over time, I just like to go right along the piston, right where it touches up against that pad. Okay, I'm going to go right on the ear, right up along right here. Okay. Let's touch this up against the outer pad and now we'll grab the pads and I'll show you one more spot that we're going to grease.
Now I'm just going to go right up against this ear, right along there. Right up along here. You don't need too much on these. Okay? We don't want it to melt down and get onto the friction material. It's not about that. It's just about when you put it in between this area of the caliper, it's going to have something in between there to help keep it from getting rusted up and getting stuck like that. Now I'm just going to push on this little clip while I push in on the pad. Should slide right in there.
We'll grab our outer pad. Here it is. Bring it over, grab that clip. Pull it over. This one, same thing. See if you can pull it over. Very nice. That's perfect, right? Like that. Awesome. Let's move along. Let's get our caliper down here. You want to make sure that your hose doesn't have any twists. Maybe you lifted it up and you brought it around and you did all sorts of things. Now you're looking at it and it's a big old curly cue. That's obviously not going to be very functional and it's going to take up a lot of the slack that we need to be able to turn the vehicle. So I'm just going to take it like that. We've got a nice little rainbow here.
Take our caliper sliders, push them in as far as we can. This is pretty close. Like it's almost ready to slide on there. Oh yeah. There we are. 10 millimeter Allen head. Same thing we use to remove these. I'm just going to wiggle it around till I feel like it starts to grab into the hole. Yeah, that's going in. So I'm just going to leave it just like that for now. We'll tighten it up in a minute. Now we're going to do this one. Do the same thing, wiggle it around till it starts feeling like it's going in. Yeah, it's definitely going in. And that one's bottom out. Come back down here. Bottom this one out. Okay. Grab our torque wrench. We're going to torque these down to 38 foot pounds.
Here we are tight, tight. Just get this back off of here. We're going to grab our wheel. We'll get it up on here, bottom it out, and then we'll torque it down. So now we'll just pump up the brake. There we are. Okay friends so here we go. It's time to get the wheel up onto there. To do that, you never want to try and bend over like this. Grab your wheel and lift with your back. You're going to potentially hurt yourself and 1A Auto, we do not want you to hurt yourself. Show you something fairly simple.
Bring your leg right up to it, grab onto it, roll it right up your leg just like this, and then lift with your leg/ab muscles. That went up there easy peasy. We're going to grab our lug nuts. Start them on there. So now we're going to take our 19 millimeter socket and we're going to snug up these lug nuts in a star pattern. The reason for going in a star is so that if we tighten it up and it kinks off to the side like this, we might think we have it all fully tightened and we might even torque it down. And the torque wrench says it is. Once you hit a bump, bonk, bonk, this thing is free as a goose.
So just go like this. By going into star pattern, it starts one side in. You do the other side, it sucks it right down and then it would be sitting nice and level for time to torque it down. Okay friends so it's time to torque up our lug nuts. We're going to go ahead and use our 19 millimeter socket and we're going to torque these down to 125 foot pounds. Okay if you want to go around one more time, why not? It doesn't cost you anything. Small price to pay for safety. Torqued, down the road we go.
Thanks for watching. Visit 1aauto.com for quality auto parts shipped to your door, the place for DIY auto repair. And if you enjoyed this video, please click the subscribe button.