Replaces
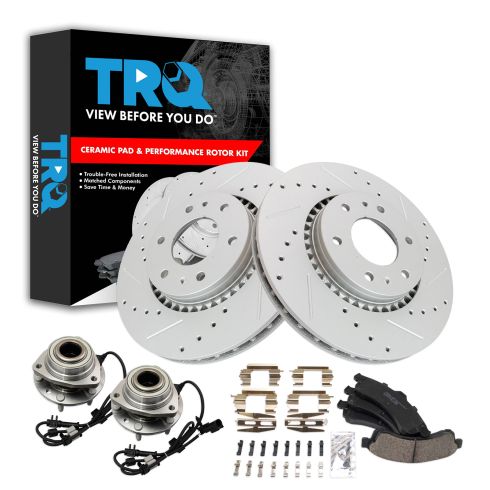
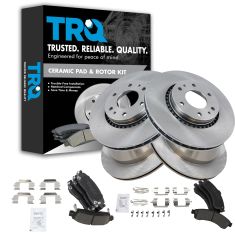
Ceramic Brake Pad & Rotor Kit
$284.95
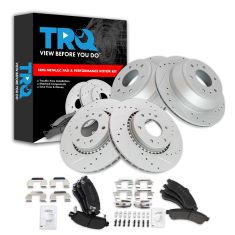
Semi-Metallic Performance Brake Pad & Rotor Kit
$289.95

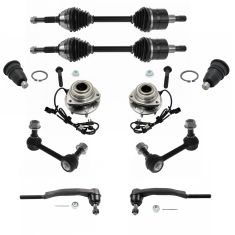
8 Piece Steering, Suspension, & Drivetrain Kit
$289.95
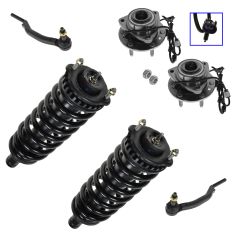
6 Piece Steering, Suspension, & Drivetrain Kit
$289.95
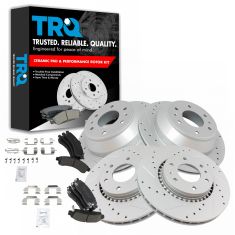
Ceramic Performance Brake Pad & Rotor Kit
$290.95
12 Piece Steering, Suspension, & Drivetrain Kit
$304.95
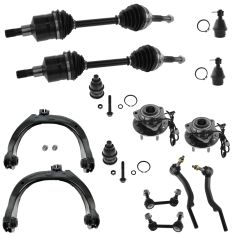
14 Piece Steering, Suspension, & Drivetrain Kit
$316.95
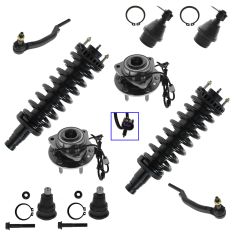
10 Piece Steering, Suspension, & Drivetrain Kit
$324.95
Part Details
Product Features
Item Condition:
New
Attention California Customers:
 WARNING: This product can expose you to chemicals including Lead and Lead Compounds, which are known to the State of California to cause cancer, and birth defects or other reproductive harm. For more information, go to www.P65Warnings.ca.gov.
Lifetime Warranty
This item is backed by our limited lifetime warranty. In the event that this item should fail due to manufacturing defects during intended use, we will replace the part free of charge. This warranty covers the cost of the part only.

Created on:
Tools used
Brought to you by 1AAuto.com, your source for quality replacement parts and the best service on the Internet.
Hi, I'm Don from 1A Auto. I hope this how-to video helps you out, and next time you need parts for your vehicle, think of 1AAuto.com. Thanks.
In this video, we're going to show you how to replace the front brakes on this 2003 GMC Envoy XL. The items you'll need for this are a new brake pad and rotor kit from 1AAuto.com; 17mm, 18mm and 19mm socket and ratchet; a piece of pipe for some extra leverage; 18mm wrench; flat blade screwdriver; torque wrench; hammer; jack and jack stands; large C-clamp; brake grease and brake cleaner.
Start off by prying off your hub cap. Then remove these lug nuts and if you don't have air powered tools, you're going to want to loosen them while the vehicle's on the ground, then raise the vehicle, and remove them the rest of the way. Once they're removed, your wheel can pull right off.
If you're looking to check the condition of your brakes, you want to run your fingernail up and down the rotor to make sure there are no deep grooves. These rotors should be turned down at least because they're pretty rough from some corrosion. Then, brake pads have a wear mark in them. You can see right here on this brake pad. If you look right down in here, you'll see right there there's a tiny little hole and that hole is basically what you can see of what's left of that wear mark, which means that these pads have a little bit of life left on them but we're going to change them out anyways to show you.
Now, you want to remove these two 17mm bolts. You can see Mike's using a 18mm wrench to hold the nut on the inside. It'll just make it easier to remove that bolt. Now, using a flat blade screwdriver, just pry out on the caliper. Then, you can just set that aside. Now, pry out your brake pads. Then, just pull off these slides.
Now, you want to remove these two 18mm bolts. We'll just fast forward as Mike does that and you can see he's using a piece of pipe for some extra leverage to help break those bolts free. Once those are removed, the bracket will pull right off and if your rotor doesn't slide right off, then you may just want to tap it with a hammer, and just keep turning it and hitting it with a hammer until it pulls free. However, there is something else you can do to break it free as well. Alright, so if you have trouble getting the rotor off, it actually has press holes. You would get a bolt that's the proper size. I believe this an M12 bolt. You use two bolts, thread them into those holes and as you tighten them up, they press against the hub and push the rotor off. You can do that or just keep going with the big hammer. I'm not worried about it because I'm replacing the rotor anyway. You can see I've put a lug nut on; this is just to keep the rotor from flying off when you're hitting it with the hammer.
On the left, are the old brake pads and rotor; on the right, are the new ones from 1A Auto. You can see they're identical and they'll fit exactly the same. Take your new rotor and you want to make sure that these holes line up in between the two holes that are on the hub and then you just slide your rotor back into place. Replace a lug nut to hold it into place. You want to check these slides on your caliper bracket and make sure that they're greased up. If they're not, just apply some brake grease to them. Then, fit the bracket into place. Then just twisting in your bolts by hand and then tighten them up. Now, torque these bolts to 110 foot-pounds.
Using a wire brush, just clean up these brake pad slides. Then just clip it back into place. Do the same thing with the other one. Now, wipe down your rotor with some brake cleaner or mineral spirits. Take your new brake pads, remove the clips from your old brake pads and just clip them into place on the new ones. Then, apply some brake grease to the tabs on either end of the brake pads. Then, just push the brake pad into place. Repeat the process with the other pad. Take your caliper and a large C-clamp and one of your old brake pads and just put the old brake pad in front of those two pistons on the caliper. Then take your large C-clamp, set it up in between the two pistons on that brake pad, and just twist the brake pad in until it pushes those two pistons all the way in. Now, push your caliper back down into place and replace those two 17mm bolts. We'll fast forward as Mike does that and tightens those up. Now, torque each of those to 40 foot-pounds.
We'll fast forward here as Mike replaces the wheel and then the lug nuts and tightens them up preliminarily, lowers the vehicle, and tightens them up the rest of the way. You want to torque each of these lug nuts to 100 foot-pounds in a crossing pattern. Obviously you'd repeat this for the other side as well. Always replace your brakes in pairs.
After you've done any work on the brakes, you want to just pump the brake pedal until it firms up. Then you want to do a stopping test from five miles per hour, then 10 miles per hour.
We hope this video helps you out. Brought to you by www.1AAuto.com, your source for quality replacement parts and the best service on the Internet. Please feel free to call us toll-free, 888-844-3393. We're the company that's here for you on the Internet and in person.