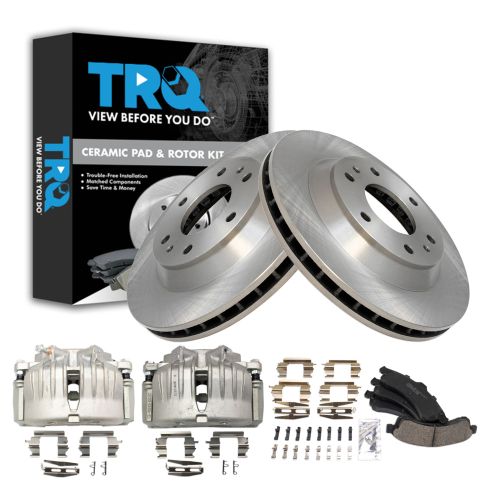
Okay, friends, one of the first things we need to do to start this job is to safely raise and support the vehicle. I like to raise it directly on the frame. Once you have the wheel off the ground, we're going to remove our center cover. That exposes our 19-millimeter lug nuts. Remove them all, and then remove the wheel.
I'm gonna you use an 18-millimeter to hold the slider from spinning. And then I'm gonna come right from the backside of the caliper, and I'm gonna remove my 13-millimeter nuts that hold the caliper to the bracket. Okay. We've got both our bolts here. Slide the caliper off. It's always a great idea to inspect the caliper directly. Look along these boots to make sure you don't see any moisture or anything like that. And you also want to make sure that the piston itself isn't chipped or broken in any way. Let's get the pads off of here. It feels as though this rearward one's frozen in there. There we are. I usually like to turn the wheel a little bit so I can expose these 18-millimeter headed bolts. We're going to remove both those bolts that holds the bracket to the knuckle. I'm gonna leave that in just a little bit. Remove the other one. Grab that bracket, and remove the other bolt. There it is, friends. Now, it's time to remove the rotor. Now, it's going to be time to clean up the area on the bearing that's going to mount against the rotor. If it looks like it's got raised areas, make sure you sand it down so it looks a lot more like this. Before we go ahead and put our new rotor onto the vehicle, it's important to make sure you clean down the braking surface. More than likely, it's going to have a chemical on it, and you want to make sure you get it off.
Now, we're going to go ahead and spray down this area of the hub with some copper never-seize. Put our rotor on. And then grab one of your lug nuts and start it in so it holds the rotor so it doesn't move around. The next thing we need to do is clean up and prep our caliper bracket. To do that, we're gonna take a small pocket screwdriver, and we'll get these tins right off of here. You can also do it by hand if it's easy enough. After that, go ahead and grab onto these right here. Those are your caliper sliders. If you pull it out, you're going to notice there's a rubber boot. Just carefully try to get that off of the lip on the slider, and then you should be able to pull it out. There we are. Inspect the condition of your sliders. You can wipe them down. You want to make sure they're not rusted and pitted or have any large flakes or anything that's going to prevent them from sliding freely inside of the bracket area. These need to be able to slide nice and smooth. Once we get these cleaned up, we'll move along. Now that we have the grease off of the slider, we're going to take a nice hard look at this end over here. There should be a little lip that's supposed to catch right on that boot. If you were to spin it around, you want to make sure that there isn't any raised areas or rust along there. If there is, go ahead and chisel it out of there or use a wire brush. Whatever you have to do, you want it to be a nice, smooth surface for the boot to ride. That way there, it keeps all the moisture out.
The next thing we need to do is clean up the inside area of the caliper bracket where the slider is going to ride. You can do that with something as simple as just using some parts cleaner inside there, a little rag. See if you can clean it up. Sometimes people have a bore brush. It kind of looks like this, has, like, all these little metal tines except it's a circle. You can put it down in there, and that'll clean it out very well. The problem with using a bore brush on something like this is it's probably going to mess up this boot. You could try to get the boot off of here by pulling on this and popping it out, but getting it back in once you've done that is going to become an issue. So, unless you have a brand new boot, I wouldn't go through any of that process. I'm just gonna take a tiny bit of parts cleaner, put it inside both holes. Let it sit and do its job. Once that's sat for a little while, I'm going to take a rag, and I'll just give it a nice twist, okay? That looks nice. Take it, put it inside, and then just keep twisting it around and around and around so it's going to accumulate any of the parts cleaner that's in there, and it's also going to try to get out any of the contaminants that are in there as well. As you could tell, that's pretty nasty.
I'm going to do the same thing to the other one. Now, this next part is just about as important as actually cleaning it. You need to make sure that all the parts cleaner is dried out of there before we continue on. Once that's completely dried, we're going to take some lubricant. This is just plain old moly grease. I'm going to go right along that whole shaft of the slider. And then it's also important to make sure you get up into this area right here. That's where the boot's going to ride. By putting it up in that area, it's going to help keep moisture and debris out of there and keep the sliders functioning properly for a long time. Just go ahead and slide it in there, press it until it stops. I like to twist it around and around and around a couple of times, make sure everything's situated. Do the same to the other side. Okay. Those look great. The next thing we need to do is clean up the area where those tins are going to ride. Something that's important to remember is it's not only where the tins are gonna ride, but after the tins are on, that's also where the pads are going to be. So, if you don't clean up the raised areas that you can see flaking up here, you're going to have an issue with the pads being stuck inside the bracket, and the brakes are not going to function well, and they're going to have an issue over time. So, a couple of ways to clean it up. You can use a pocket screwdriver or a scraper, clean it up like this, try to get off at least the large flakes for now. Move along to using one of these little brushes. Clean it up. Of course, make sure you get this upper area here too by the way.
Or if you have access to it, you could use one of these. Has a nice little sanding disc. And you can go ahead and sand this down, make it nice and smooth. But if you are going to use something like this, just be careful not to take away too much of the meat of the caliper bracket. It's not the point of it to take away any of the meat. We just want to get off the excess stuff that shouldn't be there. Now that we have the bracket nice and cleaned up where those tins are going to ride, let's go ahead and add a little bit of lubricant. You don't need to add very much here. We just want to add a nice little layer that's going to help prevent moisture or anything like that from getting in between. If you end up putting too much, it could eventually squeeze out and potentially get up against the rotor/in between the pads and rotor, which would be an issue. Now that we have the caliper bracket lubricated, we're going to install the tins. If you were to look at the backside of the tins, you're going to notice you have a little hooky-do here, and then you have a strange-looking one right there. The side that looks like this, that comes out a little bit further off to the side and then comes up is going to actually go facing towards the slider or towards the rear of the bracket. Go ahead and slide that on there and then press it in. It should want to stay. Do the same to the other side. Awesome.
Now, we need to make our way back over to the vehicle. And what we're going to do is we're going to start working on the actual caliper itself. This is the muscle of the brake. If you were to look right here, you're going to see this little tin. Take a quick look at your new one in comparison to your old one. You're going to see that you can put it one of two ways. We want to make sure we're facing in the right direction. Now we're just going to get this one out of here, and we'll install the new one. Slide it in. Give it a nice press. Make sure it's completely secured. If it falls out, it's not secure. Next, it's going to be time to go ahead and push in the caliper pistons. What you'll notice if you were trying to use a tool that looks like this, which is what most people have, is you would go inside like this, squeeze in this piston. As you squeeze this one in, this one would start coming out. That could be an issue. If you're using this tool, the best way to do it would be to go ahead and take one of your old brake pads and then go ahead and grip right in the center and squeeze it down. For me personally, I have this tool right here. As you crank it, it's going to push in both these pistons at the same time. You could also use this at the same time if you wanted to. Put this in. Now, we're just going to slowly push in the pistons.
The next step for preparing this is we want to add a tiny bit of lubricant along the pistons themselves and then along each of these three ears. The reason for doing this is for vibration dampening and noise reduction. I'm gonna get the caliper bracket on. Go ahead and take your caliper bolts and use a tiny bit of threadlocker. Let's get this started. Torque this to 118 foot-pounds. Now, it's going to be time to get the brake pads onto the vehicle. What you're going to notice is you should have some wear indicators. They probably came in your little bag. You can go ahead and squeeze that right onto the pads. And you want them both facing just like this. When we install these, we want the brake indicators facing up. Let's see if I can slide this in here. It should slide in nice and easy. If you have to force it in or use a hammer for any reason, you probably didn't clean up the bracket enough. These look great. Make sure they can move around freely. Go ahead and take that caliper and slide it over. Put it right down on there. Now, we're going to grab our caliper mounting bolts. I've got our caliper bolts with a teeny bit of threadlocker. Start them in, bottom them out, and then we'll torque them down. Let's torque these to 31 foot-pounds.
It's always a great idea to double-check everything that you removed and replaced. Just make sure everything's secure and good to go. Once you've done that, let's go ahead and get the wheel up on here. Bring the vehicle down so the tire's just barely touching the ground so it can't spin. And then torque the wheels in a criss-cross manner to 103 foot-pounds. Now it's going to be time to get our center cover on here. If you were to turn it around, you might see something that looks a lot like a valve stem. Line it up with your valve stem, and then go ahead and pop it on there. All right. Now, I know you think you're done, but you still need to pump up the brake pedal, and then we're gonna go out there and double-check that brake fluid level. Right underneath the hood, you're going to see your master cylinder. It'll tell you what type of fluid to use. You can give it a little shake and just double-check to make sure you can see it's up at that maximum line.