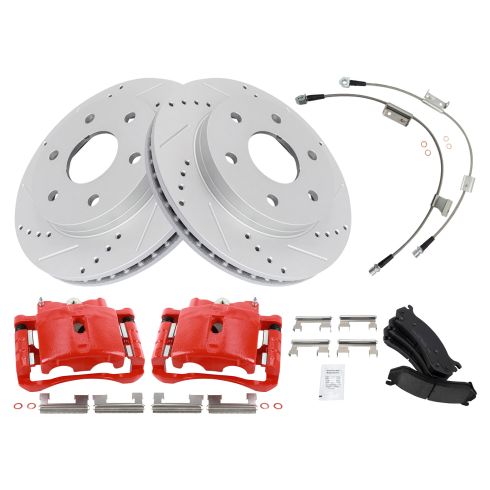
All right. So one of the first things you need to do is safely raise and support the vehicle. Once you've done that, you're going to remove all six of your lug nuts. Remove your wheel. Now, the next thing that we would want to do is take a look at our caliper right here. Look all around it to make sure you don't see any moisture coming out. If you see moisture coming out of it, more than likely it's got a fluid leak. Assuming it looks like it's in good condition, we're going to go ahead and push back the piston a little bit. Grab your small pry bar. Come right in between the caliper and up against the pad if you can, or even the rotor. And then we're just going to carefully slowly push this back.
Once your caliper is off, take a good look. Make sure you don't see any moisture coming around these boots right here. If you see any moisture, you have a brake leak, you need to replace your caliper. Now we can grab onto those pads. We'll take them right off of here and just take a nice look. This one has plenty of meat all the way around. It's not damaged in any way. If anything, I could use a little bit of parts cleaner, but that's about as much as I would go. Let's take a look at this one. That looks perfect as well. If they were worn at an angle or anything like that, there would be an issue that you'd need to diagnose. Let's get this bracket off of here to remove the rotor. Now, before we go ahead and get our new rotor up on, we want to make sure that we clean up the hub area of the bearing that's going to mate against the new rotor. So it's nice and clean. You don't want any raised areas. The next thing you need to do is clean up the rotor braking surface. Let's use some copper never seize right here on the hub.
Let's get the rotor back up on here. Now we're going to use one lug nut, screw it all the way on so it holds the rotor from moving around. The next thing we're going to need to do is push back the brake caliper. To do that, you can either open up this bleeder screw right here, and you take a risk, of course, breaking it either going in or out, or you can just go ahead and turn the caliper around. I like to use a pad and then you would just use something to squish this down and force those pistons back down and in. This is a tool that works great for the job. Let's put it in here. As I crank, it's going to spread and it's going to push back those pistons. I'm going to do this nice and slow. You'll notice this is pushing in both pistons at the same time. If you tried to push in one piston at a time, more than likely the other piston is going to want to come out.
So now we just need to take a peak along here and just double-check those boots. Make sure that they're not swollen or pushed out or ripped or torn in any way and there's definitely no leakage. These look great. So what I'm going to do is I'm going to continue on by using a little bit of caliper grease, and I'm going to go right along the mating surfaces, where the caliper is going to touch directly against the brake pad. All right. So we made our way over to the bench with the caliper bracket because it's time to start cleaning it up and preparing it for installation. Let's grab our small pocket screwdriver or pretty much anything you got that you can grab onto this area right there and remove the 10. Do the same to the other side. Next, we're going to move along to cleaning up this area right here, all the areas that you saw that this 10 was riding against. So if you see any rust buildup, make sure you clean it down.
You can use a nice wire brush and try to get in there. Spend some time. You could use your screwdriver, scrape it all up or, of course, you can use a nice sanding grinding wheel and clean it up good. You just want to be careful not to take off too much of the material of the actual bracket. Okay. So we cleaned up those areas great. Both sides of the caliper bracket look decent. Something that I did happen to notice that I want to mention to you is all this extra rot that's built up everywhere, there's a possibility that any of this could flake off and get into your braking systems, such as in between your pad and rotor, which could of course cause an issue. So just take a little punch or chisel or prybar or whatever you got, and just kind of try to get some of this crud off of here. So we got off the majority of the rust off this thing. Now we're going to clean out the inside there. Use one of these bore brushes.
So now that we have this as clean as we can get it, right out here and on the inside where those sliders are going to go, we're going to use some of this moly grease or caliper grease, and I'm going to go along the areas that we just finished sanding down. Now we have our 10s. You'll notice that you have a side that's a little thicker and a thinner side. If you were to look at the bracket, you can see exactly how it needs to go. The thicker side is going to be the side facing the boot. Go and slide it up against there and then lock it in. Do the same to the other side.
Making our way back over to the vehicle, the next things that we need to do is clean up slider bolts here and of course get all the thread locker off of our mounting bolts. Now that I have these cleaned up, let's continue on by installing the caliper. Let's grab our bracket and our two bolts. I like to use a little bit of thread locker on them, but we'll call it your prerogative. Go ahead and slide that in. Start in those bolts, we'll snug them up, and then we're going to torque them to 139 foot-pounds. You're going to notice that one of your pads has two of these brake wear indicators and then the other one's going to have one. The pad that has two goes on the inside.
The outer pad on there. Let's grab the caliper, slide it right down over here. Be careful for these boots. You want to make sure that they're lined up with the hole so the slider can go through. Perfect. At this point, we're going to add some lubricant to the sliders. When we're going to add it, we're going to put it along here all the way up to there, but you don't need to get it up onto the threaded area. Let's go ahead and put those in there. Bottom these out, torque them to 80 foot-pounds. The next thing that I would want to do is pump up the brake and make sure everything's functioning properly. You also pump up the brake for safety so that way there, when you get inside the vehicle, after you've done this job, you will have a brake pedal. Now that we've pumped up the brake, I just want to check that brake fluid real quick. Now let's go ahead and get this off of here and we'll get the wheel on. Now let's go ahead and torque our lug nuts to 140 foot-pounds. Center cap, go ahead and pop it on there.


