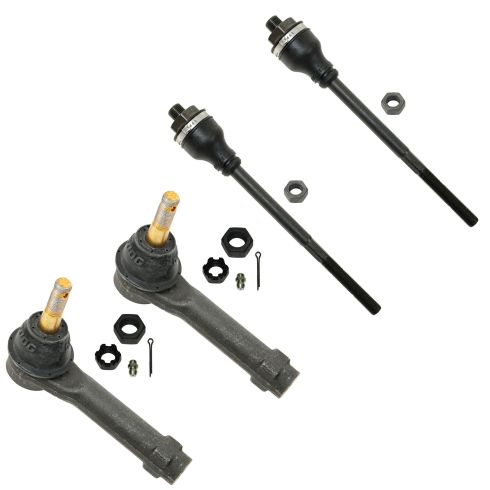
MGSFK00049-Chevrolet GMC Cadillac Front Driver & Passenger Side Inner & Outer 4 Piece Tie Rod Set MOOG MGSFK00049

Replaces
2003 Cadillac Escalade ESV Front Driver & Passenger Side Inner & Outer 4 Piece Tie Rod Set MOOG MGSFK00049

Product Reviews
Loading reviews
5.00/ 5.0
8
8 reviews
October 11, 2017
Just what I needed, easy to install , they work great,and I received them quick
The perfect fit!
December 16, 2017
Installed inner/outter tie rods on a 2004 avalanche. Very easy to replace with help of the video. Took it for aligment after this and my truck is running like a champ!
5 stars
August 11, 2020
arrived on time, good price, as advertised
Inner and outer tie rods
April 13, 2021
High quality exact fit fast delivery
October 25, 2021
Straight as can be!!!
March 19, 2022
Easy install good fitment
Tie rods
March 24, 2023
They fit perfectly on my 01 tahoe
Moog Tie Rods
October 1, 2023
It was very easy to find what I was looking for on 1A Auto' website. I chose Moog parts because I think they are the best quality and I didn't want to take a chance on cheap tie rods. They were Eady to install and work great!
Customer Q&A
I see a grease fitting with these. Do I have to drill out the hole for it or is the hole already there? So, I will just need to install it?
September 20, 2017
10
You will not need to drill. The parts will have the opening for this grease fitting upon receipt.
September 20, 2017
Alex P
Can these tie rods GO on a 4WD GMC 1500??
September 17, 2018
10
Sorry! I can't answer that with certainty. I have not yet put them in my truck. However, these were the ones suggested on the website for a replacement on my 1999 Chevrolet Silverado 1500 Z71 4x4.
September 17, 2018
M E
10
We can confirm fit for you, but we need the full year, make and model in order to do so!
September 17, 2018
T I
Are these parts compatible with both Rack and pinion and power gear steering system?
January 28, 2019
10
These are for models without rack and pinion.
January 28, 2019
Christa R
Cadillac is a registered trademark of General Motors Company. 1A Auto is not affiliated with or sponsored by Cadillac or General Motors Company.
See all trademarks.


