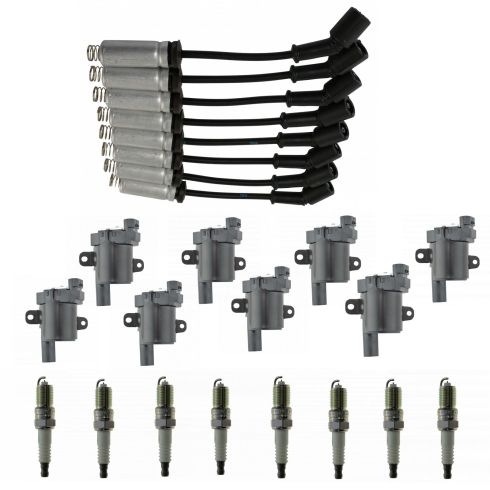
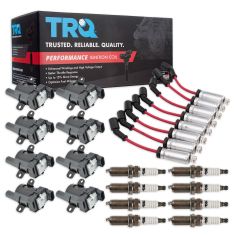
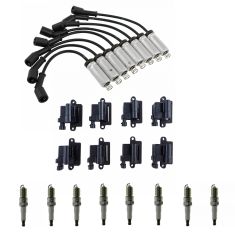
This Ignition Kit comes with NGK G-Power Spark Plugs, TRQ Ignition Coils and TRQ Spark Plug Wires.
Complete Repair in One Purchase - Stop searching for parts individually and complete your repair with a customized kit or set from DIY Solutions.
High-Quality Parts from Trusted Brands - DIY Solutions' kits and sets are selected from the best automotive brands and include hard-to-find and even obsolete parts you may need for your vehicle.
Guaranteed Fit - DIY Solutions ensures its selected parts are quality-tested to guarantee fit and function.
WARNING: This product can expose you to chemicals including Chromium (Hexavalent Compounds), which is known to the State of California to cause cancer, and birth defects or other reproductive harm. For more information, go to www.P65Warnings.ca.gov
Lifetime Warranty
This item is backed by our limited lifetime warranty. In the event that this item should fail due to manufacturing defects during intended use, we will replace the part free of charge. This warranty covers the cost of the part only.
Returns: Parts with electrical components cannot be returned once installed.
FREE Shipping is standard on orders shipped to the lower 48 States (Contiguous United States). Standard shipping charges apply to Hawaii and Alaska.
Shipping is not available to a P.O. Box, APO/FPO/DPO addresses, US Territories, or Canada for this item.
Expedited is available on checkout to the United States, excluding Alaska, Hawaii.
Final shipping costs are available at checkout.
How to Replace Ignition Coils 1999-2007 Chevy Silverado
How to Replace Spark Plugs 2000-09 GMC Yukon
How to Replace Spark Plugs 1999-2007 Chevy Silverado
How to Replace Spark Plugs 2001-09 GMC Sierra 2500 6-0L
How To Replace Spark Plug Wires 2000-06 Chevy Tahoe
How to Replace Ignition Coil 1999-2004 GMC Sierra 2500
How To Replace Spark Plugs 2000-06 Chevy Tahoe
How to Replace Spark Plugs 2000-14 Chevy Suburban 1500
Created on:
Tools used
7mm Socket
10mm Socket
Ratchet
Pocket Screwdriver
Okay, friends. Before we get started on doing our ignition coil here, we just wanna make sure that you have safety is your number one concern. Always have your eye protection and your hand protection. Let's get started.
Let's come right over here on the passenger side of the engine. If we're looking for the coils, you're gonna see them right up along the top or side, right along here. All four going down the side and then, of course, on the other side of the engine you'll have the same four. Now, we're gonna show you on this front one right here, because it's the hardest one. And it's not very hard at all, but it is the hardest. We need to grab these heater core hoses, move them out of the way. Once they're out of the way we need to remove this bracket. Use your 10-millimeter and take off this nut.
The next thing we're gonna do is take a nice small pocket screwdriver, you can use pretty much anything, including your finger, but if you take the small pocket screwdriver, you can go right along here, lift up on this tab, and then you should be able to draw your electrical pigtail away.
Now let's move on down from the coil to the spark plug wire. Grab onto it. Give it a nice twist and pull it right off. Looking at the coil on either side, you're going to see a 7-millimeter bolt, remove both. Hold onto that coil, there's nothing holding it on there, except for this bolt at this point. There it is, friends.
Now it's gonna be time to install our brand new coil. Just gonna take it and bring it right down here, and I'm gonna line it up with exactly where I removed it from. Start in both of my bolts before I tighten either of them down. Go, both are straightened. Let's go ahead and snug them up. I always like to use a regular ratchet to make sure they're snug. Go ahead and connect in your electrical connector. Let's grab that spark plug wire. Go ahead and use a little bit of dielectric grease in there, that's gonna be helpful, and then connect it right onto your coil. Listen for a little click noise, give it a nice twist and a nice little tug, to make sure it's secured on there. You also wanna make sure that your spark plug wire is in no way touching that exhaust manifold.
So, now the replacement process for all the rest of the coils would be the same at this point. But moving along to finish up with this coil, we need to make sure we get this bracket back on. I'm gonna take the bracket, put it on there just like this. Snug it right up. There we are. Make sure it's nice and tight. Make sure you secure your heater core hoses. Double-check everything. This looks great.
Tools used
Dielectric Grease
Torque Wrench
Socket Extensions
Air Compressor
5/8 Inch Spark Plug Socket
You can move these heater hoses out of the way, just pull them out of the bracket and slide them to the side. Take the wire off the spark plug. You can twist it a little bit. It might help. And then try to pull it off. It's a good idea not to pull on the wire itself. Just try to pull on the base and you can slide this out of the way.
Before we take the spark plug out, just take a little compressed air and just blow around the plug. There may be some sand in there or dirt or debris, get that out of the way. And take a spark plug socket. It's a 5/8 spark plug socket. And you can use and an extension and take the spark plug out. And slide the old spark plug out.
Take the new spark plug. Put in the spark plug socket. And then gently, feed it over to where the hole is and just by hand, screw it in. And we can torque that to 11 foot-pounds.
You can always put a little bit of dielectric grease in there and then slide this over the spark plug. Make sure you lock it in place. And you do the same with the other ones. And move these heater hoses, put them back in the bracket.
Tools used
Air Blow Gun
Spark Plug Gapping Tool
5/8 Inch Spark Plug Socket
Ratchet
Okay, friends. Now, before we get started on this spark plug video, we want to go over a couple brief things. The number one concern is always safety. Make sure you're wearing hand protection and eye protection at all times. The next thing I wanna talk about involves the spark plug directly, and it's located right here. It's the gap between the electrodes. You wanna make sure you have a gap there, and the gap for this vehicle should be 0.040. You can get yourself one of these gap tools, maybe it'll come in handy. One thing about using a gapping tool is that it's made out of hard metal, and these spark plugs right here are made out of precious metals on the end by the electrode. If you shove this hard metal in there, you could potentially damage it. So maybe you could just put it up close, see if it looks like it's approximately right. And you could also compare it to the rest of the spark plugs and make sure they are all approximately the same going across. Once you've confirmed that they all look fine, let's continue with the install.
Now in this video, we're gonna be showing you how to do the front right spark plug, but the process will be the same for all. What we're gonna need to do is remove the lower part of the spark plug wire from the spark plug. You wanna be very careful that your engine is not hot because this is your exhaust manifold. Give it a nice twist, see if you can break it free. If you can, twist and pull, should come right off. I always like to take a peek to make sure that there's no damage, there's no moisture, and there's no corrosion. That looks like it still got some lubricant on there, so that looks great.
We're gonna take our 5/8 spark plug socket, and we're gonna come right down, put it onto the spark plug, gonna give it a little spin, you should feel a click in, go ahead and turn it to the left. I'm only gonna give it a couple turns and then we're gonna use some compressed air to make sure we blow out any debris that might be in there.
Let's just take a quick look at that spark plug. Look at the condition. Does it look as though it's got funny colors? Maybe it has buildup of any sort? If you see buildup, you know that you're not burning proper fuel and, of course, your new spark plug's probably going to get buildup over time as well. This one looks fairly decent and it's not worn at any angles. I don't see that there would be any issue. Let's go ahead and replace it.
So, we've got our old spark plug, let's grab our new one. And we're gonna look right along this edge right here. That's where it's gonna mate to the engine, you wanna try to compare those together. And then come right up along the top where the electrode is, make sure that it comes out to the approximate same length. If for some reason your new or old spark plug was higher or longer than the other, you know you're probably going to have an issue. More than likely you have the wrong spark plug.
Once you know you've got the correct spark plug and it's gapped as close as possible, let's go ahead and carefully install it into the engine. Just wanna find that hole, guide it in. Always start it in by hand, and you never ever wanna use an air gun for any reason doing spark plugs. We're gonna go ahead and torque down. When you torque it, if you're torquing it into an old head or a used head, you would torque it to 11 foot-pounds. If you're going into a brand new engine or a brand new head, torque it to 15 foot-pounds.
Now it's gonna be time to get your coil wire back on here. Before you do that, I just like to say, it's always a great idea to replace your spark plug wires when you're replacing your spark plugs. Either way, whether you're replacing them or not, I definitely recommend using some dielectric grease right along the area that's gonna go over the spark plug. That's gonna help this release easier next time. Go ahead and slide it on there. Make sure it clicks in. Beautiful. Follow the wire, make sure you didn't give any tugs and it's not going anywhere near the exhaust in any way. Do the same for all the rest.
Tools used
5/8 Inch Spark Plug Socket
1. Preparing Your New Spark Plug
Using a gap tool make sure the gap is the proper size for your vehicle.
Pry it until there is just a little resistance as it slides on to the proper size.
2. Replacing the Spark Plug
Pull the spark plug wire out.
Using a 5/8� socket and ratchet remove the spark plug.
Put the new spark plug into the socket and feed it down into the hole.
Use the ratchet to tighten the spark plug.
Brought to you by 1AAuto.com, your source for quality replacement parts and the best service on the Internet.
Hi, I'm Mike from 1A Auto. I hope this how-to video helps you out, and next time you need parts for your vehicle, think of 1AAuto.com. Thanks.
In this video, we are going to show you, we're going to show you how to replace a spark plug in this 2002 GMC Sierra 2500 HD. It's pretty much the same process with most V-8 engines. And the only tools you're going to need for this vehicle is 5/8-inch-deep socket or a spark-plug socket and a ratchet, and you're also going to need a gap tool.
Okay, so because this is a V-8 engine, it has eight spark plugs. There's four on this side and four on the other side, and in this video, we are just going to show you how to change one of them, but it is pretty much the same process for all eight. Okay so, using your gap tool, you just want to make the gap on the spark plug the proper size. In this vehicle, it is .06. You just want to use the pegs on this pry out the gap on the spark plug until you get it so that there's just a little bit of resistance as it slides on to the proper size. And there it is.
Okay, so you just want to reach down to the spark plug you're changing and disconnect the spark plug wire, and then using your 5/8-inch-deep socket or a spark-plug socket and a ratchet, you just want to twist that out. And then just remove that spark plug. Okay, and then what you want to do to replace it is just put that spark plug right into the socket, feed it down into the hole and just twist it until it's threaded on there. Once it's threaded, you just want to use your ratchet and tighten up that spark plug the rest of way. Generally, you want to tighten them to about 20 to 25 foot pounds. Then remove your socket and put the spark plug wire in place and just repeat that process for the other seven spark plugs.
We hope this helps you out. Brought to you bywww.1AAuto.com, your source for quality replacement parts and the best service on the Internet. Please feel free to call us toll-free, 888-844-3393. We're the company that's here for you on the Internet and in person.
Tools used
Dielectric Grease
Hose Pliers
8mm Wrench
All right. We want to disconnect the battery. Disconnect the negative cable, use an 8-millimeter ratchet wrench or a wrench, and slide that out of the way. All right. Now, replace the plug wire. Just grab the top of the wire, pull it down. And then, at the spark plug, you can try twisting this first. See if you can loosen it up. Try to pull it. Try not to bend the aluminum too much, but if you're struggling to get it off, you might have to a little bit. There you go. Pulled that one out.
You can take a little dielectric grease or some silicone lubricant. Just put this in the end right here. Then, you want to take the heat shield off the old wire and reuse this. Now, we can line this up, up top on the coil. And then line it up with the plug. Slide it in position. Make sure it clicks in place, just like that. Then you're going to do the same procedure for the other wires.
Now, we can hook up the battery. Line it up, get it started, and snug it up. Just make sure it's not loose. That's good.
Tools used
7mm Socket
Ratchet
1. Remove the ignition coil
Unbolt the ignition coil
Disconnect the wiring connector.
2. install the new ignition coil
Bolt the ignition coil down.
Connect the wiring connector.
Brought to you by 1AAuto.com. Your source for quality replacement parts and the best service on the internet. In this video we're going to replace an ignition coil on this 2002 GMC Sierra with a 6 liter Vortec V8. This procedure is the same for most of the 4.8, 5.3, and 6.0 liter Vortecs in the trucks as well as the SUV's, very simple, only tool you'll need is a 7 mm socket with a ratchet and extension.
The coils on this GM V8's is pretty easy to get to. There's four of them each side, eight total, one for each cylinder. They're right up here on top. I'm going to do this one because it's just the easiest one to see and film. They're all really easy to get to though. Now, there's a harness that goes in right here. I'm going to pull back on that tab and pull up and the front wire is right down here. You twist it. Hold down. Now you can see the two 7 mm bolts on each side holding it in. One here and one there. We'll just speed it up as we're removing those two 7 mm bolts with a socket and a ratchet and an extension. Our original coil, the new one from 1A Auto, you can see it's all the same. It's going to bolt in just like the original. I'm going to speed up again as I just tight those bolts in and then tighten them up with my socket, ratchet and extension. When you tighten them you want them nice and firm. They're not to be overly tight though. Put the extension back in and then plug your plug wire right back and then just repeat for the other seven.
We hope this helps you all. Brought to you by www.1AAuto.com. Your source for quality replacement parts and the best service on the internet. Please feel free to call us toll free 888-844-3393. We're the company that serve you on the internet and in person.
Tools used
Hose Pliers
Torque Wrench
8mm Wrench
Air Compressor
5/8 Inch Spark Plug Socket
Ratchet
All right, we wanna disconnect the battery, disconnect the negative cable. Use an 8-millimeter ratchet wrench or a wrench. And then slide that out of the way. We can take the spark plug wire off just on the spark plugs side. You might have to use some special pliers, like hose pliers, to get there boots off. Just like that. And just slide that to the side.
Now before you take the spark plug out, there could be some dirt and debris around the plug. Just take some compressed air and just spray right around the plug itself. And take a spark plug socket. This happens to be a 5/8 spark plug socket. And loosen the plug.
And slide the plug out. Take the new spark plug, put it in your spark plug socket and just carefully line it up. And you wanna torque this to 11 foot-pounds. And reconnect the spark plug wire, just line it up with the plug. Lock it down and then you can do the same procedure for the other ones.
Now we can hook up the battery. Line it up, get it started. And snug it up. Just make sure it's not loose. That's good.
Tools used
Socket Extensions
Torque Wrench
5/8 Inch Spark Plug Socket
Ratchet
1. Removing the Spark Plug
Make sure the engine is cold
Grab and work the boot off of the spark plug
Clean off any dirt on the end of the plug
Remove the spark plug with a 5/8 spark plug socket
2. Installing the Spark Plug
Insert the spark plug into the spark plug socket
Tighten the spark plug without cross-threading it
Torque the spark plug to 11 foot-pounds
Press on the spark plug boot
These are where your spark plugs are on this 2009 Chevy Suburban. It's the rearmost one of the driver's side. We have four in each side. One, two, three, four. We go over to the passenger's side. This one is a little bit trickier to get to. It's in the way, way back. We've got back there, one here, one here, and one here. It'll be just enough room to get it. We're going to show you how to replace one on the driver's side front. This procedure is going to be the same for all of them. It just might take a little more maneuvering to get to the other side.
I'm going to give this a little turn, and then you don't want to pull on the wire. All you've got to do is work it off of the electrode and of the spark plug. It's usually on there pretty tight. I should also mention that you should do this when the engine is cold because we're right next to the exhaust manifold. Just put this to the side. You should do these one at a time.
Spark plug is down here in the head. I'm just going to take some compressed air. Just blow around the spark plug. If you don't have that, it's okay. Just be careful. Maybe take a brush. You just don't want anything falling down into the cylinder when you open up the spark plug hold. These spark plugs are going to take a five-eighths socket. You want to get a spark plug socket. This is a regular five-eighths socket. If you put a spark plug in here, it's real, real loose, and you can turn it while you're trying to install it. The spark plug is going to fall out.
A spark plug specific socket has a rubber insert to grab on to the foursome part of the spark plug so when you put it in here, it seats. You can go to install it. It's not going to fall out and the same when you're using it to remove old spark plugs. You can lift them out of the engine and they won't fall down. We're going to use a three-eighths drive and my five-eighths spark plug socket. It should be on there.
Take my ratchet. You're going to remove it. These are only torqued to eleven foot-pounds, so it shouldn't take much effort to get them out. Once it starts to get loose, you can remove the ratchet. We just use our fingers to spin it out. As you remove it, the spark plug socket is going to hold it in place so if you need to move it around, you're not going to drop it.
So you can see this is our old spark plug and this is our new one from 1AAuto.com. Their threads are the same length. A single electrode. These are going to work great and give you nice performance on your vehicle.
Take our new spark plug and put it into our spark plug socket. Carefully place it into a spark plug opening. Sometimes if you go backwards, it helps you find the threads and then you can spin it forward to go in. It should go in very, very easily. If it feels like it's cross-threading, you should stop and make sure that it's going in nice and straight. Okay. Now that you've got it hand-tight, we're going to torque it to eleven foot-pounds.
The spark plug torque can reinstall our spark plug boot. Just push it on as hard as you can and just check that it's seated.
Thanks for watching. Visit us at 1AAuto.com for quality auto parts, fast and free shipping, and the best customer service in the industry.
IGN01183
In Stock
Product Reviews
Loading reviews
4.95/ 5.020
20 reviews
5 Stars
4 Stars
3 Stars
2 Stars
1 Star
19
1
0
0
0
Tune Up
Julia
May 17, 2021
Suburban is running better and has more energy.
Best price and timely shipping
Stephen-
June 4, 2021
Best price by a long shot, the coils, plugs, and wires were cheaper as a kit than what I could buy the coils for alone at my local auto parts stores. Everything was correct and came in a timely manner. I recommend 1A Auto because of the parts and video support they provide for jobs.
Nick
June 6, 2021
Great price, great value and shipping was fast.
Wouldve costed me way more anywhere else.
Awesome!
Adriane
August 4, 2021
Best price, fast shipping, superior service. I received parts and took to a local shop. The mechanic noticed 2 coils were missing from the package. I immediately called and the CSR apologized, showed empathy, shipped parts 2nd day Air. Upon getting my vehicle back I noticed the check engine light on. Performed OBDII and there is a cylinder 8 misfire. I called the mechanic he advised the parts could be faulty and directed me to call 1a auto. I did and once again I was pleasantly pleased with the customer service. This CSR pulled up my order and apologized for the inconvenience, advised me that 1a auto stands behind their products and sent out a coil, plug, and wire to ensure all bases were covered.
Review of 1A Auto
Erick
December 6, 2021
I would most definitely order from 1A auto again parts were nicely packaged & all the parts were a correct fit for my GMC & shipping was right on time
Good value
Ken
December 19, 2021
Worked great on my 5.3 chevy
Ernest
January 4, 2022
As advertised. All parts ready to go. Everything worked out perfectly.
[{"url": "https://wac.edgecastcdn.net/001A39/prod/media/pNISJll75W64CYGsite/8d20177b3b8a7633002f9b03529fcac5_1643321105804_0.jpeg", "caption": "The bad one"}, {"url": "https://wac.edgecastcdn.net/001A39/prod/media/pNISJll75W64CYGsite/a40589ae25b1934966d62142f6625696_1643321105804_1.jpeg", "caption": "The bad one"}]
Robert
January 27, 2022
Exactly what was needed.No codes but one of the coils was fried. 2004 Silverado at 230 miles had Original ones.
Christopher
February 18, 2022
They went in great, exactly what my truck needed. The only thing I would say is, Please put some instructions and specs for all your parts in the box as well, or make a page where that is all accessible. That would help out alot of the DIYers looking to save money and feel proud to work on their own vehicles.
Antonio
February 20, 2022
Great prices and arrival time is a day earler.
Mark
April 6, 2022
Changed out the old with the new and my Tahoe is running great. Thanks.
Brian
May 6, 2022
Great smoother sound
Charles
September 8, 2022
Great!!
Fit as advertised
Charles
December 11, 2022
No problem fit and works well.
Great company to order from. Highly recommend them.
Roxann
January 4, 2023
We appreciate the fast quality service we receive for ordering with you. Always a pleasure.
Luis
February 3, 2023
So far so good! Got rid of my random misfires and other problems with running rich and catalyst codes
Another Satisified Customer
David
April 20, 2023
You guys were fast and spot on! Keep up the good work.
My Suburban runs great.
Brandon
October 19, 2023
A+item
Duane
October 24, 2023
everything like the said very satisfied
Great service for vehicles auto parts
JAMES
April 21, 2024
Every time that I called 1A auto parts. I always had a professional conversation with the sale person that I was talking to. He or she always gave me the best advice of the parts that I was calling about. My parts was always delivered on time each time that I ordered anything by phone. I'm an older person so I like calling and asking questions about what I need. I will refer 1A auto parts to anyone that's looking for parts for their vehicles. Thank you 1A auto parts . James Matthews
Customer Q&A
My 2005 Chevy Silverado 1500 is a V6. Will this kit work for my truck?May 17, 2021
Gregory M
10
This part will not fit your vehicle, but we may have a part that is listed to fit.
Please enter your vehicle's year make and model in the search bar at the top of the page. This will display parts guaranteed to fit your vehicle. Just be sure to verify all of the information shown in the Vehicle Fit tab before ordering.
May 17, 2021
Emma F
Are the spark plugs pre gaped?August 20, 2021
Ricardo M
10
Hello, Yes the spark plugs come already gapped.
August 20, 2021
Ricale A
10
What is the gap specs?
December 12, 2021
John D
With this kit work with my 2003 Chevy Tahoe Z71 5.3 l 4X4 without throwing any codes?February 3, 2022
W C
10
This kit will fit a 2003 Chevrolet Tahoe V8 5.3L with 9.20 in Spark Plug Wires with Round Style Coil
February 3, 2022
Cristina P
How do you service traction control?April 16, 2022
Michael E
Will these fit a 6.0 Silverado 2500?September 19, 2023
Brannan B
10
Thank you for your inquiry! Can you provide us with your 17-digit VIN number?
September 20, 2023
Jean O
10
No
October 19, 2023
Brandon W
Customer service
877-844-3393
Monday - Friday 8:00am - 9:30pm ET Saturday - Sunday 8:00am - 4:30pm ET
Chevrolet is a registered trademark of General Motors Company. 1A Auto is not affiliated with or sponsored by Chevrolet or General Motors Company.See all trademarks.
Enter Vehicle Year Make Model
Specify your vehicle's year, make and model to guarantee fit.
Year
Make
Model
Options
Drivetrain
This part doesn’t fit a . Select from parts that fit.