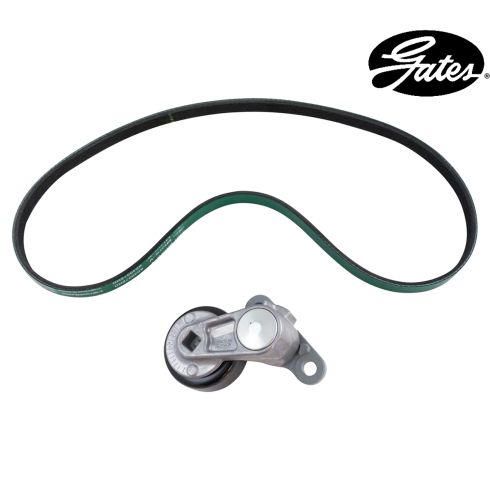
These parts are authentic Gates brand products that are supplied and packaged by Gates. Some of the components included in this kit may be sourced by Gates from other high quality suppliers such as Aisin, GMB, Koyo & other OEM suppliers. These parts are subjected to the very same testing and quality standards as all Gates products.
Item Condition:New
Attention California Customers:
WARNING: This product can expose you to chemicals including 1,3-Butadiene, which is known to the State of California to cause cancer, and birth defects or other reproductive harm. For more information, go to www.P65Warnings.ca.gov.
Lifetime Warranty
This item is backed by our limited lifetime warranty. In the event this item should fail due to manufacturing defects during intended use, we will replace the part free of charge. This warranty covers the cost of the part only.
Wear and Tear
This item is backed by a warranty against defects in materials and workmanship under its intended use. The warranty does not cover normal wear and tear. Please keep your invoice for proof of this warranty.
FREE Shipping is standard on Orders shipped to the lower 48 States (Contiguous United States). Standard shipping charges apply to Hawaii, Alaska and US Territories. Shipping is not available to Canada.
Expedited is available on checkout to the United States, excluding Alaska, Hawaii and US Territories as well as P.O. Boxes and APO/FPO/DPO addresses. Final shipping costs are available at checkout.
How to Replace AC Belt and Tensioner 2000-08 GMC Yukon
How to Replace Serpentine Belt Tensioner 1999-2008 Chevy Silverado 1500
How to Replace Drive Belt Component Kit 1999-2006 Chevrolet Silverado 1500
How to Replace AC Belt and Tensioner 2000-08 Chevy Tahoe
How to Replace Serpentine Belt Tensioner Idler 2003-2021 Chevrolet Express
Created on:
Tools used
Torque Wrench
Gloves
Socket Extensions
Flat Blade Screwdriver
15mm Socket
Serpentine Belt Tensioner Tool
8mm Wrench
8mm Socket
3/8 Inch Drive Ratchet
Safety Glasses
Remove the negative terminal from the battery. Just use a 8-millimeter wrench and just slide that out of the way. Take this cover off. You can just use a 8-millimeter socket. Remove this bolt. Just pull the cover up and slide forward. Loosen up this worm clamp right here. Use a straight blade screwdriver. Loosen this clamp as well. Take this hose bracket off of the intake. Just use a trim tool and pop this off just like that. Grab it right here. Just rock it back and forth, sliding it forward and also right here. Pop it off and pull it up. Now you're gonna use a serpentine belt tool. We're gonna use the 15-millimeter adapter on the end of it. If you don't have one, you can just use a 15-millimeter wrench. Just be careful. Loosen up the tension on it as if you're turning it clockwise and then over on the idler, just take the belt off. Release the tensioner. Pull off your tool. Take the belt off. I'm just gonna take it off the harmonic balancer with a crank pulley. Slide it off the tensioner. Slide it over the water pump just to keep it out of the way. If you're just doing the AC belt down below, you can just leave the belt off at this point. You wouldn't have to take it off all the way. If you're replacing it, take it off the alternator, off the power steering pump and the idler pulley.
Take this shield off. There's a bolt there, bolt there, there. Sometimes there's three bolts here. Sometimes just two. Use a 15-millimeter socket. And take the cover down. Now the belt has broken on this vehicle so I don't have a belt on here but if you needed to remove the belt first, just use a 3/8 drive ratchet and a extension and just go into the tensioner right here and then in clockwise motion, loosen up the tension on the belt. Slide the belt off. You're gonna take the belt off behind the harmonic balancer or the crank pulley and it loosen the tension up and just slide the belt all the way off. Now take a 15-millimeter socket. Remove the two bolts in the bottom of tensioner. And slide it out. Take the new tensioner and put it back in position. Take the bolts. Get the bolts started. And tighten the bolts down. And torque these bolts to 37 foot-pounds. Take the new belt. Go over the crank pulley. You're gonna go behind the crank pulley and then go over to the AC compressor, get it around the pulley and then around the tensioner pulley. All right. Once that's all lined up from there and take your socket and extension or ratchet and extension and pull the tension off the belt as you slide the belt on the rest of the crank pulley. Just make sure it's on there good, in all the grooves. And it looks good.
Take this cover, bolts lined up. And snug them all up. All right. Take the serpentine belt. I'm gonna go around the crank pulley down below and come up. Take one side of the belt. Just go over the tensioner pulley. The other side goes on...back side goes over the water pump and then you're gonna go down around the power steering pump pulley and then up to the alternator. Take your belt tensioner tool, carefully while you're holding the belt near the idler pulley over here. Take the tension off the tool, the tensioner, and slide it onto the idler. Just double check, make sure the belt is up over all the pulleys. It looks good. Take tool off. Should be good. Take the snorkel, line it up. Put on the throttle body and then over here on the airbox or over the mass airflow sensor, hook this holder on just like that. Your straight blade screwdriver. Tighten up the worm clamp. Snug that up and tighten this one up. Very good. Slide the cover in position. And tighten down the bolt. Take the negative terminal. Connect it to the battery. Use a 8-millimeter wrench and tighten it up. Just make sure it's not wiggle loose. Looks good.
Tools used
Flat Blade Screwdriver
15mm Socket
10mm Socket
Ratchet
3/8 Inch Drive Ratchet
1. Removing the Air Intake Hose
Loosen the two air intake hose clamps with a flat blade screwdriver
Pull the hose back
Pull the intake hose up and out
2. Removing the Radiator Fan Shroud
Remove the two 10mm bolts from the radiator fan shroud
Pry the radiator hose clip off the fan shroud with a flat blade screwdriver
Remove the four plastic clips from the fan shroud
Pull the shroud up and out
3. Removing the Serpentine Belt
Attach a 15mm socket and ratchet to the serpentine belt tensioner
Turn the tensioner clockwise to loosen the belt
Pull the belt off the tensioner
Pull the belt off the other pulleys
4. Removing the A/C Belt Tensioner
Remove the five 15mm bolts from the skid plate
Pull off the skid plate
Attach a 3/8 inch ratchet to the A/C belt tensioner
Pull down on the ratchet to loosen the A/C belt
Pull off the A/C belt
Remove the two 15mm bolts from the A/C belt tensioner
Pull off the A/C belt tensioner
5. Installing the New A/C Belt Tensioner
Put the new A/C belt tensioner into place
Insert the two 15mm bolts into the A/C belt tensioner
Feed the A/C belt into place
Attach the 3/8 inch ratchet to the A/C belt tensioner
Pull the ratchet down to loosen the belt
Release the tensioner
Pull off the ratchet
Lift the skid plate into place
Insert the five 15mm bolts into the skid plate
6. Reinstalling the Serpentine Belt
Familiarize yourself with the belt-routing diagram
Feed the belt around the pulleys, as displayed in the diagram
Attach a 15mm socket and ratchet to the serpentine belt tensioner
Turn the tensioner clockwise to loosen the belt
Check that the belt is routed correctly
Pull the belt over the tensioner pulley
Release the tensioner
Remove the ratchet
7. Reinstalling the Fan Shroud
Push the fan shroud into place
Insert the four plastic clips into the fan shroud
Clip the radiator hose to the fan shroud
Insert the two 10mm bolts into the fan shroud
8. Reinstalling the Air Intake Hose
Put the air intake hose into place
Tighten the two intake hose clamps with a flat blade screwdriver
Clip the smaller hose to the intake hose
Brought to you by 1AAuto.com, your source for quality replacement parts and the best service on the Internet.
Hi, I'm Don from 1A Auto. I hope this how-to video helps you out, and next time you need parts for your vehicle, think of 1AAuto.com. Thanks.
In this video, we're going to show you how to replace the A/C serpentine belt tensioner on this 2002 Chevy Suburban with a 5.3 liter V8 engine. It's the same part and similar process on these Suburbans from 2000 to 2008. The items you'll need for this are a new A/C belt tensioner from 1AAuto.com, 10mm and 15mm socket and ratchet, flat blade screw driver, and a 3/8 inch ratchet.
Start off by loosening these two hose clamps using your flat blade screw driver. We'll just fast forward as Don does this. Now just pry this clip out and then pull the hose back. You may need a flat blade screwdriver to help you pry it free and then pull forward and lift it up and out.
Next, remove these two 10mm bolts and we'll fast forward as Don does that. Then pry the clip on this hose out of the fan shroud, and then remove these four clips around your shroud. To remove these clips, you just pry up the center and then pull the clip out. We'll fast forward as Don does this to the other three. Then just pull that hose back and lift the shroud straight up and out.
Right here is your tensioner. Just put the 15mm socket and ratchet on it and push down on the ratchet. This will release the tension on the belt, and you can pull the belt from the pulleys. You want to just reach down, pull it off all the pulleys, and the belt will be free. You can just pull it up and out.
Underneath the front bumper, you'll see this plate and you need to remove these five 15mm bolts. We'll fast forward as Don removes those. Behind the plate, is your A/C belt tensioner and you just use a 3/8 inch ratchet. Just pull down on the tensioner and then pull your A/C belt free. It pulls right off. Right here is your A/C belt tensioner. Sorry for the shaky camera, but you can see it's held in with two 15mm bolts and we'll just fast forward as Don removes those. Then the A/C tensioner will just pull right off.
On the left is the old A/C belt tensioner. On the right is the new one from 1A Auto. You can see they're identical and they'll fit exactly the same. Put your new A/C belt tensioner into place and replace those two 15mm bolts. We'll just fast forward as Don tightens those up. Feed your new A/C belt back up into place and for now, you're really just preliminarily getting it into place, and then, use your ratchet on the tensioner. Now make sure the belt is on all the pulleys and that it's on all the way. Once the belt is in the right position on each of the pulleys, carefully release the tension on the tensioner and pull your ratchet free. Put the skid plate back up into place and replace those five 15mm bolts and tighten them up.
Now, located at the front of your truck, you'll see this serpentine belt diagram. You want to follow this when you're putting your belt back on and really it's hard to show us doing it, so you're going to have to refer to that, but it's pretty simple to follow. Everything is where it needs to be and you can see he starts with the lower pulleys. He just starts feeding the belt down and around each of them following that diagram. We'll fast forward as he does the majority of this. Once you've got it on all but one pulley, push back down on the tensioner and double check. Make sure your belt is on all the pulleys properly and that it's not just half on some of them. Then just get it into position. Then carefully release the tension on the tensioner and pull the ratchet free.
Now to replace the shroud, just push it back down into place. Then, replace those four clips. Just push them back down into place and push the center down to lock them. Push the hose back into place, and then, replace those two 10mm bolts. Now take this air intake hose and push it back down into place on the air intake box and then onto the engine. Then just tighten up those two hose clamps. Then just re-clip that hose to the air intake hose and you're all set.
We hope this video helps you out. Brought to you by www.1AAuto.com, your source for quality replacement parts and the best service on the Internet. Please feel free to call us toll-free, 888-844-3393. We're the company that's here for you on the Internet and in person.
Tools used
15mm Wrench
Torque Wrench
Gloves
14mm Socket
Flat Blade Screwdriver
15mm Socket
Socket Driver
Ratchet
Trim Tool Set
Safety Glasses
Tools used
15mm Wrench
Torque Wrench
Gloves
Socket Extensions
15mm Socket
Serpentine Belt Tensioner Tool
8mm Socket
Ratchet
Trim Tool Set
Safety Glasses
3/8 Inch Socket
You remove this cover. There's a bolt right here. Use an 8-millimeter socket. Take that out. And slide the cover up and slide it forward. There's a bracket right here that holds the coolant hoses on. Just use a trim tool and just separate that from that. This one's broken in this vehicle. Now we wanna remove the snorkel and use an 8-millimeter socket, loosen up the worm clamp or you can use a straight blade screwdriver. So right here. Slide this off. And slide it off the throttle body. And pull it out of your way.
And use a 15-millimeter wrench or you can use a belt tensioner tool and just put it on the belt tensioner, loosen this up. Slide the belt off of the idler pulley. Loosen up on the tensioner and slide the belt off the alternator, off the power steering pump pulley, off the water pump, and off the crank pulley. Now your vehicle may have a shield right here. There should be two bolts down below and then two or three bolts up top. They're 15 millimeters. Use a 15-millimeter socket, take that shield down. I'm gonna take a ratchet with a 3/8 extension and slide it right into there of the tensioner. Loosen up the tension on the belt. Then slide the belt behind the crank pulley just like that. Then take the ratchet off. You can slide the belt over the AC compressor and slide it off the crank pulley. And there's two bolts on the AC tensioner. Use a 15-millimeter socket, remove those 2 bolts. All right. Take those bolts out. And just grab the tensioner and slide it out. Take the new tensioner and put it in position. Take the bolts. Get them started. And now I can torque those bolts to 37 foot-pounds.
Take the belt. You can go over the crank pulley and then go behind it. And then slide it over the AC compressor. Get that lined up. And then try to get the belt over the top part of the crank pulley. And make sure it's over the tensioner. And you can try this this way or the opposite way. You could have the belt on this side. Then we'll take the ratchet. As you pull a little bit of tension on the belt, then move the tensioner down and just walk the belt onto the pulley. Oops, slipped off. Can try to slip it over the tensioner like this as well. It's not as easy. Oops. And slip it over. And just make sure the belt is all the way around the pulleys and the AC pulley. And that looks good. And if your vehicle had a shield right here, you wanna replace that shield at this time.
All right. Take the serpentine belt and slide it over the crank pulley first and go over the water pump. The back side of the belt needs to go over the water pump. And go down to the power steering pump and up over the alternator. And then over the tensioner right here. And you hold off on putting it over the idler pulley till last. And now take your belt tensioner tool or a wrench and just take the tension off the tensioner. All right. Now I'm gonna slide the belt close to the idler pulley and take the tension off the tensioner with your wrench or your belt tension tool. Just be careful. And take the wrench off and just double-check all the pulleys. And it looks good. Now take the intake snorkel and line this up with the throttle body. And that's good there. And line it up on the mass airflow sensor just like that. And tighten this up. Tighten up that worm clamp and then same with this one. And take this bracket and then reposition that into that bracket. This one's broken. And slide this cover back on. Get this bolt started. And tighten that up.
Tools used
13mm Socket
Torque Wrench
Socket Extensions
Flat Blade Screwdriver
15mm Socket
8mm Socket
10mm Socket
Ratchet
Trim Tool Set
Pocket Screwdriver
Product Reviews
Loading reviews
4.80/ 5.05
5 reviews
5 Stars
4 Stars
3 Stars
2 Stars
1 Star
4
1
0
0
0
Perfect Fit
Samuel
January 13, 2019
I bought this kit immediately after I purchased a used Avalanche. The truck did not have any problems with as it was a one time owner predominantly highway driven vehicle.
I intended to change just the belt alone, unaware that they were sold in a kit with the pulley. Once I removed the old belt I noticed that the pulley showed some serious wear.
Thanks to 1A auto selling both as a kit for a really affordable price.
Charles
August 7, 2021
1234
Preventative maintenance of an overlooked component
Matthew
October 8, 2021
This kit was perfect. Did not need the belt removal tool on a 2001 tahoe with 5.3l engine.
Everything fit just fine and replaced the squeaky worn out parts like new.
Very easy job that took longer to get the truck up on stands than even replace the parts.
Definitely worth the peace of mind not having the airconditioner belt or tensioner grenade after 20 years and possibly take out the main serpentine belt.
No problems!
Matthew
December 5, 2022
No more knocking at start speed! tensioner is hard to get at with a ratchet
Works!
Edward
October 26, 2023
So far so good.
Customer Q&A
Do you have bolts for sale to mount this a/c belt tensioner? Thank you. take care.September 26, 2021
David V
10
Currently, we do not carry this part for your vehicle. We're always updating our inventory so please check back soon!
September 27, 2021
Cristina P
Customer service
877-844-3393
Monday - Friday 8:00am - 9:30pm ET Saturday - Sunday 8:00am - 4:30pm ET
Chevrolet is a registered trademark of General Motors Company. 1A Auto is not affiliated with or sponsored by Chevrolet or General Motors Company.See all trademarks.
Enter Vehicle Year Make Model
Specify your vehicle's year, make and model to guarantee fit.
Year
Make
Model
Options
Drivetrain
This part doesn’t fit a . Select from parts that fit.