Replaces
This part doesn’t fit a . Select from parts that fit.
Frequently bought together
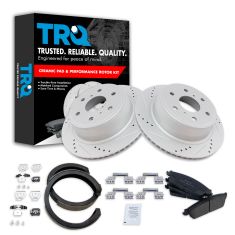
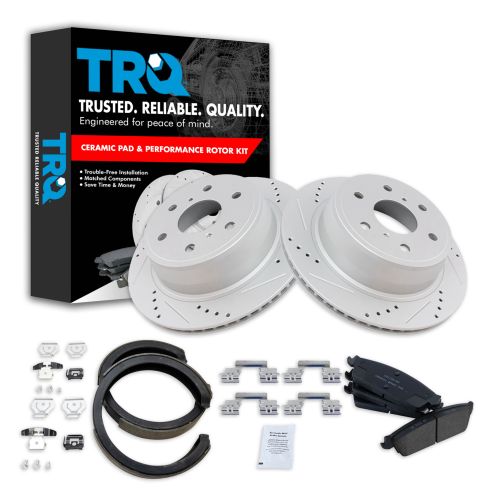
Part Details
Product Features
Item Condition:
New
Attention California Customers:
 WARNING: This product can expose you to chemicals including Lead and Lead Compounds, which are known to the State of California to cause cancer, and birth defects or other reproductive harm. For more information, go to www.P65Warnings.ca.gov.
Lifetime Warranty
This item is backed by our limited lifetime warranty. In the event that this item should fail due to manufacturing defects during intended use, we will replace the part free of charge. This warranty covers the cost of the part only.


Created on:
Tools used
Tools used
Tools used
Tools used
Tools used
You can take the center cap off. Use a straight blade screwdriver. Take that off. Use a 22-millimeter socket to take off the lug nuts. Take the wheel off. Take these two caliper bolts out. I'm gonna use a 12-millimeter socket and then a 16-millimeter wrench, just to hold the slide from spinning, loosen these up. Now we'll just use a screwdriver, pry the caliper off. Pull that out, then you can use a caliper hanger and just support it from the upper control arm right there. Just make sure there's no tension on the hose. Slide it over here. Take the brake pads off. Use the same straight blade screwdriver.
And take an 18-millimeter socket, take these 2 caliper bracket bolts out. Take these bolts out and slide the bracket right off. Now take the rotor off. If it's stuck on there, just take a hammer. Get a tap in these areas. Just try to not hit the studs. It should be loose. Try not to breathe any of that in, and slide it off.
We're gonna take the parking brake shoe off. There's a clip right here that's held in with an 8-millimeter bolt. Use an 8-millimeter socket to take that off. Slide that bolt out. Then we can slide this out. And if you just push the whole shoe assembly down, and get it to pop off, that lever right there, and this takes a little bit of effort. You don't have to take the axle out to get these off. Slide one side, get the other side out. Just like that. I'm just gonna take this adjuster out. Take that out. Clean that up a little bit. You can use a wire brush, and same with the other side. There should be a pin on that side. I'm just gonna put some grease on here before I put it back. Put the adjuster side on this side, and when you do the other side, it's going to be the opposite. And this pin's all cleaned up. Just put some grease inside there and get that pin in. Put a lot more grease on that. And the grease will hold it in there, and just slide this on this side.
Take the new shoes, and just angle this. This might take a couple tries to get it right. Here you go. Like I said, you really don't have to bend it, just angle it at the right angle. It might take a little practice. What you can do is get this to slide on like that and then we can move these afterwards. Just get it in the right position. You can try using a screwdriver or even some pliers. Try twisting this a little bit. Get that to line up with the screwdriver. Do the same on the other side. Find the correct hole down that matches the one you took off. Slide that in position with the new bolt and snug that bolt up, not too tight. That's good.
I'm just gonna clean up this surface right here. You can use a wire brush or some type of grinding wheel. Just be careful. You don't want to take too much material off, just get some of the rough stuff. Take a little anti-seize, put it on the hub area right here. When you go to put the rotor on, you may have to adjust the parking brake. You can spin that wheel either forward or backward and it will either tighten it or loosen it. Slide the rotor on, just make sure it spins good, and then double check with your parking brake, and adjust accordingly.
Slide the brake caliper bracket in place. Put the bolts in. You can use a little thread locking compound on the bolts. Now I'm going to torque these bolts to 122 foot pounds. I'm gonna install the brake pads. Make sure you have the brake pad warning indicator facing up on the outside and also on the inside. Now we'll take the brake caliper off. Take the hanger off. I have to compress the caliper so I use a brake caliper compressant tool. Just compress it really slow. This is gonna push the fluid through the hoses, back through the lines, back up to the master cylinder and into the reservoir. Just go nice and slow.
That's compressed. Pull the compressing tool out. Slide the caliper over the brake pads and the bracket. Take the two bolts. Install the bolts. You can put some thread locking compound on those bolts. I can use my 16-millimeter wrench, 12-millimeter socket, torque these bolts to 31 foot pounds.
And reinstall the wheel. Put the lug nuts on. Now I'm gonna torque these lug nuts to 140 foot pounds in a star pattern to tighten the wheel down evenly. And just go around again, double check.
And reinstall the center cap. Now we're gonna pump the brake pedal nice and slow. There's gonna be an air gap between the caliper piston and the brake pad, so we want to eliminate that air gap. Once the pedal feels good, then you're all set. Check the brake fluid level in the master cylinder reservoir. There's the minimum line right there, the max line right there. Adjust accordingly.
Tools used
Brought to you by 1AAuto.com, your source for quality replacement parts and the best service on the Internet.
Hi, I'm Mike from 1A Auto. I hope this how-to video helps you out, and next time you need parts for your vehicle, think of 1AAuto.com. Thanks.
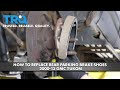
In this video, we're going to show you how to replace your E-brake shoes on this 2002 Chevy Suburban. We show you on the passenger side, but the driver side is the same procedure. The items you'll need are new emergency brake shoes from 1Aauto.com; 8, 12, 18, and 22 mm socket and ratchet with a piece of pipe for leverage; flat blade screw driver; large C-clamp; torque wrench; and jack and jack stands.
Start off by loosening up these lug nut covers. We'll fast forward as Don does this. Once those are all loosened up, you can pull the hub cap free. Now, you want to loosen the lug nuts preliminarily, raise the vehicle and remove them the rest of the way, unless you have air powered tools. Then, you can do it while it's up in the air.
Then, to inspect your brakes, just run your finger along the rotor, and check for any deep grooves. You can look in here for the life of this brake pad, and then through here for the life of the other brake pad.
Now, remove these two 12 mm bolts. We'll fast forward as Don does that. Use a large C-clamp. You just put it on this end on the back of the caliper, and on this brake pad and just twist it in. This is going to push the caliper piston in and make it easier to pull the caliper up and off. Now, remove the large C-clamp. Pull the caliper free and set it aside. Now, pry out the brake pads.
Now remove these two 18 mm bolts. Just use a piece of pipe to help break it free. We'll just fast forward as Don removes those two bolts. Now pull your caliper bracket off. Pull the rotor off.
There should be a bracket underneath here held in with an 8mm bolt. So, you'd want to remove that next. Ours is missing. After that, you can pull your E-brake shoes forward, and then hit them down. Now you just want to pull it over the hub. You do have to angle it just right to get it over.
Now, before you install your new E-brake shoes, make sure you put this new bracket into place. The E brake shoes from 1Aauto do come with this bracket. Just replace that 8mm bolt and tighten it up. Put your new E-Brake shoes on. Now you want to just put these two tabs on the ends of the shoes into these two slots, one on either side of the adjuster here. Once you get one side into the slot, just use a flat blade screw driver to pry the other side. Once it's lined up, you can just use your flat blade screw driver to just turn this adjuster. If it's a little stiff, just use a hammer. Just adjust it so that when you put your rotor on there's just a little bit of resistance.
Slide your new rotor into place. Then twist on a lug nut to hold the rotor in place while you put the caliper bracket back on. Then put your caliper bracket back into place and replace those two 18mm bolts. We'll fast forward as Don tightens those up. You want to torque these to about 85 foot-pounds.
Push your brake pads back into place. Then, put your caliper back down into place and replace those two 12mm bolts. Now we'll just fast forward as Don does this and tightens them up. You want to tighten these to about 30 foot-pounds.
Put your wheel back into place. Then replace your lug nuts and tighten them preliminarily. We'll fast forward as Don does this. Lower the vehicle and torque the lug nuts to 100 foot-pounds in a crossing pattern. Then replace that hub cap and tighten up each of your lug nut covers.
Before taking the vehicle out on the road, you want to just pump the brake pedal until it firms up. Then do a stopping test from 5 miles per hour, and then 10 miles per hour. Then you're all set.
We hope this video helps you out. Brought to you by www.1AAuto.com, your source for quality replacement parts and the best service on the Internet. Please feel free to call us toll-free, 888-844-3393. We're the company that's here for you on the Internet and in person.
Tools used
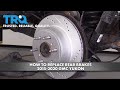
Okay, friends. One of the first things we have to do is safely raise and support the vehicle. Once you have your wheels off the ground in the rear, we're gonna go ahead and remove all six of these lug nuts. Remove your wheel. One of the next things that we need to do is take a nice small pry bar like this, we're gonna come in between the caliper and the pad and we're just gonna apply a little bit of leverage. What we wanna do is just push in that caliper piston just a teeny bit to take the pressure off of the brakes. The next thing we need to do is remove our two 18-millimeter mounting bolts for our caliper. Just take a wrench, can use a socket with a ratchet if you'd like. There's one bolt. I'm just gonna start that in just a couple threads to hold the caliper for me while I remove the second. There it is. Let's get that other one out of there. Next, we're gonna take the caliper and we'll just set it up here where it's gonna be nice and safe. Just make sure you put it somewhere that it's not gonna potentially fall down and hopefully not hurt you in any way.
Now it's gonna be time to remove your rotor. You might need to give it a couple light bonks. The next thing we're gonna do is use our 8-millimeter and we're gonna remove this small bolt right here. Just be careful because very often it's frozen in there and it might break off. Nice long ratchet did the trick. That little bolt out of there. Grab this out of here. Set those aside. Just gonna grab onto this. You'll notice it can move around now. If you were to look under here, you're gonna see the adjuster. If you just take that shoe, move it kinda closer to the axle and then give it a loving bonk down, it should come free from the adjuster. Go ahead and grab that shoe. At this point you can try to weasel it off the axle. There we are.
The next thing we're gonna have to do is take out this area right here. This is gonna be the adjuster and it should separate. We'll just spray it down with some penetrant. That looks good. Grab my little pry bar here. We need to separate the cogged area from the base area. Okay, starting to come up. Get this side out of there too. Right inside this area is where the adjustment's supposed to be for the emergency brake shoe. If you take it apart and you happen to notice that this part right here is frozen, the part that has a little cog, this part right here should spin in there. If it does not, you need to completely separate these, clean them up, re-lubricate them and then, of course, put them back together. This piece right here has like a little bobble. Believe it or not that's not one piece. It actually does come apart so you wanna be careful not to lose this. It's a great idea to clean all this up as well. That's just about good right there. This flows smoothly. It's looking great. You wanna make sure that this area right here is nice and clean, free of debris or anything that might obstruct it from being able to spin because that's gonna go inside this hole right here. How can I tell that this goes inside of this hole and not in the bottom hole? Because of this little clip right here. That clip is gonna line up with the notches on this and it's gonna prevent it from spinning on its own. We're not gonna put that in yet though. What we're gonna do, grab some more of that caliper grease and we're gonna put it right inside the hole on the other piece. All right, this is gonna be the other end. Just try to fill it right in there if you want. Get some more. More the merrier. Put it right in. Now I'm gonna grab my nice, clean pin. I inspected it. It's in good condition. I'll just put it right in there. Now we need to put a nice coating of that grease all along the areas where it's gonna rub up along the unit right there.
Now that those are nice and coated, let's continue on with the grease a little bit more and we're gonna go directly to where the adjuster is gonna be. You can go ahead and put in as much grease as you want. If you put in too much, it's not really that big of a deal but what you will notice is it will kinda come out and if that was to happen, you would just kinda clean it up so you don't get any mess on your emergency brake shoe. Now we're gonna take our pieces. Should slide right in there. Make sure it spins like it should. Do the same to the other side. You're gonna need a little bit more of that caliper grease or whatever type of grease you're using and you're gonna put it on the contact points of this bracket where the emergency brake shoe is gonna ride. The reason for that is of course for vibration dampening and noise reduction. So, we'll come right down here because we know it's gonna ride right along the outside there. Right here. This is a spot right there. If you were to come up here, you're gonna have this whole area. It hits up against there. And then if you come along the other side, you can clearly see exactly where the emergency brake shoe was riding before.
There we go. Now it's time to get the emergency brake shoe back up on here. To do this, you're gonna have to do a little bit of contortioning and just a little bit of wiggling and I'm sure over a period of time you should be able to figure out how to get it right over there. There we are. Nice light bonk. No big deal. We'll go ahead and line these tabs up with where it's supposed to sit on the adjuster there. Should slide over. If it doesn't, you can just kinda go past. Line up the adjuster ends so they're straight up and down so they'll line up with the way that the shoe needs to go on. Once you've gone past, like I said right here, you should be able to just kinda stretch it and draw it straight up on there. That looks great.
Now it's gonna be time to get the mounting bracket on there. It's a kind of funny looking thing, but if you were to look at it, you would see that it has an indented area right here. That's gonna ride right on this bracket right there. You want it to be kinda facing in this general direction so that the black part is gonna be riding up against the inner portion or the inner ridge of this shoe. Put it up on there. Line up your screw hole and then put in your screw. All right, so that's pretty much bottomed out right there. At that point, you definitely don't wanna go too much further because it is just a very small bolt, but something that I would like to mention is you also don't wanna go tight enough. With that said, once it's bottomed out, just give it a teeny bit more. Make sure it doesn't feel as though it's super loose to you. Give this a nice little wiggle. Make sure you don't see any movement between this and the bracket itself. I think that that looks great.
The next thing that we need to do is clean up the mating surface where the rotor is gonna match up against the axle. If it's all bumped up like this or rough in any way, just go ahead and sand it down with something. Now that the majority of the area is nice and clean and sanded down, we need to continue on by getting in between the lug studs and the rest of the hub area here, right in there. If you notice there's a large build up, you can use something like this, maybe a scraper or even a flathead screwdriver, just kinda get the majority of it up. Then you can take a nice brush, just work at the rest. Now we're gonna spray down the mating areas with some copper never seize.
Go ahead and put your rotor back on there. Look at the backside. This is the area that's gonna meet up against the axle. You need to make sure that's nice and clean as well. Now that we've cleaned up the backside of the rotor, we're just gonna place it over the axle like this. Push it all the way in and it should go over the emergency brake shoes. If it doesn't go over the emergency brake shoes, de-adjust your adjuster. If it does go over but you feel as though there's no drag at all, you're probably gonna wanna adjust it up a little bit. What you're actually gonna wanna do right now is get it so it's a semi-close so you can hear the shoes just barely dragging in there. Okay, that's the sound of the shoes hitting up against the inside drum portion of this rotor. If it's too tight and you try to turn it and it just doesn't wanna turn, then you know that it's over-adjusted. If your brakes are over-adjusted, they're gonna overheat and you're gonna have major braking issues.
Now it's gonna be time to get the caliper back on the vehicle. Before you go ahead and do that, you need to make sure that you clean all the existing thread locker off of these bolts, and I always like to replace it with some new thread locker of my own. Caliper around here. Make sure that your pads are situated inside the brackets as they need to be. They might keep wanting to fall out if they're like mine. Go ahead and grab those caliper mounting bolts. Start them both in. Now we'll snug them up and we'll torque them to 148 foot-pounds. We got our torque wrench. The next thing I always like to do at this point is to make sure I pump up the brake. Now it's gonna be time to get the wheel up on here. Let's start on those lug nuts and then we'll bottom them out and we'll torque them to 140 foot-pounds.
Let's the torque them. Double-check them if you want and if you have a center cover, put that on as well. Let's make sure we double-check that brake fluid. Give it a wiggle. It looks as though this is low. There's the maximum line. Open this up. We're gonna add some DOT 3 brake fluid. Bring it right up to that maximum line. Make sure you close it back up. Down the road you go.
Tools used
Okay, friends, before we get started, let's talk safety, hands and eyes. With that said, go ahead and raise and support the vehicle and remove your lug nuts and then remove the wheel. So, now that the wheel is off, we have a nice clear view of our brakes. This is your caliper slider bolt here and one up there, remove the pair. As you can see, the slider itself is turning. You're probably gonna need to hold that with something such as pliers. There's one. Do the same to the other. There we are. Let's go and remove that caliper. It's a good idea to inspect it. Make sure you don't see any fluid. This looks good. Let's set it aside. Let's go ahead and remove the pads. Looking at the caliper bracket, you're gonna be able to see the two mounting bolts. Use your 18-millimeter, remove the pair. There's one bolt, let's go ahead and start it in just a couple of threads and remove the other. Remove your bracket and set it aside.
Next, we're gonna use some cutters and we're gonna take off these two little tabs right there. They basically just hold the rotor from falling off. Let's remove the rotor. For our next step, we're gonna need a nice collection bucket. We're gonna put it down underneath here and we're gonna clean down the emergency brake apparatus. Come down along here. Right down there is where your adjustment is. We're gonna need to work with that, so we wanna make sure it's nice and clean. The next thing I like to do is take a nice pry bar on the backside, and I'm gonna press up against this. As you press, you wanna look at the forward side and make sure that this can pivot freely. If it seems like it's seizing up or it doesn't wanna move at all, you need to take it apart and free that up. Right down here is your adjuster, you wanna make sure that that can move. I like to spray them down with some penetrant right along here, that's the adjustment area. Then right here is another area that it pivots. Let's go ahead and spray down this area with a little bit of penetrant. Clean down this area where the rotor is gonna ride.
So, I got in between all the studs and the hub area there. Now, we're just gonna put on a little bit of copper never-seize to help make sure that the rotor comes off fairly easily down the line. Perfect. Let's take a look at our brand new rotor. We're gonna, of course, clean it down before we go ahead and install it. A little bit of parts cleaner, nice clean rag. Get your braking surfaces, and right down along in here. That's where your emergency brake shoes are gonna ride. I like to clean that down as well. Now, this part we're gonna have to talk about for a second. When we put the rotor on, what we wanna try to do is activate the emergency brake, which you can do with the pry bar from the backside. And you wanna try to make sure that the emergency brake is gonna be able to hold the rotor from being able to spin. If it doesn't, you need to go ahead and pull off the rotor, come under here to where your adjuster is, and turn this so it expands the shoes out just a tiny bit, and retry. You wanna continue doing that back and forth until you find the perfect amount of pressure for your emergency brake shoes. Okay. So, pretty much right where it was at for me. Worked perfectly. Because I can put just a teeny bit of pressure and then that kind of keeps it. And if I put a little bit more, then it really holds it. So, that tells me that I don't need to remove this and readjust that. But if you do, it's very easy. Like I said, just pull it back off, adjust it a tiny bit, and then go ahead and put it back on and try again.
Something that I like to mention is once you have it so it's adjusted, you wanna make sure that you can turn it and you hear a tiny bit of drag and that's it. You definitely don't want anything that makes it feel like you have to put any force without having the emergency brake on. All right. So, we made our way over to the bench because I wanted to talk about cleaning up this caliper bracket here. We're gonna take it apart first. What I mean by that is to come in between here and remove the tins. We're gonna set those aside for recycling so we've got some nice new ones. After that, if you grab onto this area right here, this is considered your slider. Go ahead and pull that out. Same thing with the other one. Perfect. I'm gonna go ahead and wipe these down. Just like that. And we're gonna inspect them. You wanna make sure that you don't see any rust pits, large rust flakes, and you definitely don't wanna see anything up inside the groove, up along right here because that's where the boot is gonna ride. So, you wanna make sure it's as clean as possible.
Okay. Now, over a nice collection bucket, let's put a little bit of parts cleaner inside here and let it sit for a second. If you happen to have a bore brush, go ahead and give it a little whirl inside there. Let's empty this out. Oh, yeah. So, that's gonna get out all the debris or even leftover grease that might be left inside there. We'll let that to continue drying. Set this aside. Now, we need to clean up this area right here, which is the area tins are gonna ride. If you don't clean this up, there's a possibility the pads could be stuck inside the brackets and that's, of course, gonna cause an issue. All right. So, I've got all four corners here nice and cleaned up. As you can tell, those look great. Let's use a little bit of caliper grease along those areas. Now, it's gonna be time to install our tins. This is the backside. You can see it's got two little ears that face towards the center. And then the other side has the two ears that are gonna spread those pads apart. Go ahead and put the ears so they're inside the center of the bracket there. Lock it in. Same thing on the other one. Perfect. That looks good. They're definitely not falling off. I'm just gonna put a little bit of grease along the boot right there.
Now that we have that done, let's go ahead and grease these slider pins here. Crawl up and down the entire shaft there, make sure you put on plenty of grease. It doesn't cost you anything, so why not? There we are. Make sure you get up along the lip right there where the boot is gonna ride. It's gonna help keep moisture out of there. Keep this functioning good for a long time. Go ahead and start it into the hole. As you press in, you're gonna hear air come out. And give it a nice twist. That's good. That settles in the grease. Do the same to the other side. Okay. At this point, we have our caliper bracket cleaned and prepped. This looks amazing. Let's get back over the vehicle. Before we can go any further, let's go ahead and clean down the threads on our bolts. We wanna make sure there isn't any more thread locker on there, and then we're gonna replace it with some of our own. So, we cleaned up our bolts. I put on a little bit of red thread locker because that's how I roll. We're gonna go ahead and take the bracket here, start in both the bolts, and then we'll snug them up and torque them to manufacturer specifications.
All right. Let's torque these to 148 foot-pounds. Now, it's gonna be time to put our pads on. Something that I want you to pay attention to is this right here. This is called a wear indicator. You want that on the inner pad and you want it facing up. There we are. The outer pad should not have a wear indicator on it. Perfect. The pads move around inside the brackets. That tells me that I cleaned up the brackets well. Now, it's gonna be time to push in the caliper piston. A lot of times people like to open up the bleeder screw, you just wanna be careful not to break it and you also wanna be careful not to get any air in there. With that said, for the purpose of this video, I'm just gonna go ahead and push it back slowly without opening it. There we are. Now that we have the piston pushed in, let's go ahead and apply a little bit of caliper grease right along the piston right there. And then, of course, up on these ears right there. Basically, the contact point is where it connects with the pad. Let's go ahead and put on our caliper over those pads. Squeeze them in if you have to. There we are. Slide the bolts. Tiny bit of thread locker is a good idea.
All right. Snug them up. Torque them to manufacturer specifications. Here we go, 38 foot-pounds. Let's get the wheel up on here. Start all your lug nuts, snug them up, and torque them to 140 foot-pounds. Here we go. Torque them to 140. Torqued. And now, of course, the process would be the same for the other side of the vehicle. Okay. So, the next thing that you need to do is go ahead and pump up your brake pedal so it's nice and firm. Aside from that, check your brake fluid right over here and take it for a road test. Of course, it's a great idea to make sure you check your parking brake as well. Make sure that that holds the vehicle while it's idling and drive and maybe even a little bit of foot pressure on that gas pedal.