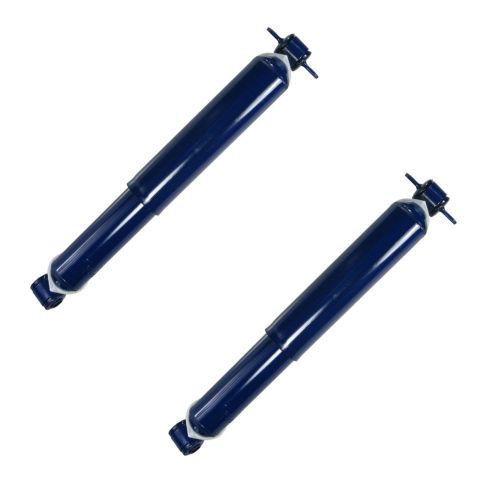
The Monro-Matic Plus® shock absorbers are nitrogen gas charged and feature velocity sensitive valving and all weather fluid, which offers trucks improved comfort at an economical price.
The result: enhanced control with uncompromised ride comfort.
All Weather Fluid: Contains special modifiers to reduce friction and ensure smooth rod reaction.
Full Displaced Valving: Tuned specifically for each application, this valving automatically adjusts to road extremes to provide consistency and ride comfort.
Sintered Iron Piston: Stronger than traditional metals, enhances durability for longer service life.
Nitrogen Gas Charged: For improved ride and handling, helps maintain tire to road contact by reducing aeration.
2" Reserve Tube: More fluid for more consistent performance.
1-3/8" Bore: Lower operating pressure than standard 1" bore units.
5/8" Piston Rod: Heavy-duty nitrocarburized rod* for long service life.
Special Seal: "Self-lubricating" fluid seal designed to retain gas without excessive wear or friction.
* On non-dust shield units only.
Lifetime Warranty
This item is backed by our limited lifetime warranty. In the event this item should fail due to manufacturing defects during intended use, we will replace the part free of charge. This warranty covers the cost of the part only.
FREE Shipping is standard on orders shipped to the lower 48 States (Contiguous United States). Standard shipping charges apply to Hawaii and Alaska.
Shipping is not available to a P.O. Box, APO/FPO/DPO addresses, US Territories, or Canada for this item.
Expedited is available on checkout to the United States, excluding Alaska, Hawaii.
Final shipping costs are available at checkout.
How to Replace Rear Shocks 1995-2000 Chevy Tahoe
Created on:
Tools used
21mm Socket
Socket Extensions
Torque Wrench
14mm Socket
Jack Stands
Ratchet
Floor Jack
1. Removing the Rear Shock
Raise the Vehicle with a Floor Jack
Secure the Vehicle on Jack Stands
Use a 21mm wrench to hold the lower shock bolt
Remove the lower shock nut with a 21mm socket and ratchet
Remove one of the two 14mm bolts from the top of the shock
Hold the shock as you remove the other 14mm bolt
Pull down the shock
2. Installing the New Strut
Thread one 14mm bolt through the top of the new shock
Put the shock into place
Tighten the first 14mm bolt preliminarily
Start the second 14mm bolt and tighten it preliminarily
Tighten the two 14mm bolts
Push the lower end of the shock into place
Push the 21mm bolt through the lower end of the shock
Start the 21mm nut by hand
Use a 21mm wrench to hold the lower shock bolt
Tighten the 21mm nut to between 75-80 foot-pounds of torque
Lower the vehicle to the ground
Repeat this procedure on the other side
Brought to you by 1AAuto.com, your source for quality replacement parts and the best service on the Internet.
Hi, I'm Don from 1A Auto. I hope this how-to video helps you out, and next time you need parts for your vehicle, think of 1AAuto.com. Thanks.
In this video, we're going to show you how to replace the rear shocks on this 1996 Chevy Tahoe. If you replace one of them, we do recommend that you replace both of them. We show you on the passenger side, but the driver's side shock is the same procedure. It's the same part and process for the Tahoes from '95 to 2000. The items you need for this are new rear shocks from 1AAuto.com, 14mm and 21mm socket and ratchet with extension, 21mm wrench, a torque wrench, and jack and jack stands.
You want to start off by removing this 21mm bolt and then you're going to remove these two 14mm bolts. Using a 21mm socket and ratchet and a 21mm wrench, you just want to remove that nut. Once the nut's removed, use the socket and ratchet on the other side and just start twisting out the bolt. Now, use a 14mm socket and ratchet with an extension to remove those two upper bolts and we'll just fast forward as Don does this. Once those are removed, the shock will pull down.
Up front is the old shock, in the back is the new shock from 1A Auto. You can see they're identical and they will fit the same. You will have to just apply some pressure to shrink the new shock. Feed your new shock up into place with a bolt and a 14mm socket and then just tighten it into place. Really, you only need to tighten it preliminarily and then you should start the other bolt. Once you have both bolts started, just got back and forth tightening them up until it's nice and firm. Now, push the shock in and then forward and then line it up and push the bolt through. Then, just replace the nut and washer on the other end and tighten that up with your socket and ratchet and the 21mm wrench. Torque this lower bolt to 75-80 foot pounds and you're all set.
We hope this helps you out. Brought to you by www.1AAuto.com, your source for quality replacement parts and the best service on the Internet. Please feel free to call us toll-free, 888-844-3393. We're the company that's here for you on the Internet and in person.
MNSSP00653
In Stock
Product Reviews
Loading reviews
5.00/ 5.01
1review
5 Stars
4 Stars
3 Stars
2 Stars
1 Star
1
0
0
0
0
Good subs over top shelf
Sylvia
February 15, 2023
Good and firm ride no roll
Customer Q&A
Would these get my suv back to stock height?January 2, 2019
Steven Z
10
These shocks are made to be a direct replacement of the original equipment and will bring the vehicle back to the stock height as long as they are purchased for the correct application.
January 3, 2019
Jessica D
Customer service
877-844-3393
Monday - Friday 8:00am - 9:30pm ET Saturday - Sunday 8:00am - 4:30pm ET
GMC is a registered trademark of General Motors Company. 1A Auto is not affiliated with or sponsored by GMC or General Motors Company.See all trademarks.
Enter Vehicle Year Make Model
Specify your vehicle's year, make and model to guarantee fit.
Year
Make
Model
Options
Drivetrain
This part doesn’t fit a . Select from parts that fit.