Replaces

This part doesn’t fit a . Select from parts that fit.
Frequently bought together
Part Details
Product Features
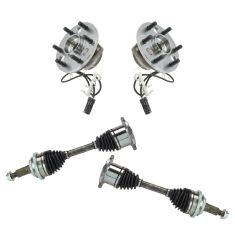
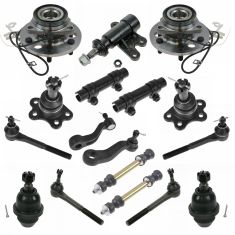
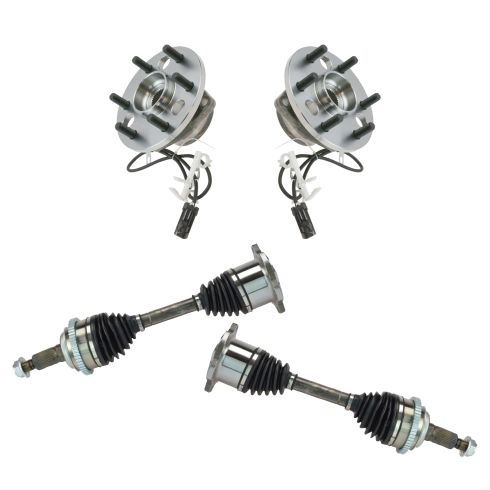
TRQ drivetrain kits are manufactured using premium raw materials to restore original performance. Each TRQ drivetrain component is designed to be a direct, maintenance-free replacement to the stock unit. To extend the service life of your drivetrain, TRQ recommends replacing wheel hubs, bearings, and constant velocity (CV) drive axles at the same time to ensure even wear of components and improved ride comfort. All products are fit and road-tested in our Massachusetts R&D facility to ensure we deliver on our promise of Trusted Reliable Quality.
CV axles are designed to transmit the power from your vehicle's drivetrain to the wheels while being able to flex and pivot to the demands of the steering and suspension systems. If your vehicle is making clicking noises at lower speeds or when making turns, it may be time to replace your CV axles with our 100% brand new assemblies.
What are Tapered Bearings and Why Use Them? Tapered bearings use rollers shaped like flat-topped cones and two races angled from the outside in of the bearing. This angle makes the bearing better at handling forces exerted on the bearing during cornering (known as axial load) in trucks and large cars. Your model came from the factory with tapered bearings. Roller ball bearings work well for smaller cars, but replacing a tapered bearing with a roller ball bearing increases wear and failure.
Our steering and suspension components are pre-greased and sealed for long life and do not require the extra maintenance typically required by greaseable versions.
Item Condition:
New
Attention California Customers:
 WARNING: This product can expose you to chemicals including Lead and Lead Compounds, which are known to the State of California to cause cancer, and birth defects or other reproductive harm. For more information, go to www.P65Warnings.ca.gov.
Lifetime Warranty
This item is backed by our limited lifetime warranty. In the event that this item should fail due to manufacturing defects during intended use, we will replace the part free of charge. This warranty covers the cost of the part only.
FREE Shipping is standard on orders shipped to the lower 48 States (Contiguous United States). Standard shipping charges apply to Hawaii and Alaska.
Shipping is not available to a P.O. Box, APO/FPO/DPO addresses, US Territories, or Canada for this item.
Expedited is available on checkout to the United States, excluding Alaska, Hawaii.
Final shipping costs are available at checkout.


Created on:
Tools used
Hi everyone. Sue here at 1A Auto, and today we're gonna talk bearings. The difference between a roller bearing and a ball bearing type.
While both a roller bearing and tapered bearings work in the same manner. Tapered bearings use tapered rollers shaped like flat topped cones and two races angled from the outside to the inside of the bearing. The rollers have a large contact area which is what makes them better than roller bearings at handling forces exerted on the bearing during cornering in trucks and large cars.
For applications that require it, the TRQ brand offers tapered roller bearing style wheel bearings that match OEM specifications where other brands do not.
Roller ball bearings work well for small cars but replacing a tapered bearing with a roller ball bearing will result in increasing wear and faster failure.
So now that you know all parts aren't created equal, you can purchase your TRQ bearing at 1aauto.com.
Tools used
Tools used
Okay, friends. One of the first things we need to do is safely raise and support the vehicle from under the frame. Let's get the center cover off of here. Remove all six of your lug nuts and remove the wheel. Now, let's remove our axle nut. Remove the washer. Let's spray this area with some penetrant. Let that soak, move along.
Now that the wheel's off of here, we have a nice clear view of this area. Let's continue on to pushing back our caliper piston. Typically, to do that, you can use a pry bar, come right in between this area right here, and then we're just gonna slowly and carefully pull on this like that. Next, we need to remove our caliper sliders. There's one slider, do the same to the other one. Go ahead and grab on to that caliper and give it a nice wiggle, see if we can get it to break free. Set this up here so it's not putting any tug on there. Remove the rotor. The next thing we wanna do is disconnect our ABS wire. You just pull on this tab. Can pop that off of there. It's always a good idea to make sure you inspect all of your connections, make sure you don't see any funny colors. Assuming you don't, set it aside. We're gonna remove this 13-millimeter headed bolt here. And then if you follow it along, you'll find a nut with a bolt coming from the bottom. Let's get them both out of there.
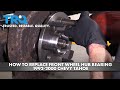
Now, I'm just gonna use a little fork tool or even a pry bar. Just get underneath this, pop it out of the frame. Let's get these off of here. Now, looking behind this hub area, you're gonna be able to see where there's three mounting bolts, one up top and then two that are down diagonal from there. If you were to spin your front hub, you're gonna notice that there's gonna be a couple holes. Go ahead and line those up with the bolts and then start removing them.
Now, the next thing we're gonna do is just take our axle nut, start it on the axle just a few threads and then we're gonna continue on to bonking on our wheel bearing trying to break it free from the knuckle itself.
Let's go ahead and pull this off of here. There it is, friends.
Now, let's just go ahead and clean up the area. Get any grease out of here and, of course, clean up the mating area so it's nice and smooth. All right. Now, let's just clean up this entire area, paying special attention to the bolt holes as well. All right. Before we can go ahead and put in our brand new bearing, we wanna of course make sure that we clean up the threads on our mounting bolts. Let's do that now.
All right. Now, it's time to install our brand new wheel bearing. Let's go ahead and carefully slide it over the axle. We wanna make sure that the splines match up. And of course, we wanna make sure that the ABS wire is gonna be located in this general area right here and not over where the caliper is gonna be. Now, that's in there, let's go ahead and put our plate on it. That's gonna be a shield that's gonna protect the ABS wire. Now, we'll just go ahead and start in all three of our bolts. We'll snug them up and then we'll torque them to manufacturer specifications. Now, let's torque this to 133 foot-pounds. Now, let's secure our ABS wire. You're gonna notice you have little prongs, set those so they're facing down towards the control arm/ball joint. Take your bolt from the bottom to the top, start on that nut. Let's bring the other end all the way over here. Let's grab that ABS wire, connect it in. Let's go ahead and push this tab into the frame. Make sure it's nice and secure. Now, let's just go ahead and start snugging everything up.
Now, let's coat the cleaned area with some copper never-seize. Let's get that rotor on there. I'm just gonna start one of these lug nuts to hold the rotor from moving around. Now, let's carefully put our caliper over the rotor here. Now, we'll just start in both of our sliders and we'll torque them to 38 foot-pounds. Now, let's go ahead and put on the axle nut. We're gonna tighten this up by hand so it's nice and snug, and then we'll put on the wheel, torque everything down. Now, let's start on all of our lug nuts. Now, let's go ahead and torque this axle nut to 103 foot-pounds. Now, we're gonna go ahead and torque our lug nuts to 140 foot-pounds. Now that everything is torqued, let's continue on by putting on our center cover. Go ahead and snug up all of those plastic nuts.
Tools used
Tools used
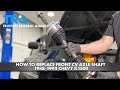
Once your vehicle is safely raised and supported, take a pry bar right to this area right here, remove that. Use your 22-millimeter socket and remove all of your lug nuts. Now we're gonna use our three-eighths Allen head and we're going to remove our caliper slider bolts. get that out of there. Do the same to the other one. Now let's get the caliper out of the way. You can use a pry bar to just try to pry it. Obviously, this caliper is going to be replaced at some point, but that's not for this video. We'll get the rotor out of the way. Now we have a clear view of our bearing. Now we're gonna flip this up right here and it exposes where the ABS wire connects in. We're going to disconnect these two. Small screwdriver. Pops right up. Take that off of there. Use your 13-millimeter, remove this. Come along here. Remove the wire from these clips coming across the top of the control arm, and you're gonna use a 13-millimeter here and hold the bolt on the bottom side. I want to spray this with some penetrant for good luck. That's off of there.
Now we're going to use our 36-millimeter socket and remove our axle nut. Inside here, there's a washer. Use your magnet and get that out of there. Use a punch with a hammer or your air chisel with a punch bit and drive right in through the center right here. If you want to use a little penetrant in between the wheel bearing and the axle, it's your prerogative. That's great. It's important not to use a hammer right on here just in case you peen over these threads. Next, we're going to use a 15-millimeter socket and we're going to remove our mounting bolts. There's one here, here, and right there. These bolts right here in great condition, but with the year of this vehicle, more than likely, they're probably going to be in poor condition. If for some reason yours were rotted and you didn't think that they were usable, we sell them. Use your little hammer and break this free from the knuckle. Awesome. I'm going to put this rag in here like this, and then I'm going to clean this up so there's no debris along it. Let's wipe this down.
Now, if I'm looking at this, it looks as though that there's grease in here and the grease itself actually looks like it's in really good condition. If for you, inside there look like it was rusted and flaking or anything like that, or if it look like it was full of debris, you'd want to clean it out. To me, this looks fine. It's going to help keep moisture out. I'm going to continue. Wipe off this blind area, just check to make sure everything looks like it's in great condition, and it does. Let's grab our bearing. Slide this on here. Make sure your cables in no way are gonna get pinched. This looks great.
I'm going to line up our bolt holes here, and then we'll start in all the bolts and torque them down. Snug them up. Torque these to 184 foot-pounds. Torqued. Make sure you mount this on there. Got my nut in here, snug it up. Move along to this one. This is going to come right up here. And then, of course, we've got this. I'm gonna take this piece right out of here because obviously, we have a nice new one. Click this in. Nice and easy. Put that up there. Let's make sure we get this mounted in here as well. Here we are. Not touching up against anything. Make sure we get this, cover that back up, put this back in here.
Time to get the axle nut back on here, start with that washer, that nut. If you want to use a little threadlocker, we'll call it your prerogative. It's going to get that close. And then we'll torque it down to manufacturer specifications. Let's put on some copper Never-Seez on the mating surface here. Now, of course, we're going to clean up the mating surface on the backside of that old rotor. Now that we've got that done, we're just going to hold it by putting on one of these lug nuts so the rotor can't move around. Now, using a little bit of imagination and not noticing that the brake hose is ripped off of there, we're going to take our caliper, put it right up on here, it should slide right on. If it doesn't slide on, you're gonna need to clean up this area here and that area right there. Take your slider bolts. Put them through like that.
Now we're going to snug these up and then we'll torque them to manufacturer specifications. Torque these to 38 foot-pounds. Torqued. Let's get the wheel up on you here. We're going to start on all the lug nuts. We're going to bottom them out in a criss-cross manner, and then we'll torque them to 140 foot-pounds. Torqued. Now we're going to torque this axle nut to 165 foot-pounds. Let's grab our center cover.