Hi, I'm Mike at 1A Auto, we've been selling auto parts for over 30 years.
What's up guys, I'm Andy from 1A Auto. Today I'm gonna show you how to replace the front struts in this 2008 Chevy Silverado. If you need these parts or other parts for your vehicle, click the link in the description and head over to 1AAuto.com.
I'm going to take a 22mm socket, I'm just going to take this center cap off. Loosen up these plastic covers, if you have to use a ratchet you can use a ratchet. Pull that off, take my same 22mm socket and a breaker bar, now loosen up these lug nuts.
Now we're going to raise and support the vehicle. We're using a two post lift, if you're doing this at your house you can use a jack and jack stands. I'll remove these lug nuts, you know, take the last lug nut off, take the wheel off.
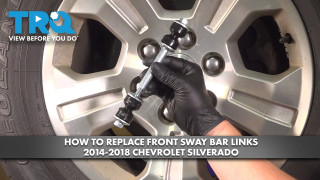
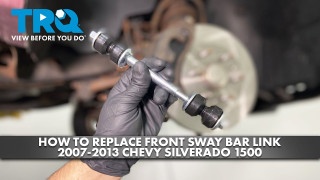
We're gonna take some rust penetrant, we're just gonna spray it on this sway bar link. We're also going to spray some on our lower shock bolts, right there and right there.
We're gonna take a 15mm wrench, slide it over the nut, and I'm gonna use a 15mm socket and a ratchet a little lower and loosen this up. This is on there pretty tight, so now I'm gonna use a ratchet wrench once it's cracked free, and be a little bit quicker. Loosen up this nut, take that nut off.
Rubber bushing right here, I'm just gonna take it off with a trim tool. Just try to pry underneath here, try that out, slide that off. Let's pray some more rust penetrant, and then let that soak for a little bit.
I'm just gonna take some locking pliers, just lock this right here, try to turn with the 15mm socket and match it, try to turn the bolt. Pretty rusty, it's right now it's frozen in the middle, they're turning very well, trying to turn it back and forth.
So because this sway bar link is frozen against, it's frozen to the bolt that's going through it, because of the rust and everything, it's pretty rusty here. I had to disconnect the other sway bar link from the other side so I can actually move this sway bar.
I'll just take a pry bar, just get underneath here, pry up, just to get that off. Then I can take a trim tool and start by taking this rubber grommet off, slide up underneath here. I got off, and this plastic piece is pretty stuck in there, so I'm actually going to cut it off.
I'm actually going to use an air-powered cutoff wheel, we're gonna slice down the side of this, this link right here. It is plastic, so should cut pretty easily.
And just sliced it down the center, and I can take a trim tool or a straight bladed screwdriver, just try to pry this apart a little bit. Normally, normally you wouldn't have to do this if this wasn't so rusted. This rod, the bolt should slide right down. This one's pretty bad. I'm just gonna take a smaller pry bar and a hammer, you can use a chisel, just try to bang this up a little bit. It's okay if I break it more because we're not reusing it.
Let's start the move. Slide that off, take this other rubber grommet off, slide the bolt up. And it takes some rust penetrant, I'm just gonna spray them on these two bolts coming through for the bottom of the strut. Then I'm gonna take a 15mm socket and a ratchet, I'm going to take these two bottom bolts out. Pull those bolts out, because we separated this link, this makes this lower control arm pretty loose, it's gonna make it easier to take this strut out. You don't have to take that link off, it just makes it a little, a lot easier.
Alright, next I'm just gonna use a trim tool, there's a little wire harness right here, it's on one of the studs for the strut, so just get underneath there. This is, most of this is easiest to get from under the hood rather than trying to entangle your hands in between the wheel housing. Pull that off, get that out of your way.
We're gonna take a 18mm socket, we're gonna use a ratchet. I'm gonna take these nuts off, place three of them, one here, one over here, and then one over here. There's some, these up, take these off. One thing you want to keep in mind, do not take the nut off in the center, that's for the strut itself. Take that last nut off, right, and I'm just gonna push down on this whole front-end assembly, push the bottom part down, and then grab the spring, pull it straight up.
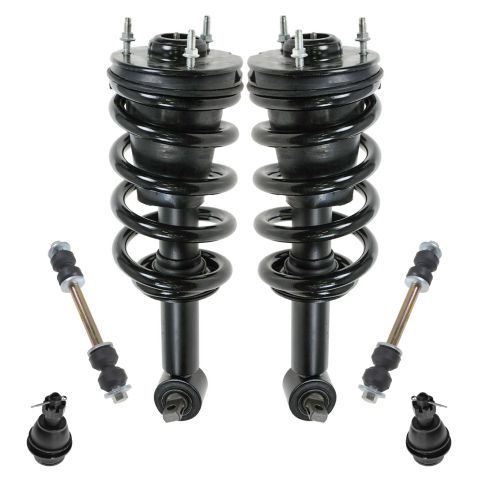
Has our old spring and strut assembly, here's our new spring and strut assembly from 1AAuto.com. As you can see, the upper strut mount is the same, the new one actually comes with new nuts. The spring is the same, it's got a boot, it's got a bumper inside the boot. The base is the same, it's the same height, comes with new bolts and nuts for the bottom. Get yours at 1AAuto.com and you'll be ready to rock and roll.
Before we install our strut assembly, we're going to take these nuts off, set them aside.
And when we go to install this, we want to make sure that the top of the strut assembly is like this, in this formation. These two studs are towards the back, this one's coming forward, and you can see that the strut is in this formation in the front. If you look at this from the side a little bit, this is angled, and you want this angled in this direction, not this direction. It's going against the lower control arm.
So take this, slide this in. You're gonna go through the hole in the lower control arm. We're gonna go up, this holes up, then we're gonna push down on the suspension, then just get that to rest right there. Then we can go up top and put our nuts on from up top.
Now we're going to install these nuts. Now the new nuts happen to be 15mm, so I'm going to use a 15mm socket and a ratchet. Tighten these down with a ratchet first before I torque them.
Now we're going to use a torque wrench and the 15mm socket. We're going to torque these nuts to 37 foot-pounds. That's good. It'll take this wire, put that fastener and reposition that on that stud.
We're gonna install these bolts down below. I don't want to pull this control arm down a little bit, slide this strut over. Use a pry bar, just get it into position. You could also do this before you tighten up the nuts on top, make it a little bit easier.
Line this one up, that's through. Take the nut, put them out on top. The same with the other side. You can give it a little tap with a hammer if you have to bend that on top.
I'll take a 15mm wrench on top on the nut, and then a 13mm socket and ratchet for the bolt on the bottom. We'll tighten these up.
I'm gonna put a 15mm socket on the nut, and I'll use a 13mm wrench on the lower bolt, and these a torque wrench, and torque these to 37 foot-pounds.
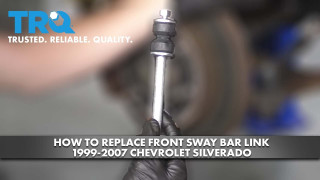
You install this sway bar link, just take this apart. I'm going to take the nut off, take this pushing off, I'm going to slide this apart. This center piece should stay together like that. Line this up with the hole right there, line the stud all the way through the center, slide the bar down, pull that into position.
I help with installing this, I'm just gonna use a pry bar, just go underneath the frame, slide it down. It'll take this upper grommet, push that on. So with the pry bar prying down, get the nut started. Once that started we can remove the pry bar.
I'm gonna use a 15mm wrench, just put it on that not up top, then a 15mm socket and a ratchet on the bottom. Depending on the sway bar link itself, your sizes might be different. Tighten this down.
All right, then we're going to torque this. We can just, I'm going to switch from these, the wrench in the bottom, torque the nut. We're going to torque the nut to 17 foot-pounds.
Grab the tire, line it up, install the lug nuts. Now we're gonna lower the vehicle down to the ground, just so the tires just touching the ground.
Now I'm going to use a 22mm socket and a torque wrench. I'm going to torque these lug nuts to a hundred and forty foot-pounds. I'm going to do it in a cross pattern so that it tightens the wheel down evenly. Now I'm going to recheck it.
I'll install the center cap, and I'll use my socket and just tighten these little caps down, not too tight, they are plastic.
Thanks for watching. Visit us at 1AAuto.com for quality auto parts, fast and free shipping, and the best customer service in the industry.











 WARNING: This product can expose you to chemicals including Chromium (Hexavalent Compounds), which is known to the State of California to cause cancer, and birth defects or other reproductive harm. For more information, go to www.P65Warnings.ca.gov
