Brought to you by 1AAuto.com-- your source for quality replacement parts and the best service on the internet.
Hi, I'm Mike Green. I'm one of the owners of 1 A Auto. I want to help you save time and money, repairing and maintaining your vehicle. I'm going to use my 20 plus years' experience, restoring and repairing cars and trucks like this, to show you the correct way to install parts from 1 aauto.com. The right parts, installed correctly, that's going to save you time and money. Thank you and enjoy the video.
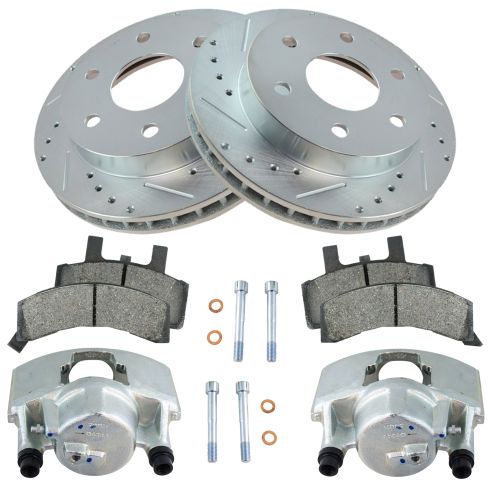
In this video, we're going to be doing a front brake job on this 1996 Chevy Tahoe. We show you obviously, the passenger side and the drivers side is going to be the same. Always replace your brakes in pairs. This is the same for the Tahoe, Suburban, and also the CK Pickups, Chevy and GMC alike. Tools you'll need are: jack and jack stands, a 22millimeter socket with a ratchet, or your tire iron, a 3/8 Allen wrench, combination wrench, a large hammer, wire brush, grease, as well as a torque wrench.
Start by removing your wheel. If you have a center cap or the lug covers, take them off carefully and then, if you don't have the benefit of air tools or impact tools as I do, you'll want to start with your vehicle on the ground, loosen the lug nuts, then raise it up, secure it and remove the lug nuts and the wheel. You can see our outer pad is actually getting a little bit thin, and on the front side, the disc is in pretty good shape, if you run your finger on it. On the back side there is a pretty good groove, we'll see what that's all about when we take it off. You want to take a large screwdriver or a pry bar and what happens is that as your brakes wear, the piston, right here, comes out of your caliper. To get your brakes apart, it helps if you force that piston back in. I'm taking a screwdriver and prying out on the caliper, and you can see that that forces the piston back in. With a good sized screwdriver, you can actually reset your pistons, pretty much all the way.
We want to remove the calipers, and back here, there are two 3/8s Allen bolts, one here and one right down here. I've got my 3/8s Allen wrench, I'm going to put it in, make sure it goes into the bolt as far as possible, then I'm going to use a regular crescent wrench on there for some extra leverage. Pull, ok, same thing for the top. I'm going to fast forward here as I finish removing those two bolts. Once you've got the bolts back out, your caliper comes off. You see your pads, the inside one just pulls right out. On the other one, put a screwdriver right in here, twist it and it comes right out. On your caliper, the bolts go through these sleeves, and those sleeves should slide pretty nice and easily. If they don't, you can use an extension and force them out, go easy though, you don't want to push too hard and have them fly right out, like that. You want to inspect these and see how worn they are. You can wire brush these, if there's some build up on them, you can wire brush these and reinstall them with a little bit of grease. This one was really difficult, this one here, I'm pushing much easier and takes a lot less to force it out.
If you want to better reset the pistons on your caliper, what you can do is put your old pad back in, take a C clamp, put it in place, tighten the clamp up, you will force that piston in the rest of the way. To remove the rotor, be very careful not to hit your studs, and if want to, you can put the lug nuts back on, that will help protect the studs from getting damaged. Usually a good hit breaks it loose. You can see on the backside, there's quite a bit of uneven wear. We will replace these rotors. New rotor from 1 A Auto, going on, in place. I like to put a lug nut right on, just to hold things where they should be.
You'll notice I'm working with new calipers. The owner of this vehicle wanted a new set put on the truck. Not always necessary, but make sure you reset the pistons, also check those sleeves, like I showed you earlier in the video, make sure the sleeves that the bolts go through are sliding nicely in the caliper. Take your inside pad, put it down in and press it in. Your outer pad, kind of slide it right down in. Just going to make sure these two shafts are back in at their starting point, looks like they're out a little bit.
I'm going to hit fast forward here. Put the bolts through, you might have to move the calipers a little back and forth to get them started. Use your Allen wrench to start them most of the way until you get them seeded. With an Allen wrench of this size, I'm basically pull it as tight as I can with that, should be about 25 to 30 foot pounds. Now you can remove that lug nut you have holding the disc on. Put your wheel on, start all your lug nuts by hand, then use a wrench to torque them, or tighten them preliminarily. Set the vehicle back down on the ground, and torque your lug nuts to 100 to 120 foot pounds. Put your cap back on, just use a socket to secure those caps. Very lastly and most importantly, make sure you pump your brakes and get a good firm brake pedal before you road test your vehicle.
We hope this helps you out, brought to you by www.1AAuto.com-- your source for quality replacement parts and the best service on the internet. Please feel free to call us toll free at 888-844-3393. We're the company that's here for you on the internet and in person.